Datamodeling Fundamentals
Getting started using CrossModel
In this set of exercises we'll work towards a workspace with a set of source models and a simple data warehouse model, covering most of the features of CrossModel along the way. We have organized the topics in a way that we feel is chronologically logical and we'll be using a fictional use case for the exercises. Each topic builds on to the previous one so you can continue working in the same workspace and set of models from day one. In case you want to skip topics or jump straight into a specific topic we provide example workspaces that contain everything you need to get started on that topic straight away.
Naturally you can use your own use case if you prefer.
The scenario: Building the data foundation for BrightGreen Electronics

BrightGreen Electronics is a thriving electronics store that sells products both from their stores as online. They sell TV's, computers, audio devices as well as downloadable content such as video's, music and software.
As an organization that started small but is growing fast, they discovered that, in order to make better informed decisions, they need a data platform that provides them with an integrated view on their sales, warehouse and staff.
You have been asked to assist BrightGreen by providing them with a logical overview of the current data landscape and a design for an integrated datamodel providing them with the necessary information elements.
Exercise one: visualize the logical datamodel for the sales application
In this exercise we'll cover the following topics:
- Signing in to CrossModel
- Creating our first workspace
- Manually creating a simple logical data model
- Exploring the different perspectives in CrossModel
BrightGreen uses a simple sales application that was built internally. The system consists of the following tables:
| Table | Description |
|---|---|
| Customer | A table that holds Customers, with their ID, Name, Date Of Birth and email address |
| SalesOrder | A table that holds all sales orders with an ID, reference to a customer, OrderDate |
| SalesOrderLine | A table that holds all sales order lines with an ID, reference to a SalesOrder, reference to a Product, Unit price and Quantity |
| Product | A table that holds all Products with an ID, name and unit price |
Since it is a fairly simple datamodel and you don't have access to the actual database for reverse engineering, you decide to manually create the datamodel in CrossModel.
Exercise steps
1 - Prepare your CrossModel workspace
Go to CrossModel, register for an account and follow these instructions to create and launch your CrossModel workspace.
When CrossModel starts you are presented with the welcome page and an empty workspace. Before we start modeling, let's pull in the BrightGreen example workspace. You don't need to hunt for a repository URL - the welcome page can do it for you.
In the Tutorials & Examples section, choose BrightGreen in the first dropdown and press Clone.
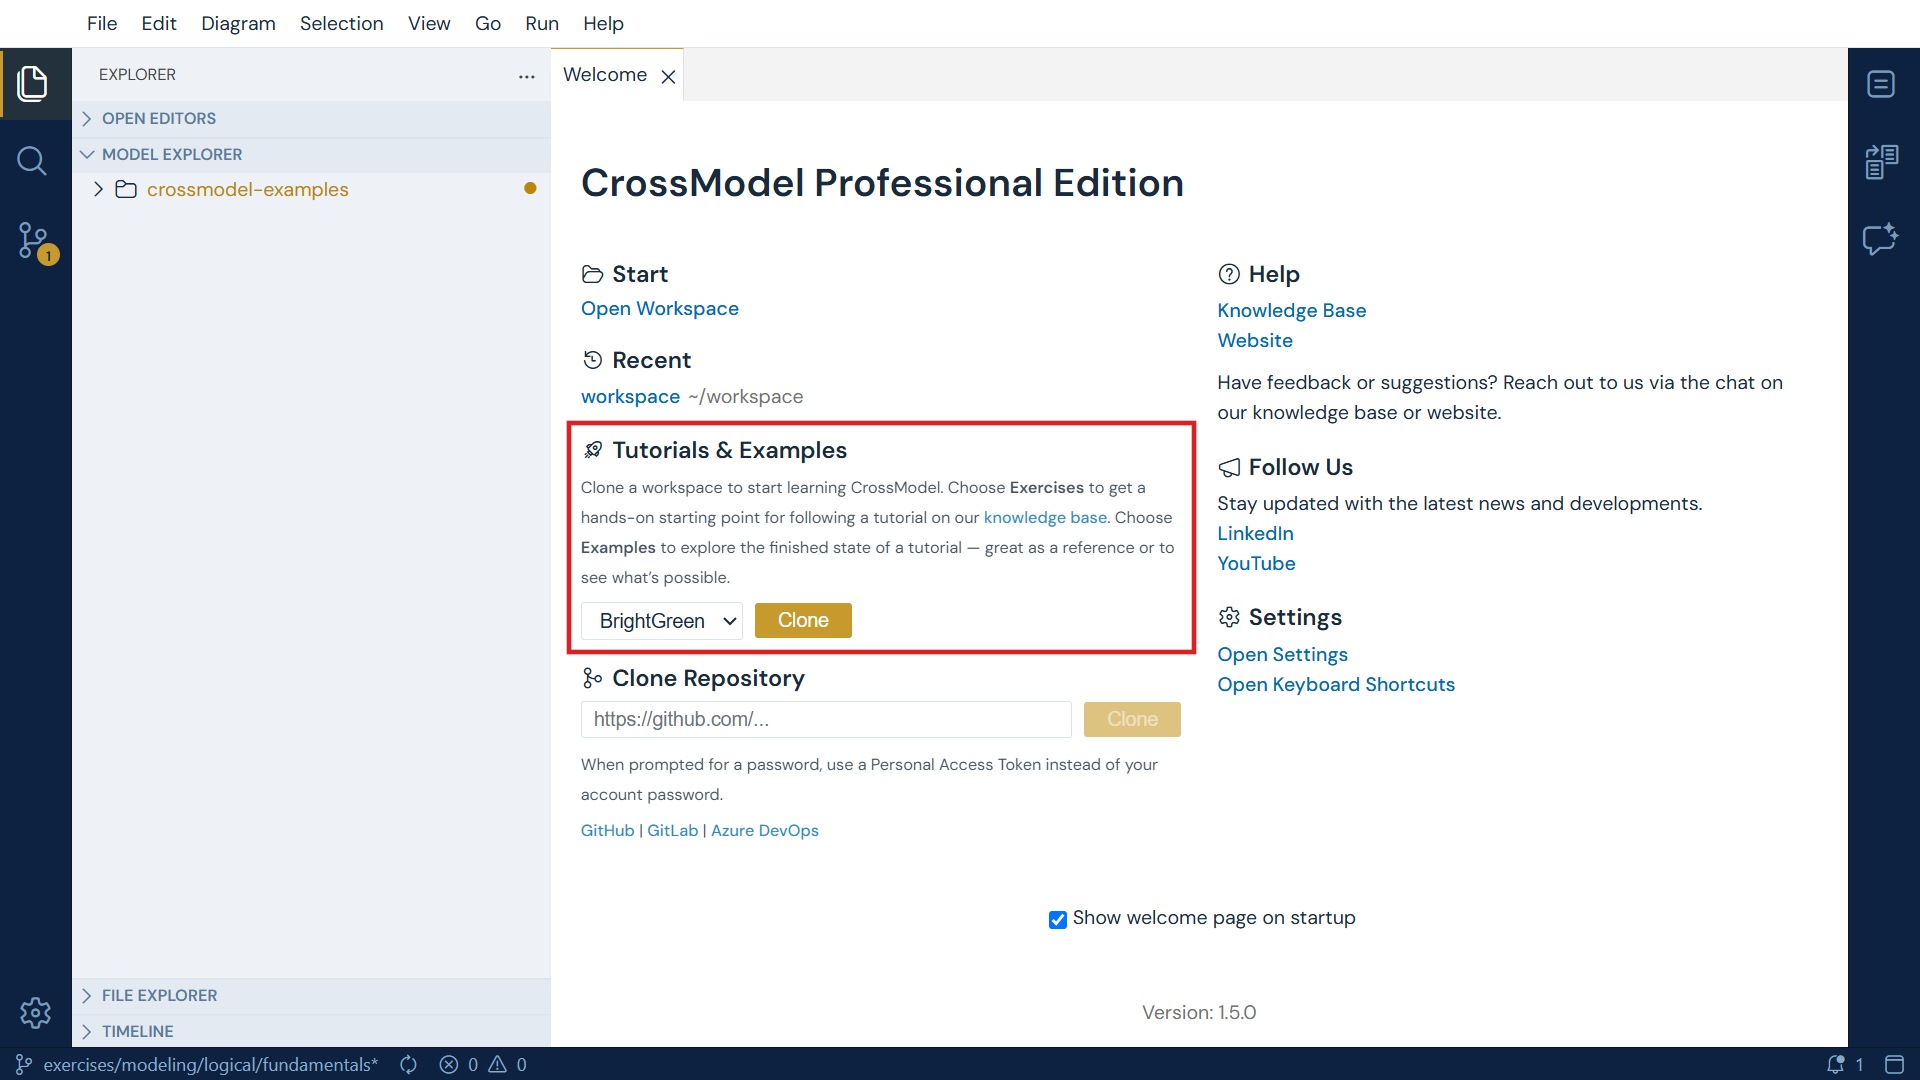
CrossModel then asks you two things. First, where to clone into: select your workspace
folder and press Select as Repository Destination. The picker opens one level above your
workspace, so the folder it offers by default sits next to it rather than inside it, and
cloning there puts the files somewhere the Model Explorer will not look.
Then it asks whether to open the cloned repository or add it to the current workspace. Press Close: you cloned into your workspace, so it is already there.
The models appear in the Model Explorer under crossmodel-examples.
Why BrightGreen?
This tutorial builds a data model from scratch, so the starting point is simply the base
data model - the source systems you will model against, and nothing else. Tutorials that
build on an earlier tutorial have their own tutorials/… starting-point branch instead.
See Getting the workspace for a tutorial.
Want to see the finished result?
Clone examples → data-modeling → fundamentals into a second workspace to compare your
work against the completed model.
2 - Create a new data model
In the Model Explorer, select the Sources folder and create a new data model using the appropriate button in the toolbar. In the form that is then displayed, provide a suitable model name, choose Logical in Type, and hit save (CTRL+S). Now you have created a new logical data model.
Pick Logical from the list, even though it is already shown
As of v1.10.0, a model saved with the Type field untouched is not fully registered: it appears in the Model Explorer with its badge, but the toolbar offers no New Entity for it and its context menu has no New Element until you reload the page. Opening the dropdown and selecting Logical before you save avoids this.
Logical or conceptual?
The Type dropdown offers two kinds of data model, and the choice is a modeling decision rather than a technical one.
- Logical is what this tutorial builds: entities with attributes that carry datatypes, lengths and identifiers. It describes the information in enough detail to generate something from it.
- Conceptual describes what things are before anything is decided about how they are stored. Its attributes deliberately have no datatypes, because a datatype is a logical concern.
The two are linked rather than alternatives: a logical entity can declare which concept it realizes, so you can trace a warehouse table back to the business idea behind it. See Conceptual modeling.
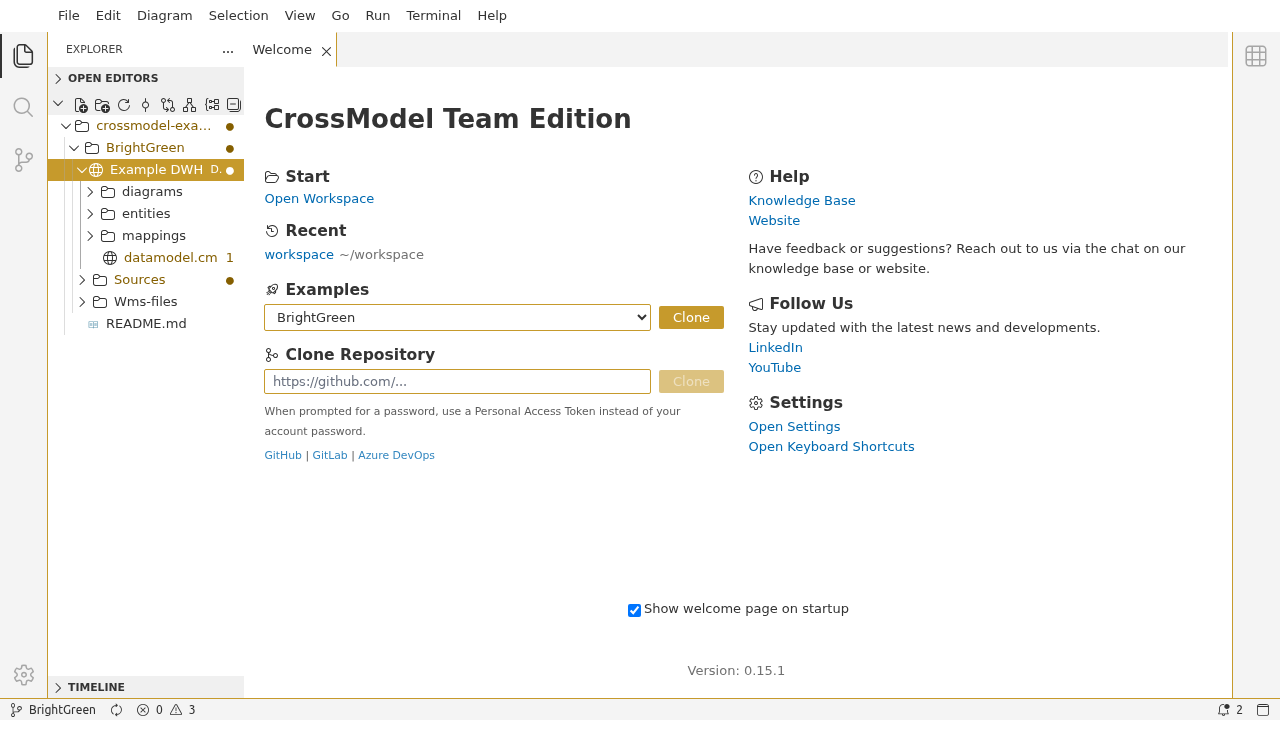
3 - Create entity using the form editor
In the Model Explorer, select your newly created model and use the toolbar to create a new entity. In the form that is now displayed, create the Customer entity using the information from the table described earlier in this exercise. When you have set the entity name, description and defined the attributes, hit save (CTRL+S). That's it! you have created your first entity in CrossModel.
Descriptions can span multiple lines
The Description field accepts multi-line text, so you can write a proper
explanation rather than cramming it into one line. In a grid, a multi-line description
is shown as its first line followed by …; press Shift+Enter to add a line break
while editing and Enter to save the row.
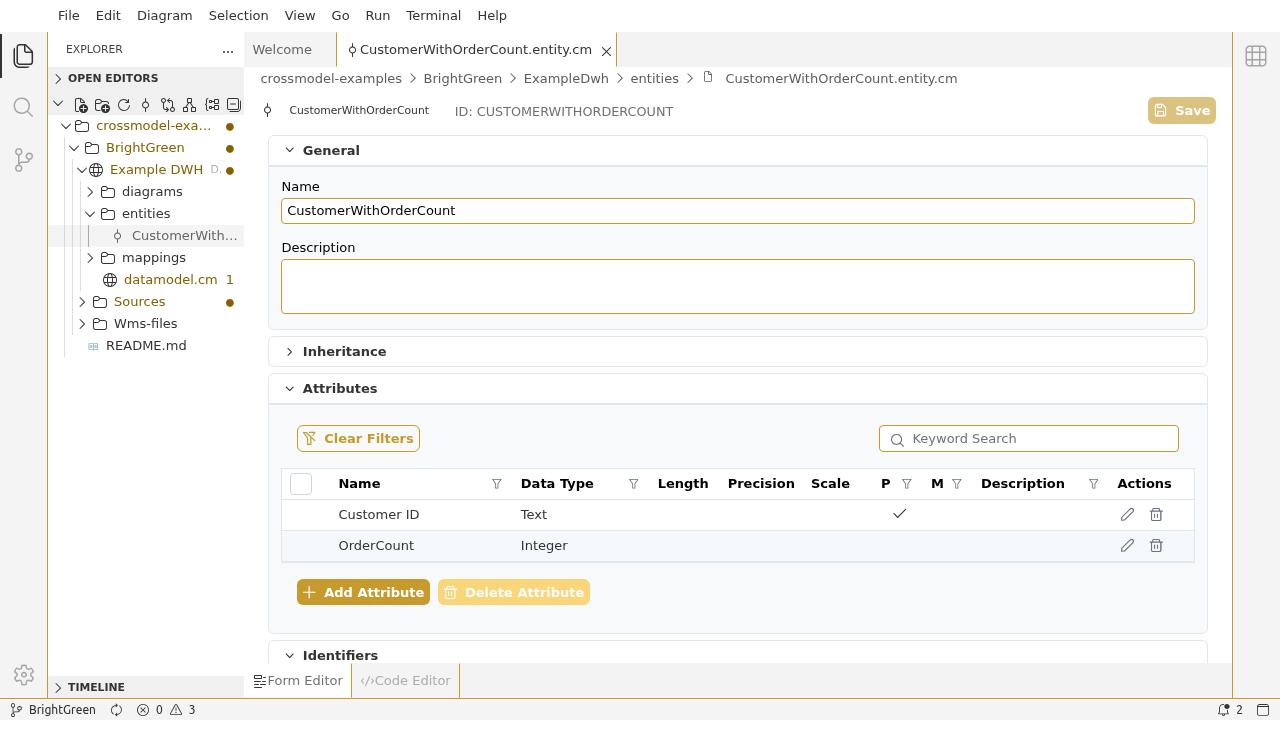
4 - Create entity using the code editor
In the Model Explorer, either on the model name or on the entities folder underneath, hit the create entity button from the toolbar again (same as in the previous step). Instead of filling in the form now switch to the code editor and copy the following definition into this panel (overwrite what is already there).
entity:
    id: SalesOrder
    name: "SalesOrder"
    description: "Salesorder entity"
    attributes:
      - id: ID
        name: "ID"
        description: "The primary identifier"
        datatype: "Integer"
      - id: CustomerID
        name: "CustomerID"
        description: "A reference to the customer that placed the order"
        datatype: "Integer"
      - id: OrderDate
        name: "OrderDate"
        description: "The date the order was placed"
        datatype: "Date"
    identifiers:
      - id: Primary_Identifier
        name: "Primary Identifier"
        primary: true
        attributes:
          - ID
Now switch back to the form editor and see that your entity is properly populated. Hit ctrl + s to save and you now have two entities in your datamodel. This time you used the code editor to create the entity. This editor also enables you to do easy replacements in a model, for example update all Integer fields to a different data type.
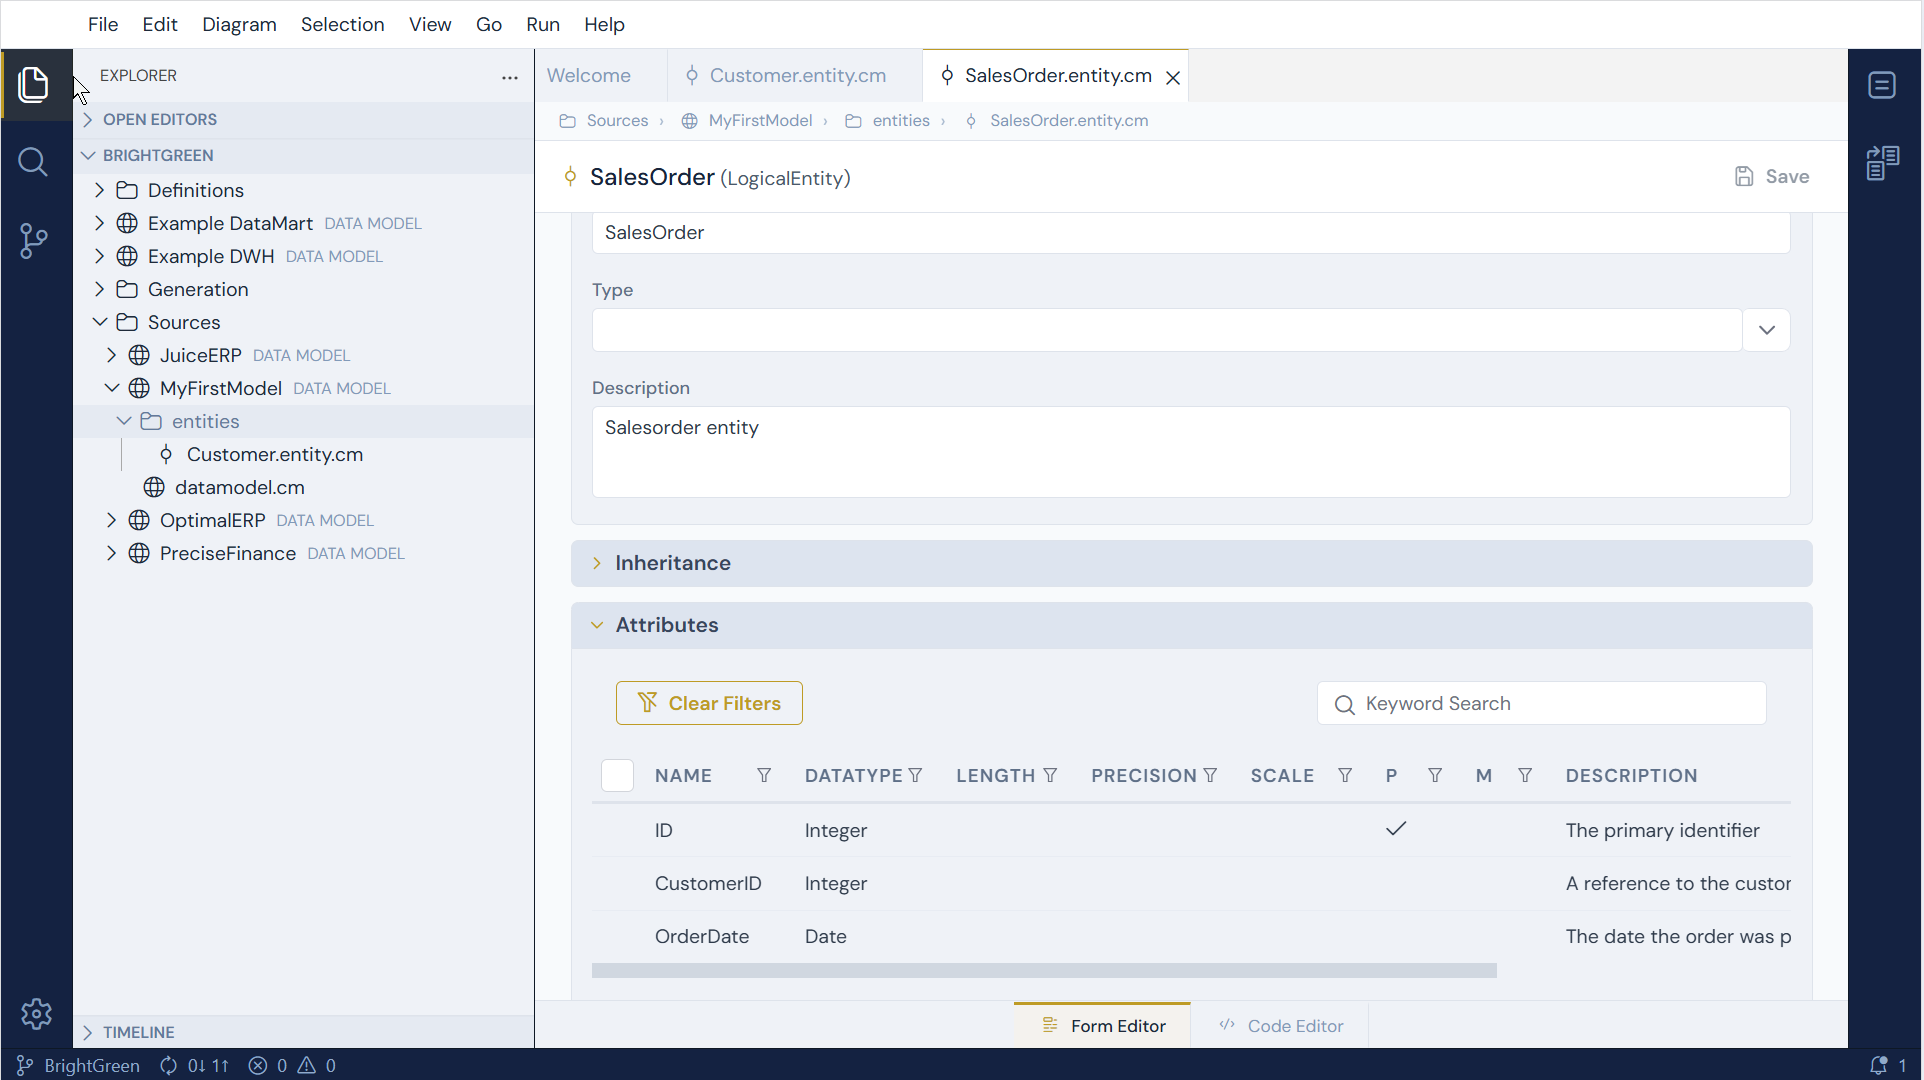
5 - Create entity via a diagram
Let's create the last two entities using a more visual approach using the diagram. For this we first need to create a diagram. We can do this by selecting our model in the explorer and hit the create diagram button. After specifying a name for the diagram we are presented with a new empty diagram.
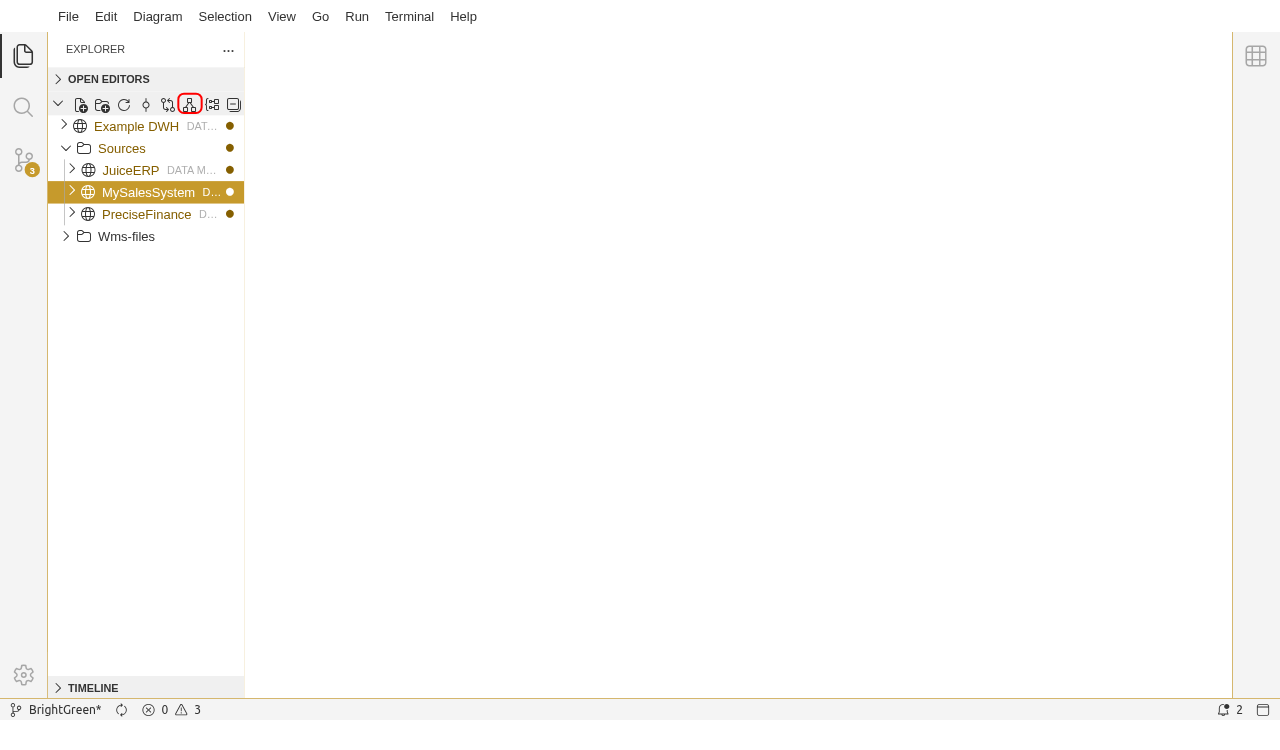
In the diagram select the Create Entity command from the toolbox, click anywhere in the diagram and type the entity name, press Enter to confirm. Then right-click on the entity and choose "Open in form editor". Now add the attributes to the sales order line entity.
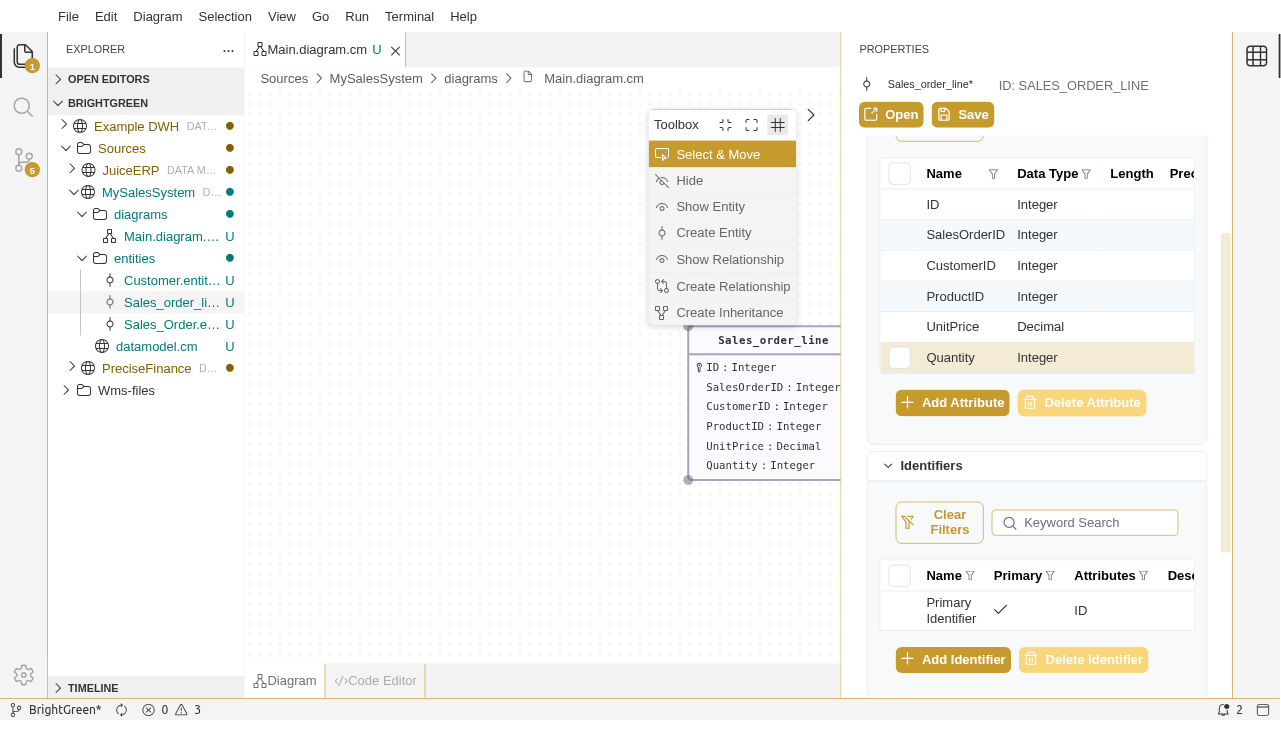
Hit save, now you have created a third entity using the diagram view. Repeat the steps to add the Product entity as well.
6 - Create relationships
Now that we have created the entities for our first model it is time to model relationships. The easiest way for this is to use the diagram view. Go back to the diagam created earlier and ensure all four entities are displayed, use the toolbox action Show entity for this.
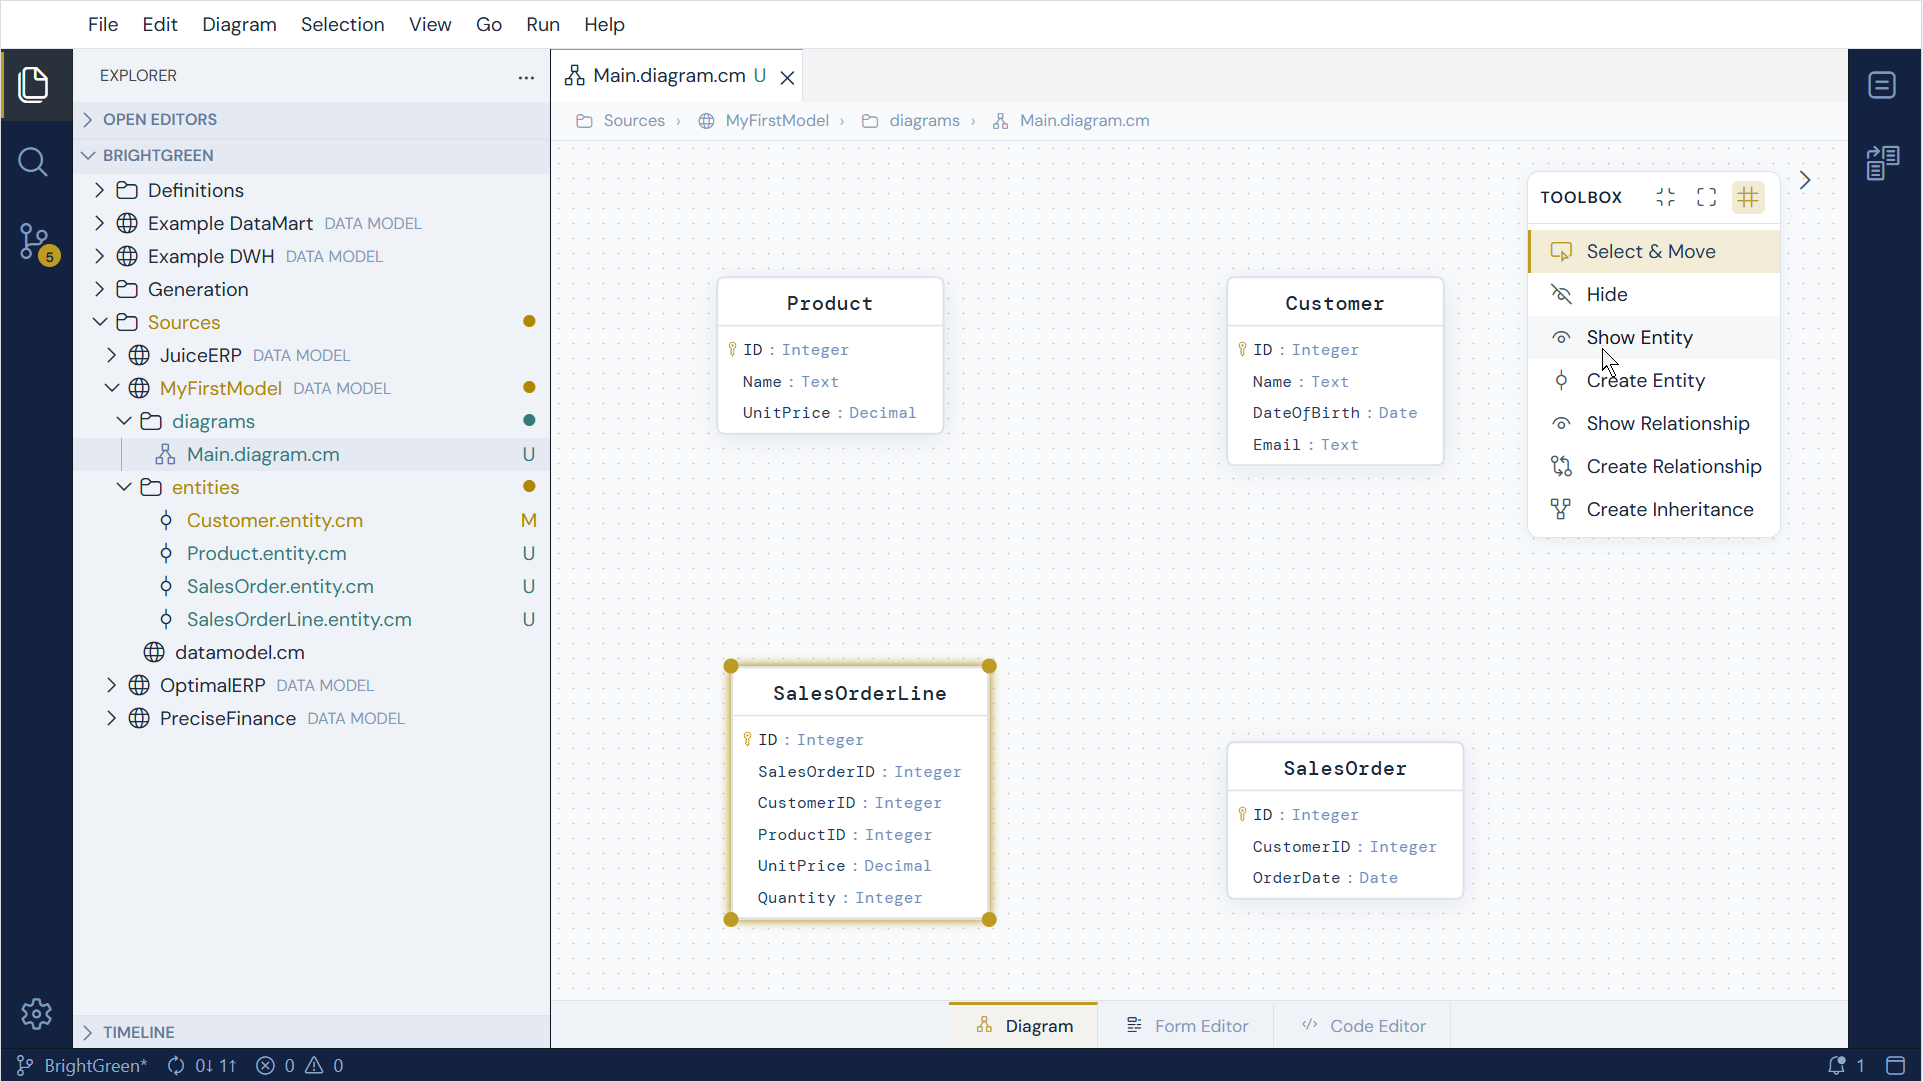
Now select the Create Relationship action and drag a relationship line from Customer to SalesOrder.
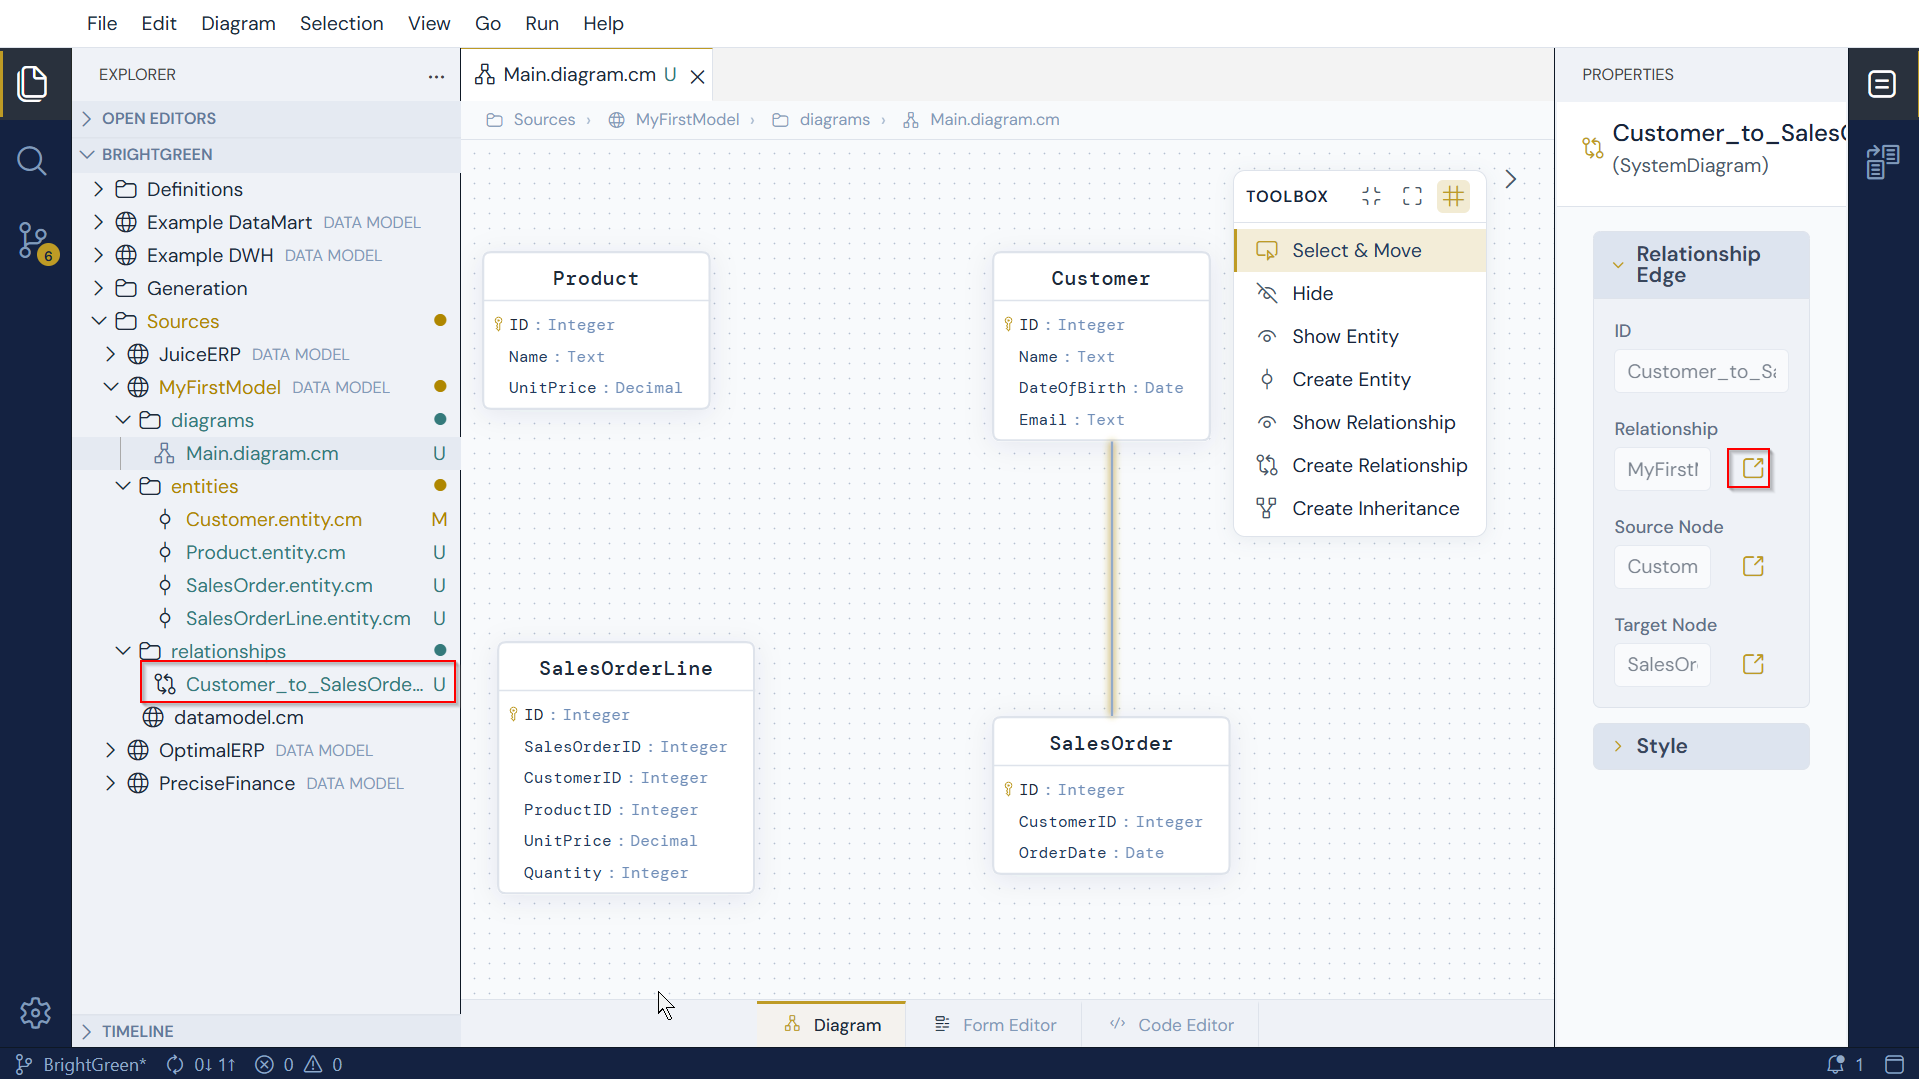
Notice that the new relationship is displayed in the Model Explorer (left). On the right panel, open the properties and click on the form-button next to the relationship name to open the relationship form.
In the relationship form, set the parent and child cardinality, relationship attributes and any other attributes you want to define.
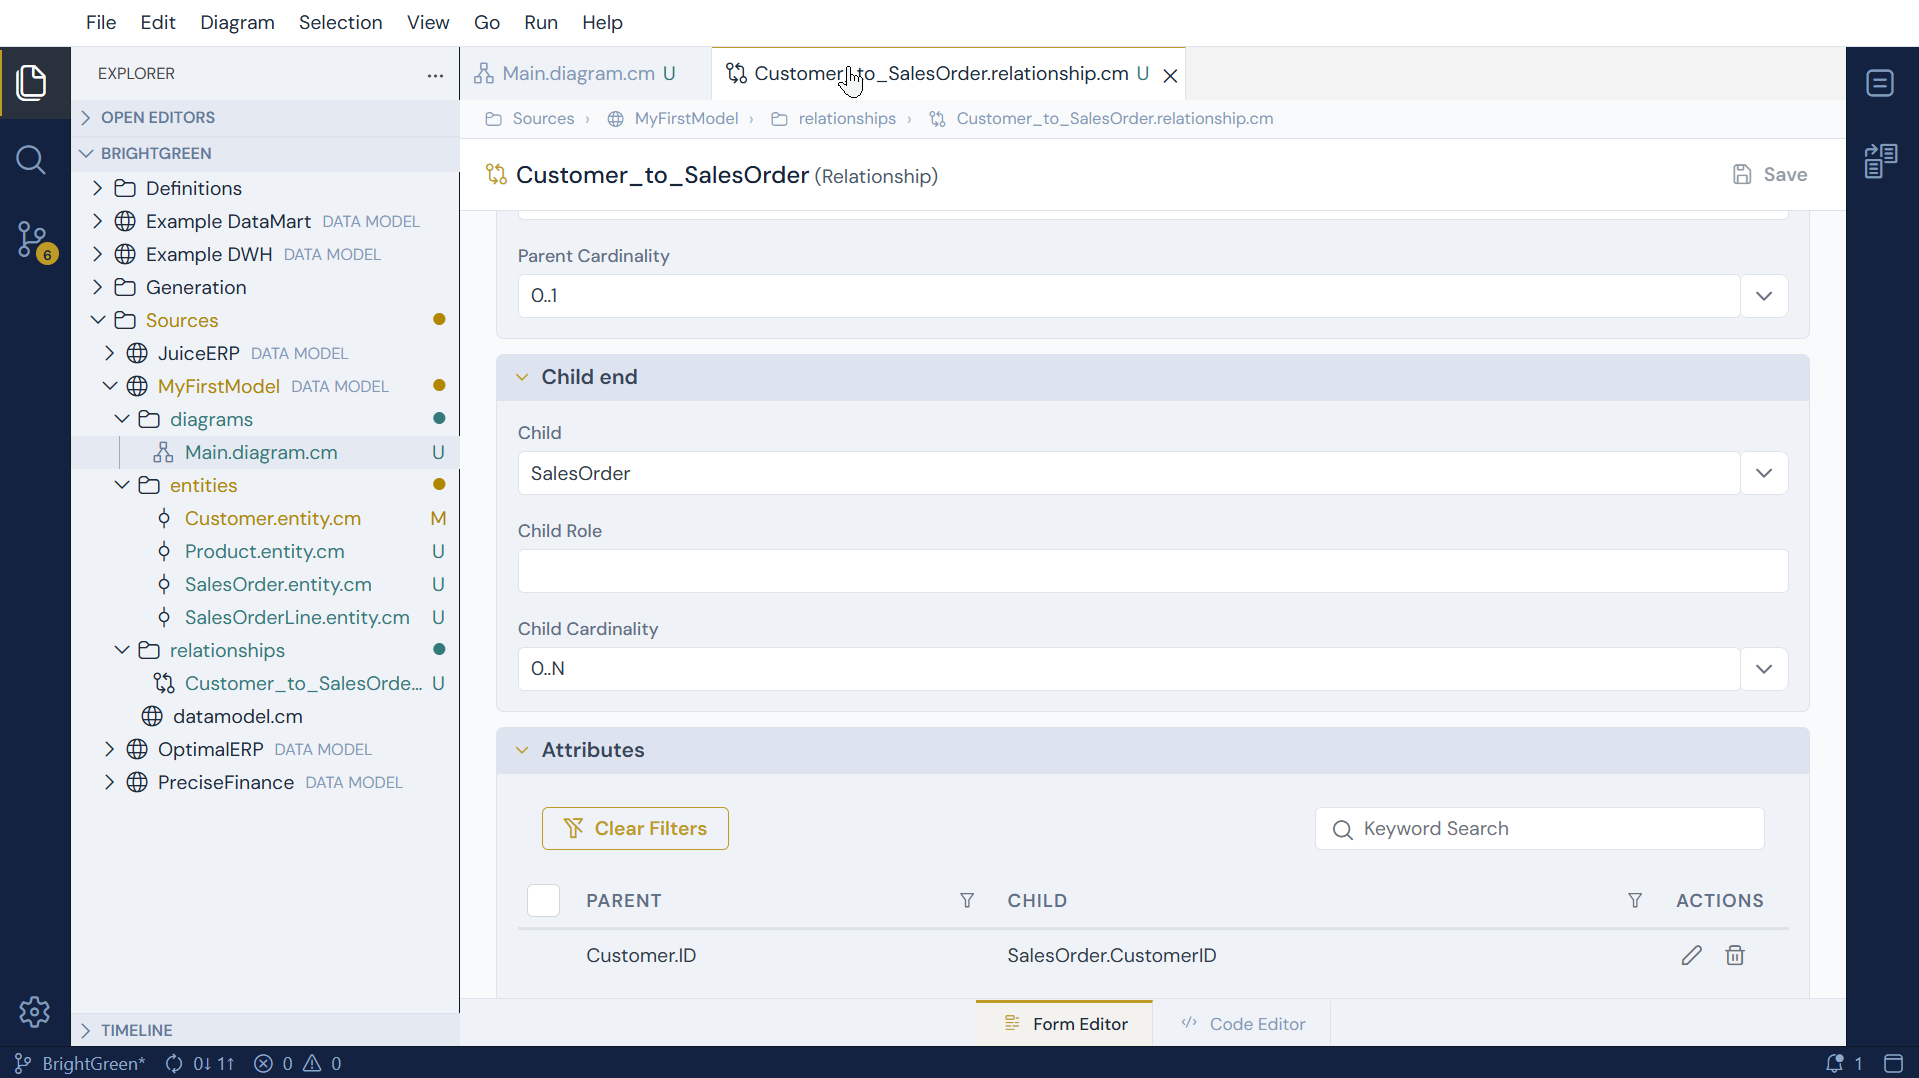
Then press save to save the relationship.
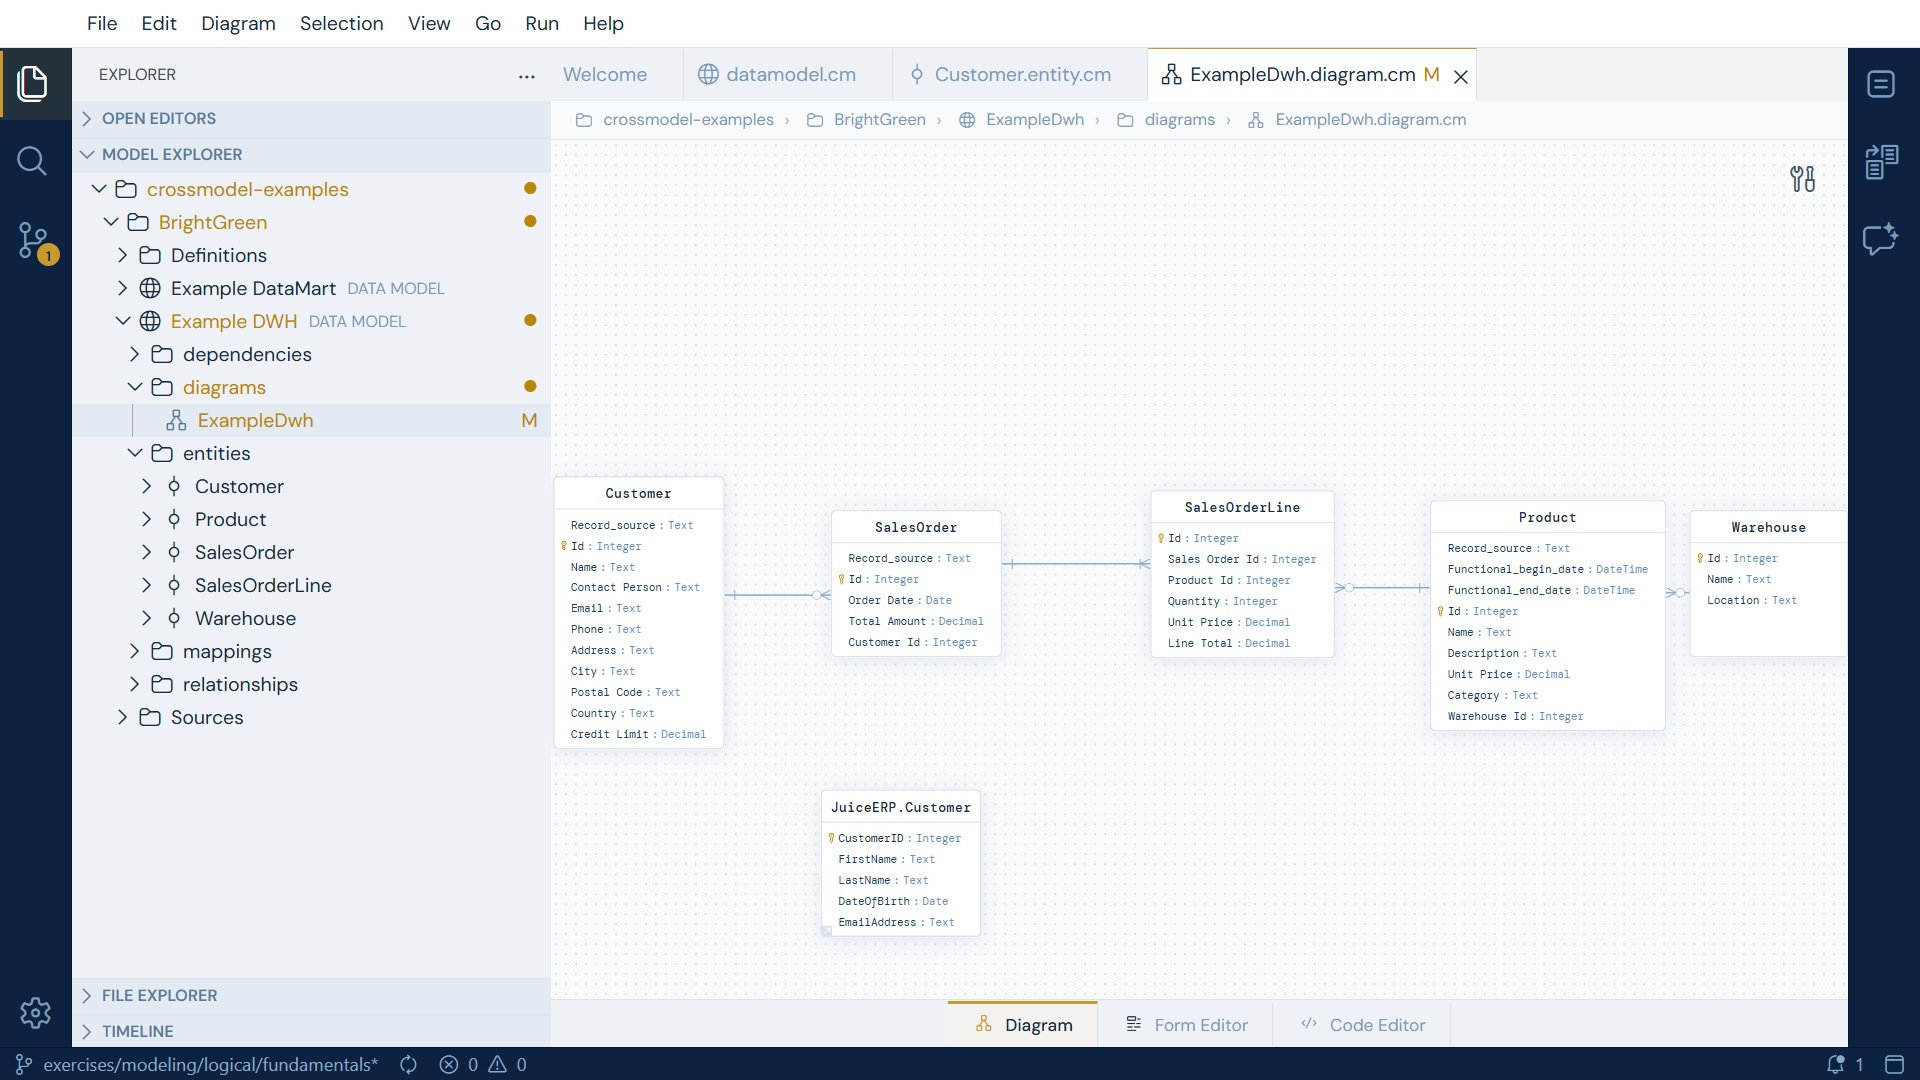
Repeat these steps to create all the relevant relationships and end up with a diagram like this one, showing the entities and the relationships between them:
7 - Tidy up the lines with routing points
Once a diagram has more than a handful of relationships, some lines will run straight through a box or overlap each other. CrossModel routes edges automatically, but you can override it where the automatic route is unhelpful.
Click a relationship line to select it. A handle appears at its midpoint.
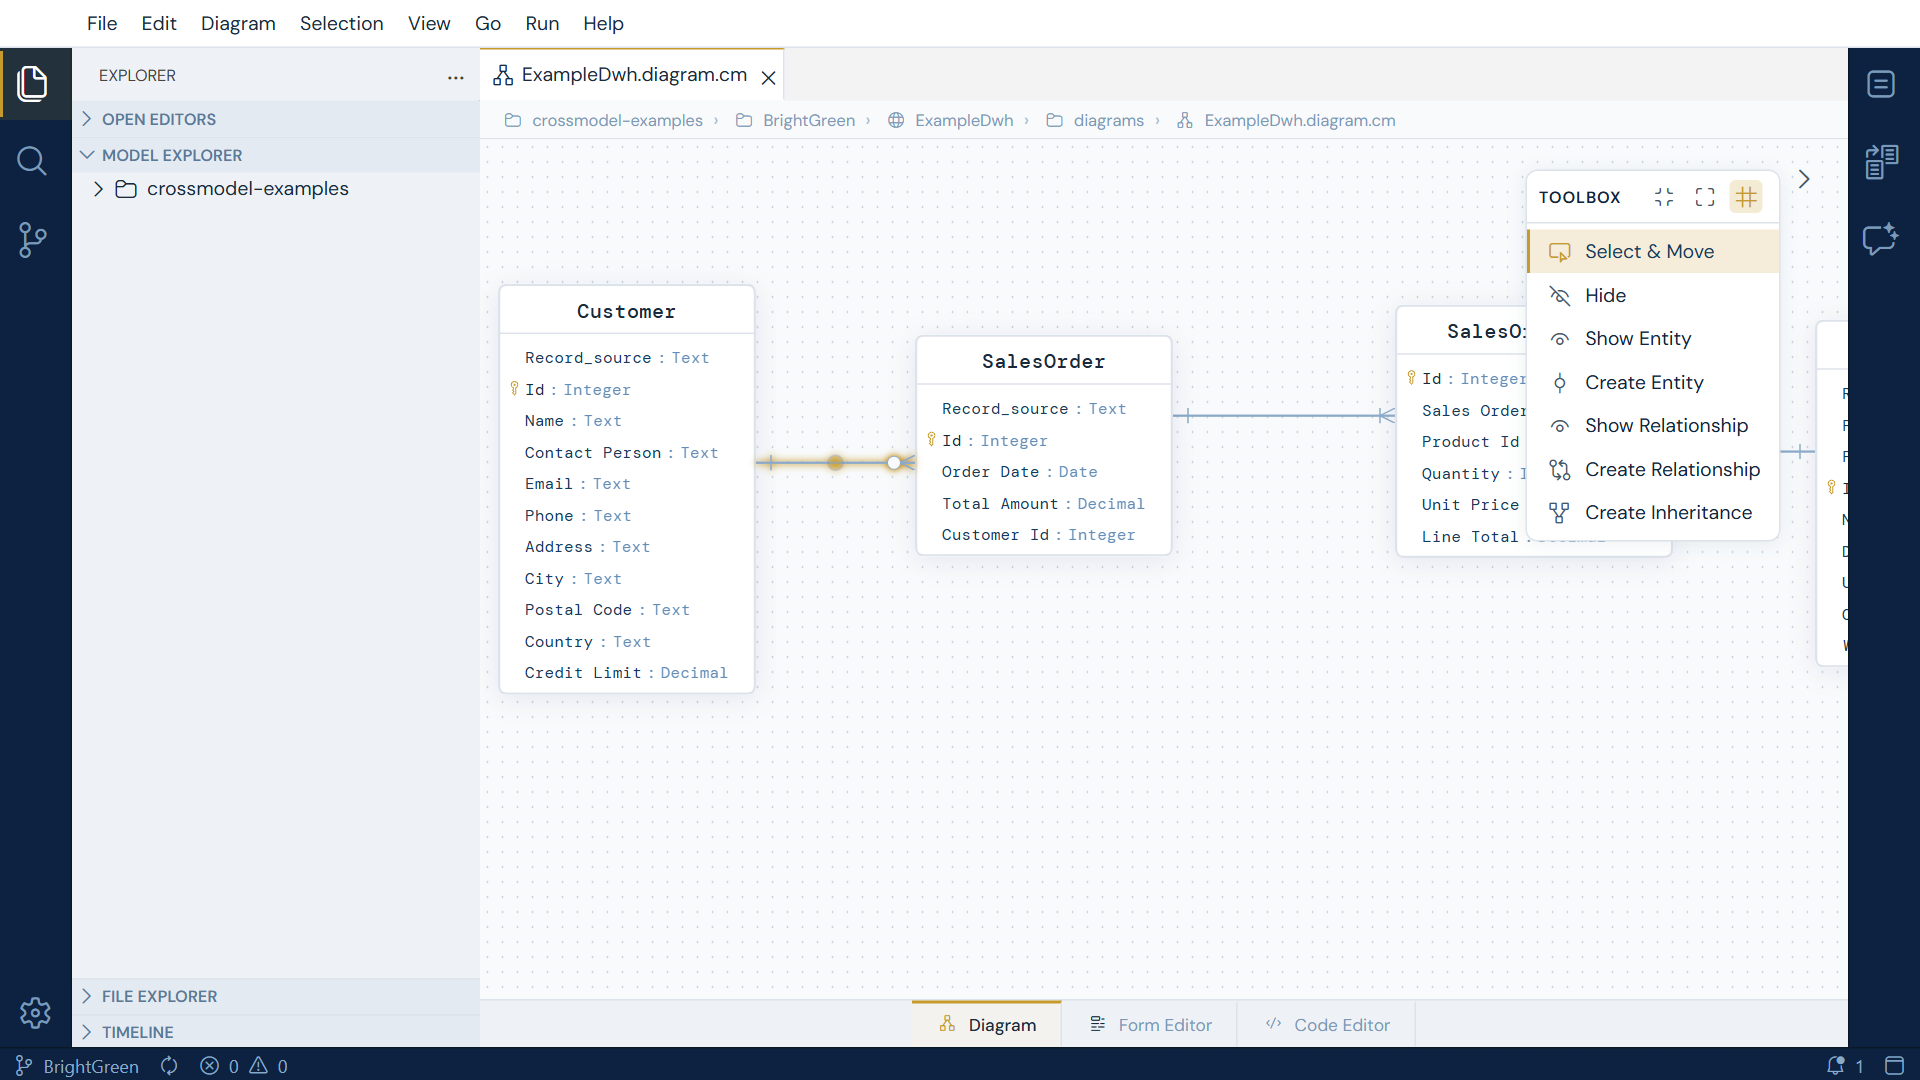
Drag that handle and you create a routing point: a fixed spot the line must pass through. Drag again from the new segments to add more, and bend the line around whatever is in the way.
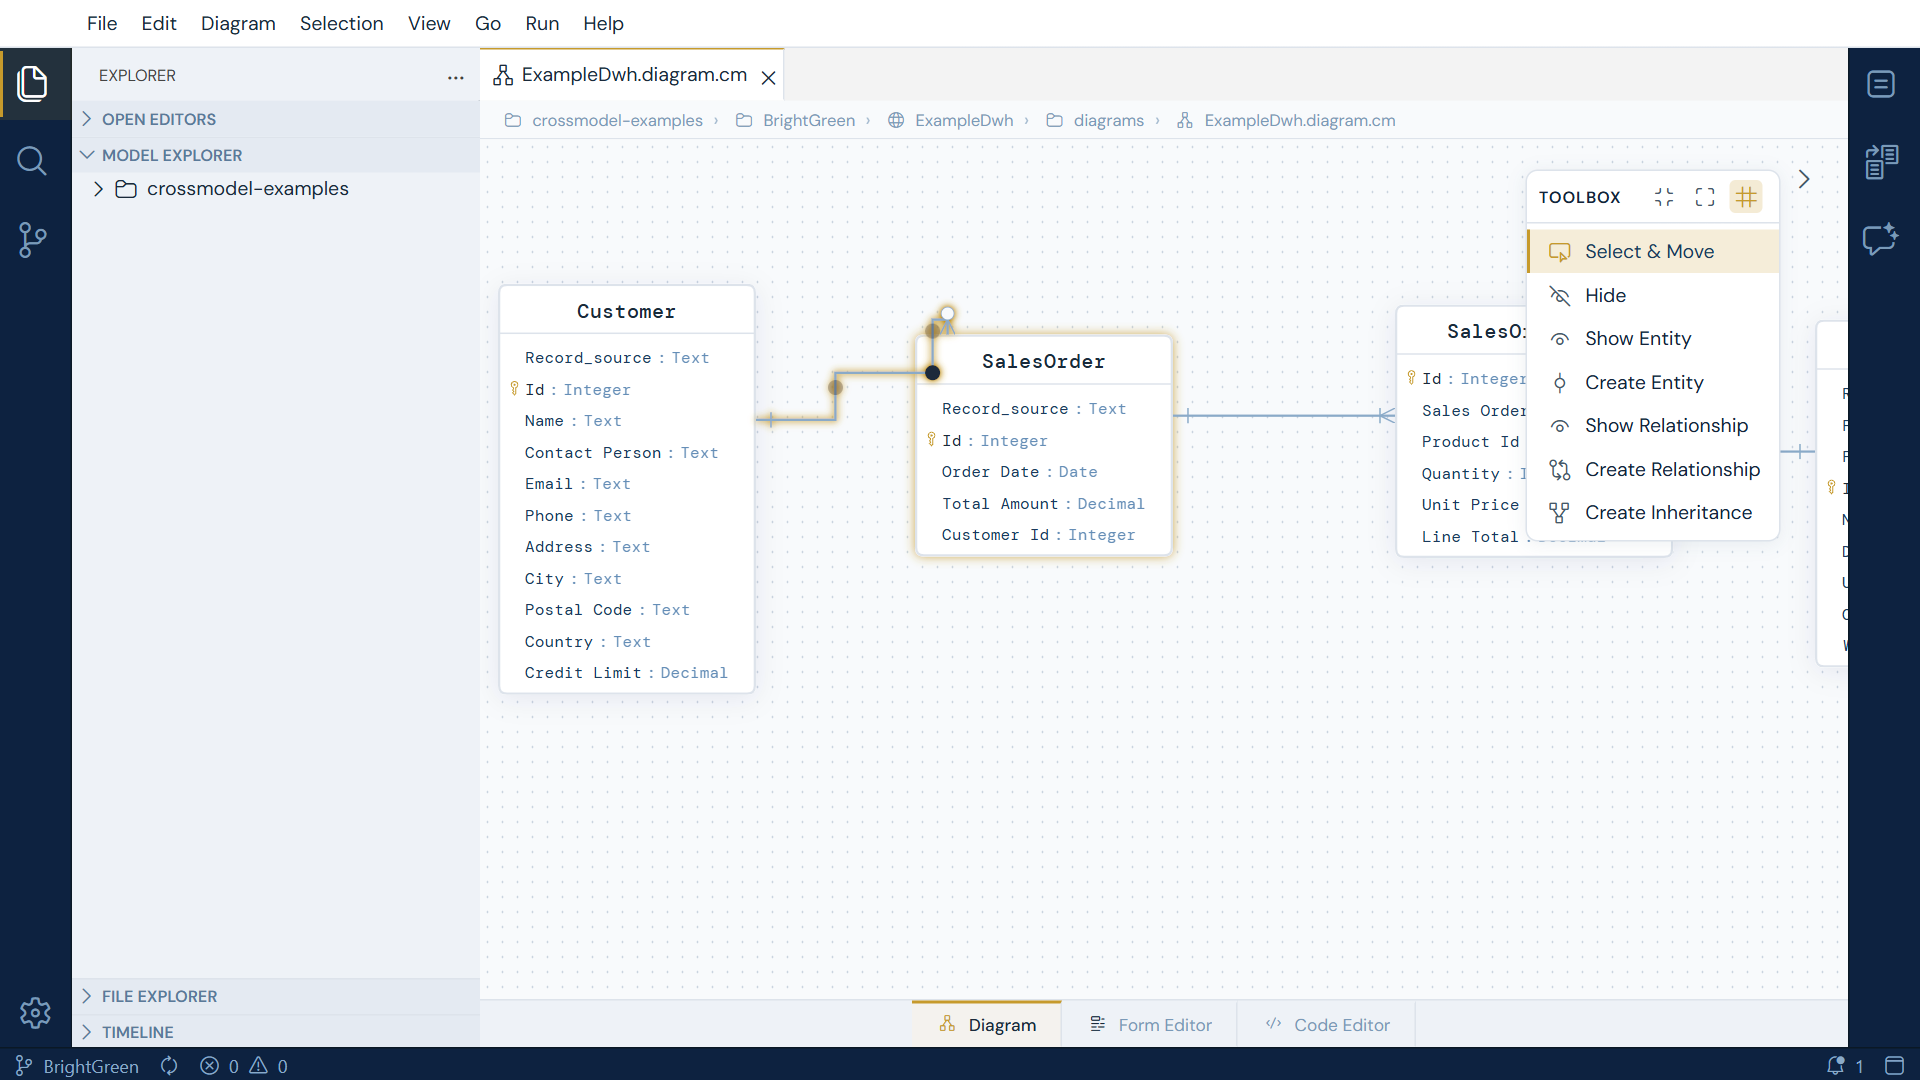
Routing points are part of the model, not a per-session view setting. They are saved into the
.diagram.cm file, so the layout you arrange is the layout your colleagues see.
To remove them:
| What you want | How |
|---|---|
| Drop one point | Select it and press ++delete++ or ++backspace++. Several can be selected and removed together |
| Reset one line | Right-click the line and choose Remove All Routing Points |
| Reset the whole diagram | Right-click empty canvas and choose Remove All Routing Points. It asks for confirmation and tells you how many edges it will affect |
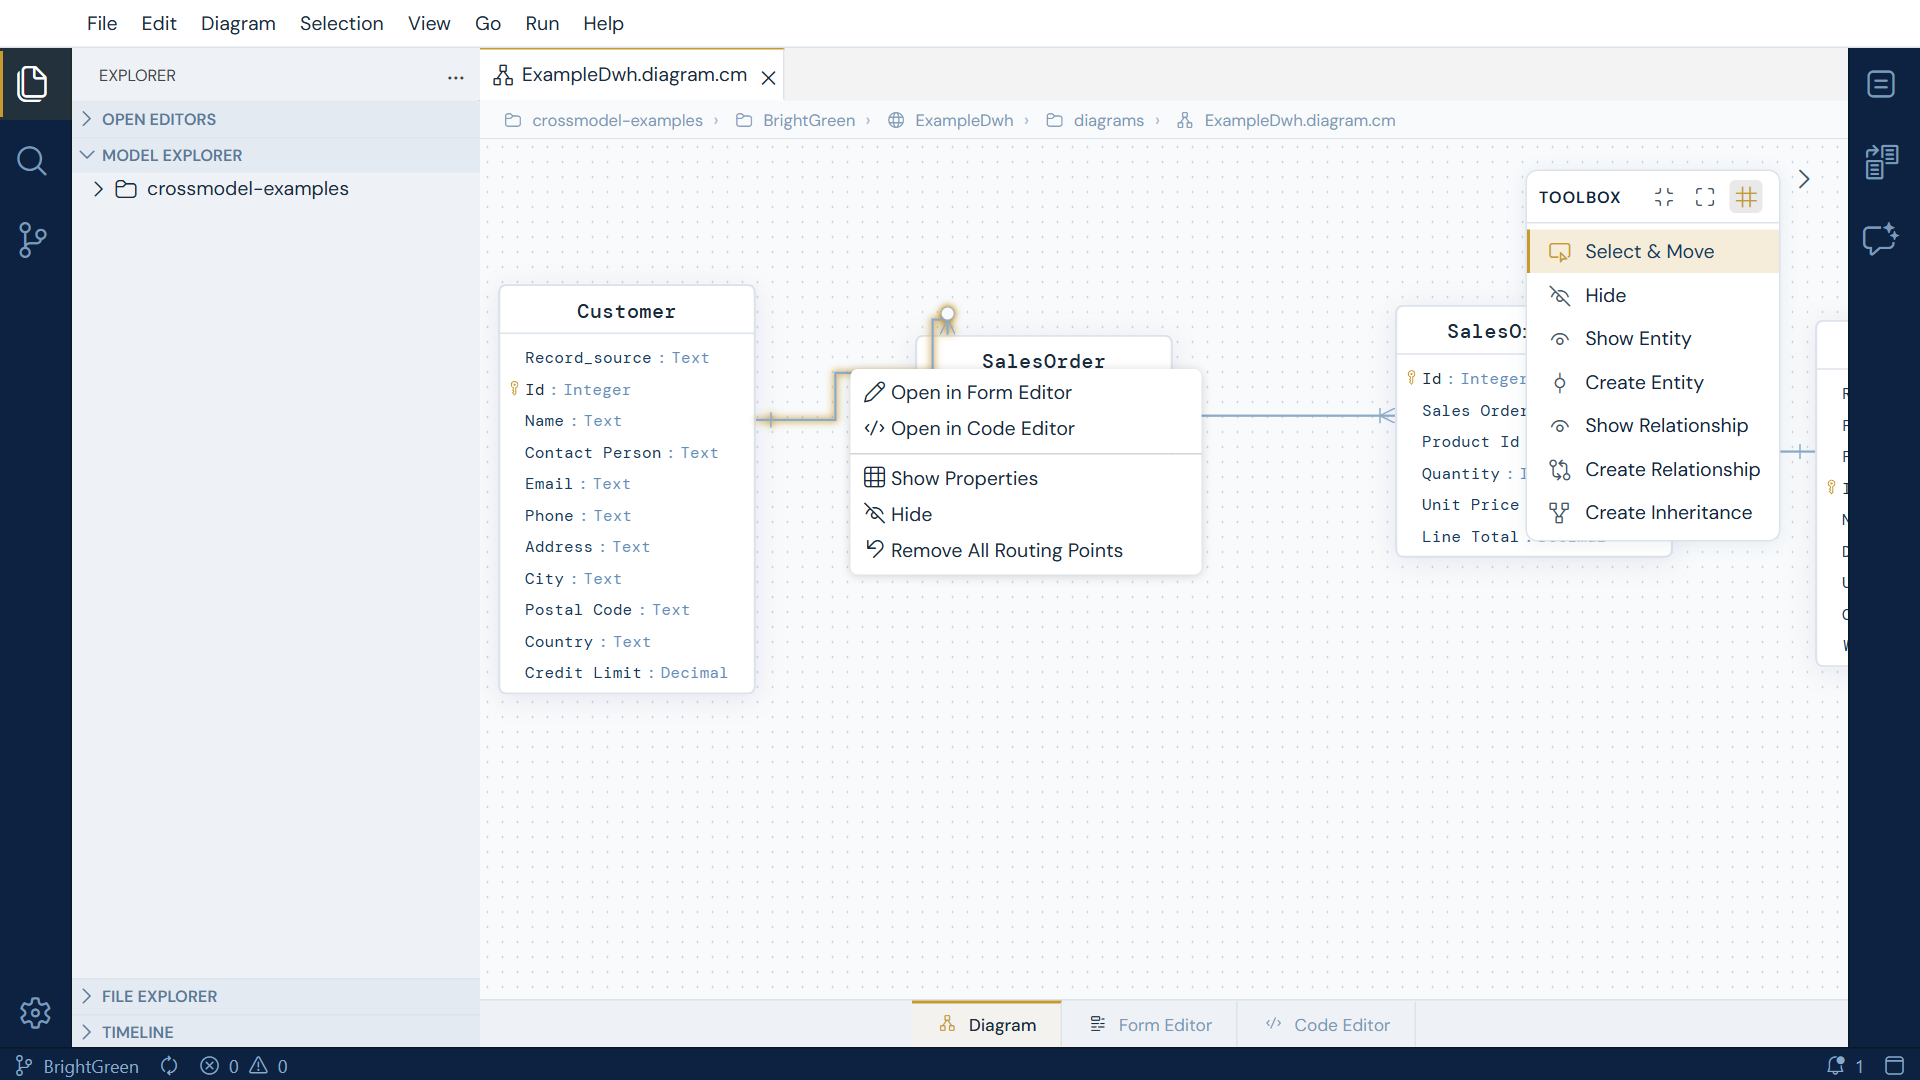
The remove entry appears only once a line has points
Right-click a line you have never bent and the menu offers only the usual Open in Form Editor, Open in Code Editor, Show Properties and Hide. Nothing is missing: there is nothing to remove yet, so the entry is not shown. Bend the line and Remove All Routing Points joins the menu.
Move the boxes first
A routing point pins a line to a position. If you later move the entities, the pinned points stay where they were and can make the route worse than the automatic one. Arrange the boxes until you are happy with them, then add routing points for the few lines that still look wrong.
Spotting entities from another data model
As soon as your workspace holds more than one data model, diagrams start to mix entities that belong to the diagram's own model with entities borrowed from another one.
Use the toolbox action Show Entity to add one. The picker makes the distinction immediately: entities from the diagram's own model are listed by their plain name, while entities from another model are qualified with the model they come from:
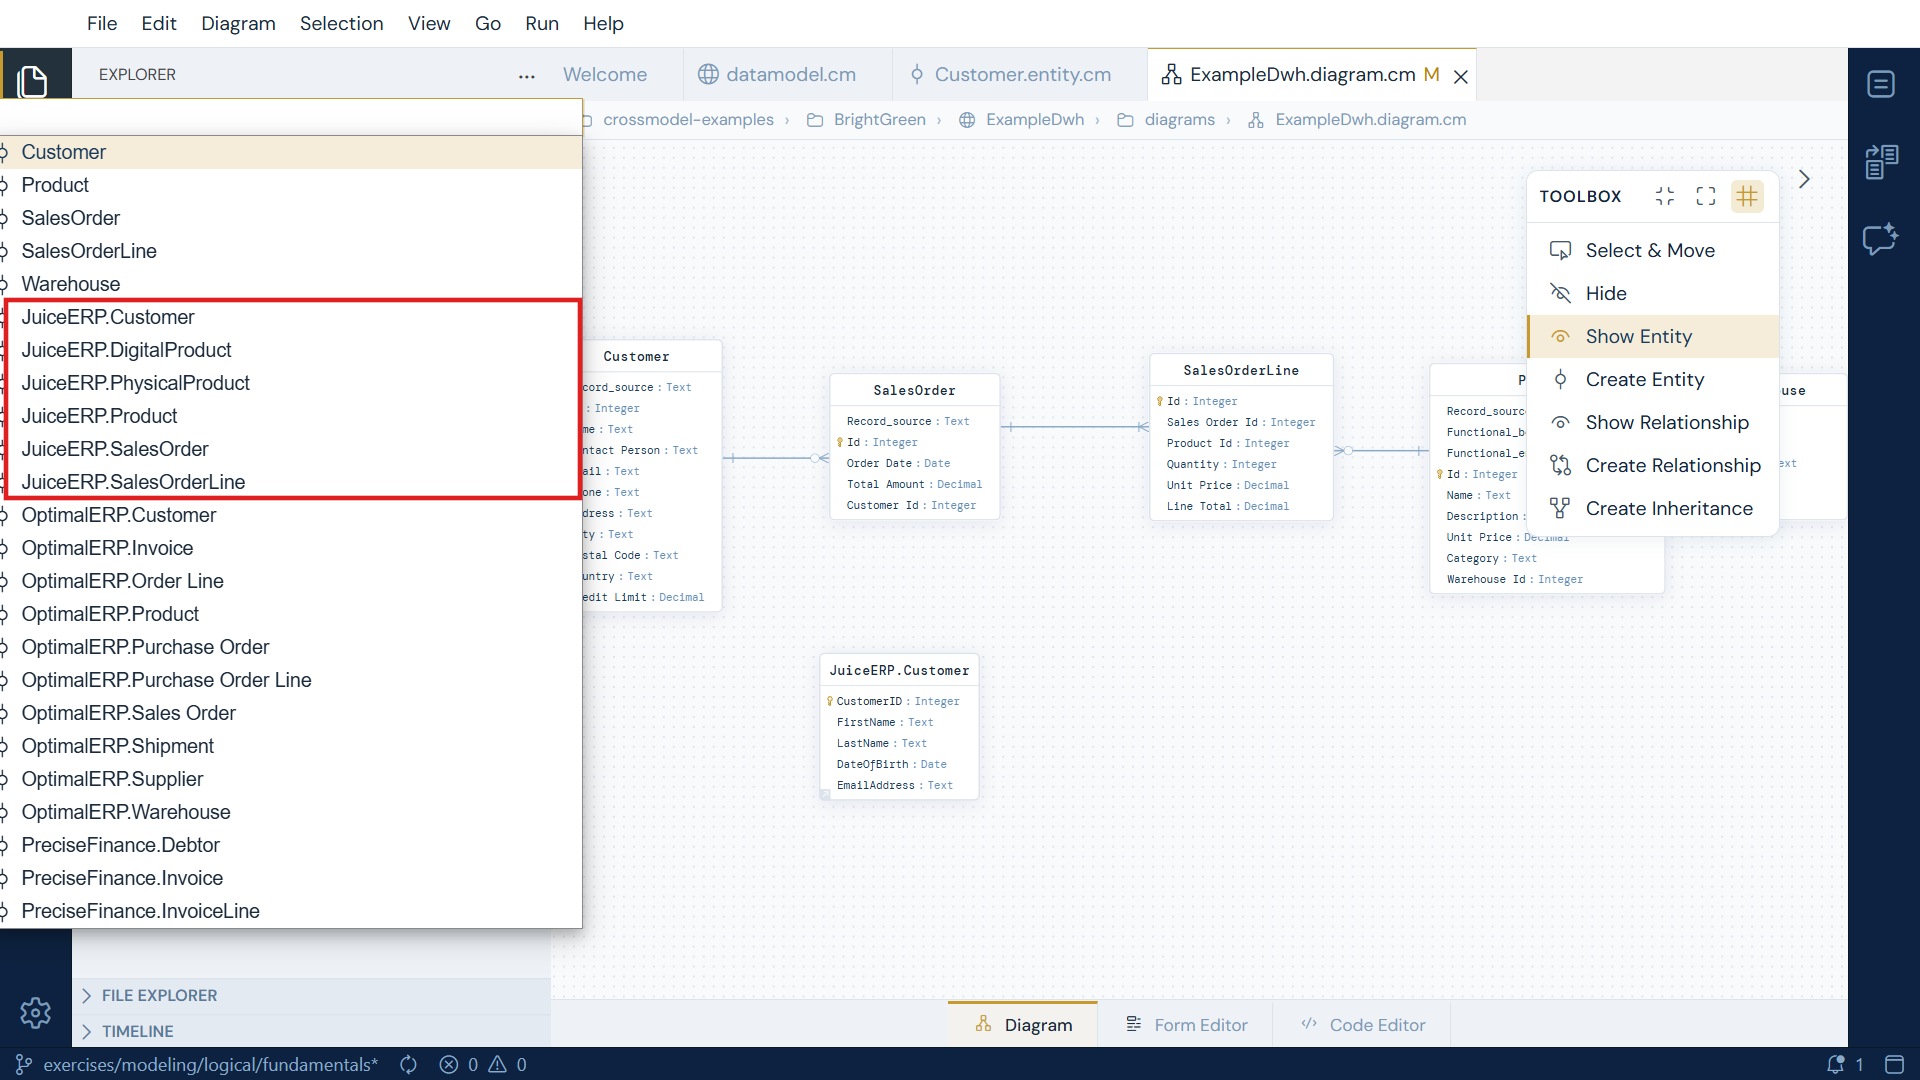
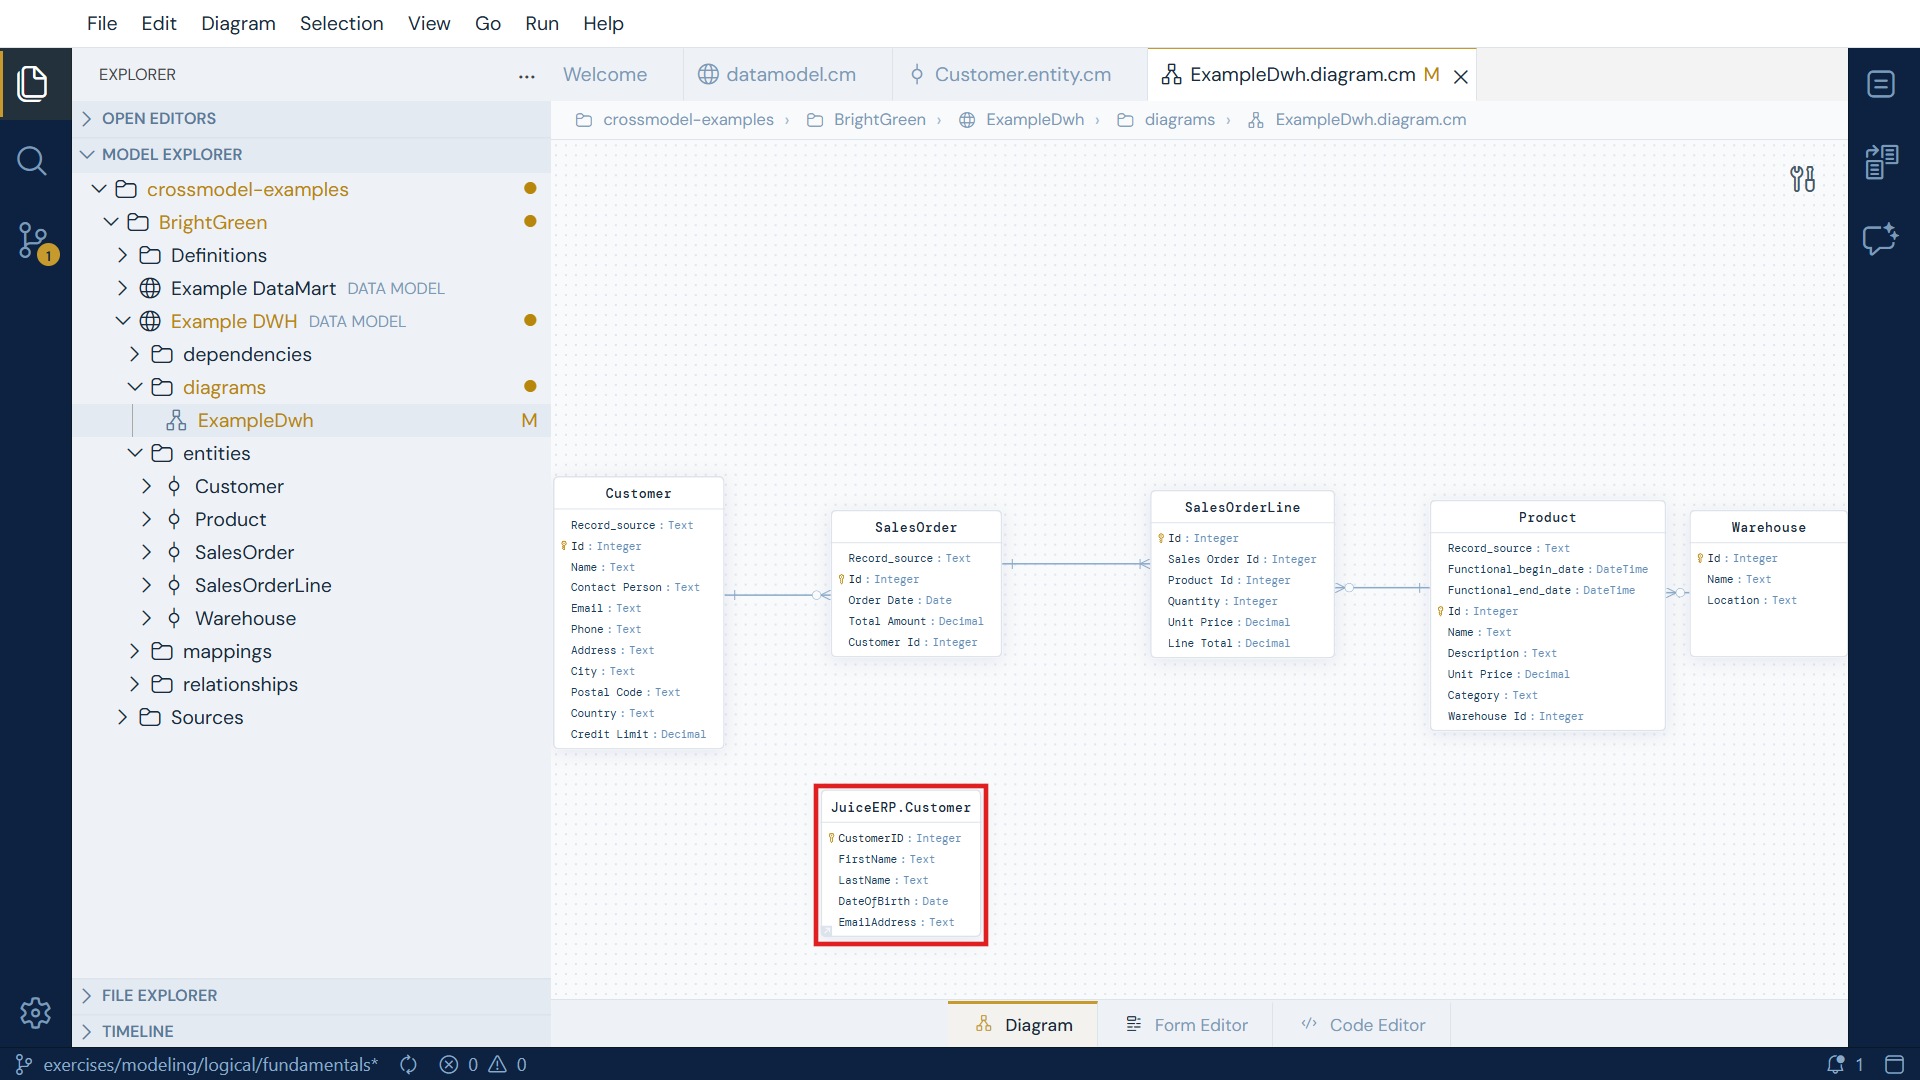
On the canvas, an entity node whose entity lives in a different data model carries a small badge in its bottom-left corner:
Zoomed in, the badge sits just inside the node's border:
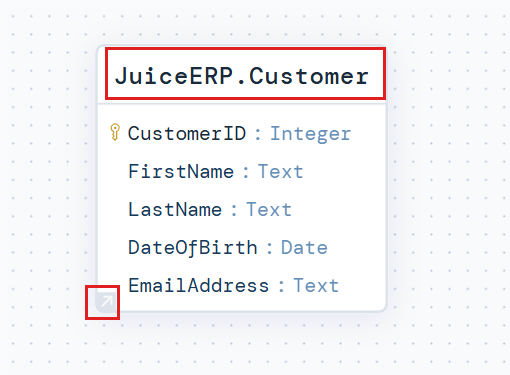
The badge is purely informational - it tells you "this one isn't mine" at a glance, so you know that changing it affects another model too. You will see the same badge on source and target nodes in mapping diagrams, where drawing on other models is the whole point.
Wrapup
In this exercise we have covered the basics for creating a logical data model in CrossModel. We have created a model, worked with diagrams, entities and relationships. We explored the different perspectives that CrossModel offers and found our way around in the workspace.
In the next assignment we'll explore other options to create data models, using the AI agent to perform reverse engineering and recognition of manually drawn datamodels.