Mapping fundamentals
Use mappings to model data lineage or data flow
Now that we have familiarized ourselves with modeling structure and using the AI capabilities of CrossModel, it is time to explore the mapping feature to extend models with lineage or data flow.
Start from the prepared workspace
The starting point for this tutorial is the base data model: on the welcome page, under
Tutorials & Examples, choose BrightGreen and press Clone. To see the finished
result instead, clone examples → mapping → fundamentals. See
Getting the workspace for a tutorial.
Create a datawarehouse model with model dependencies
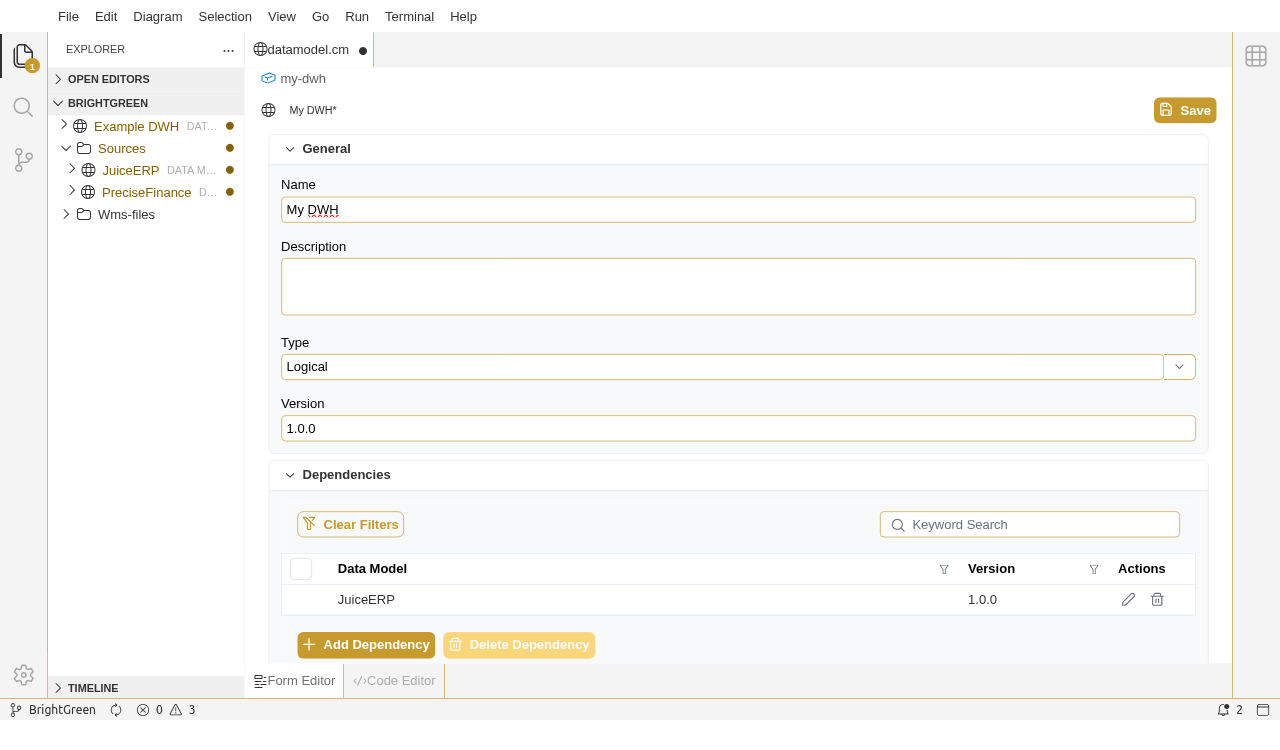
We start with creating a new logical data model like we did before. This time we also include dependencies to the other two models in the workspace:
Create a entity
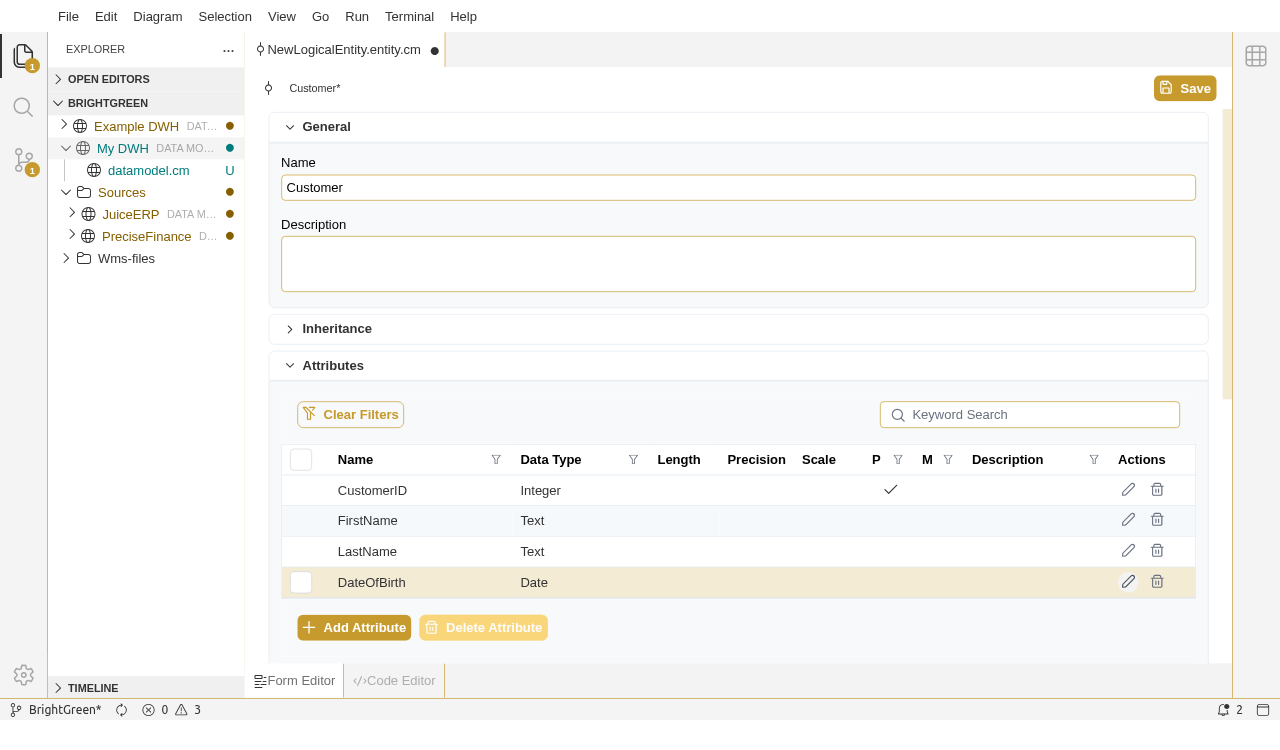
Let's create our first entity in the Datawarehouse; the Customer entity. We'll start with a one to one mapping on the Customer entity from the existing JuiceERP model.
First we create the entity with all relevant attributes, for our DWH scenario we don't need the email address so we'll leave that out:
Add a mapping
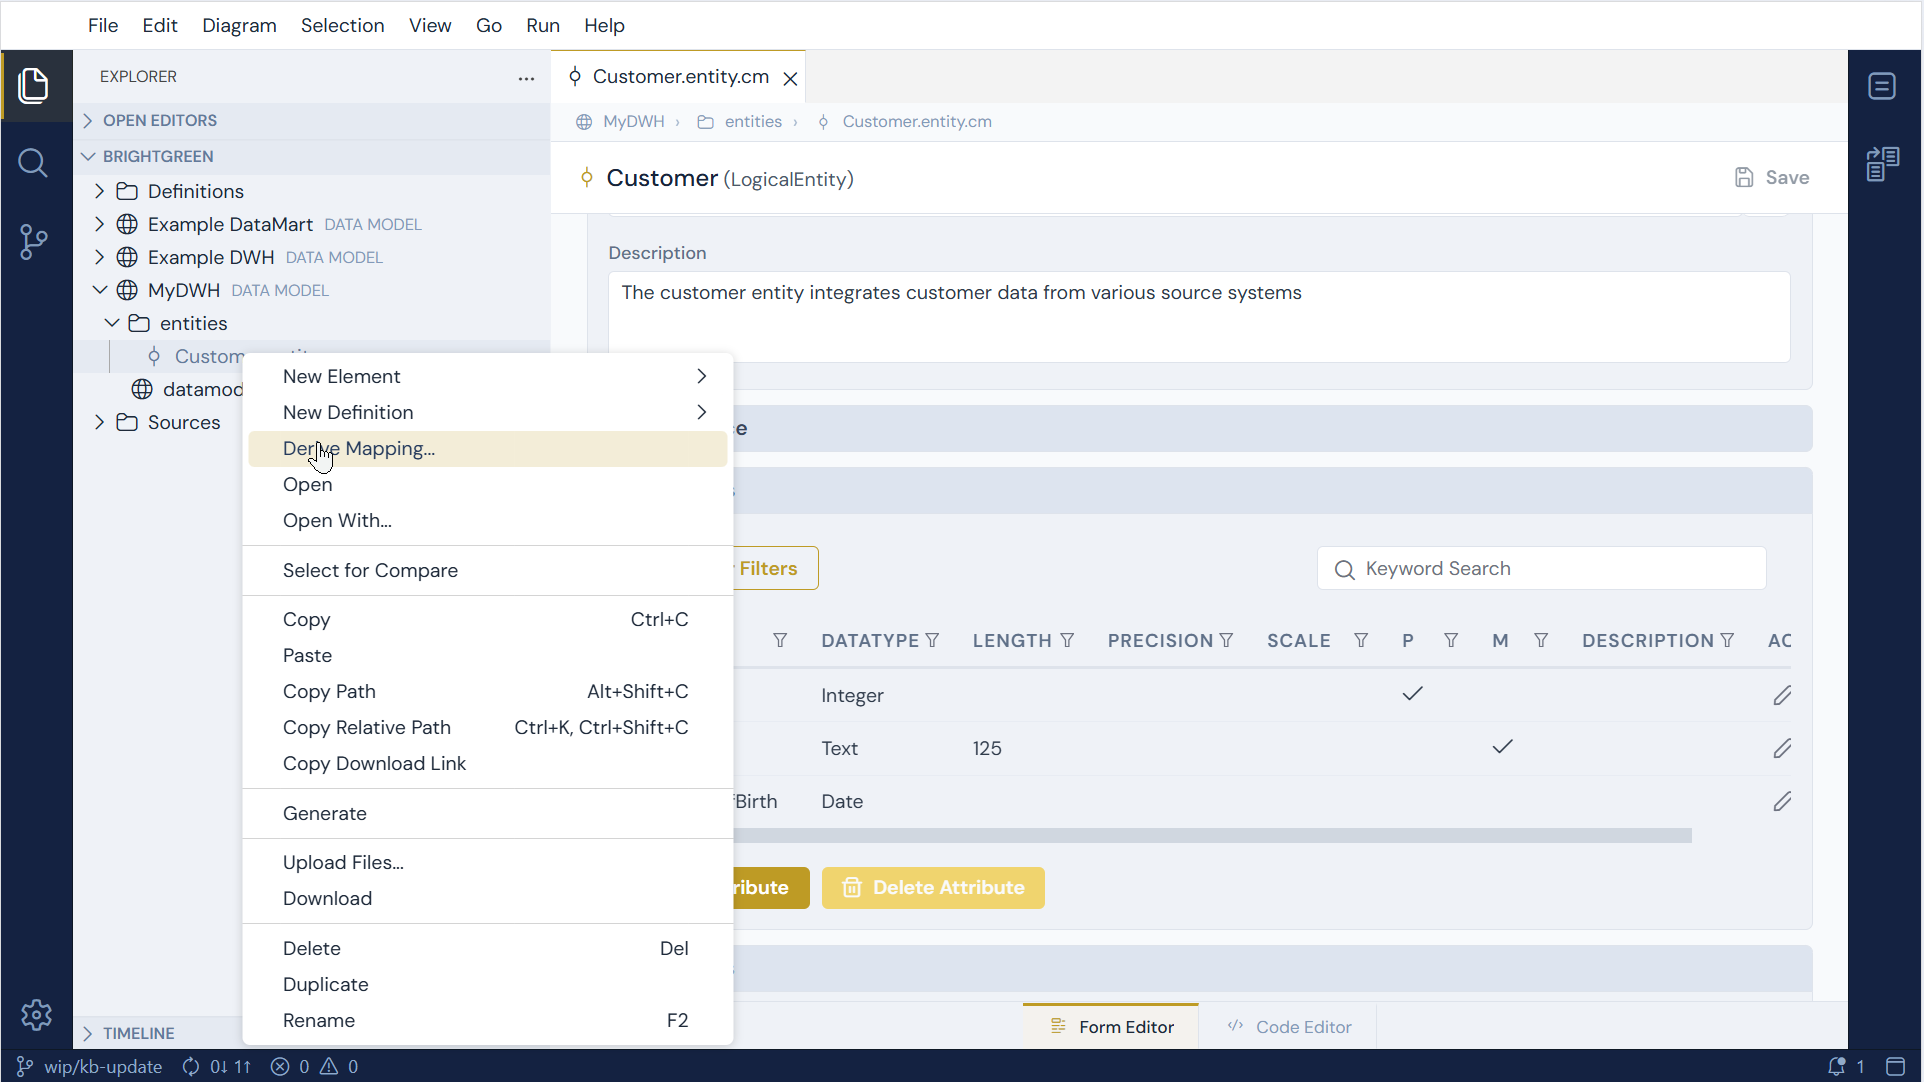
Now we can create a mapping for our newly created entity by either:
- Right clicking on the Customer entity in the Model Explorer and select Derive mapping...
- Create a new mapping via the button in the Model Explorer toolbar
- Create a new mapping via the File -> New element menu
We 'll use the first option for now:
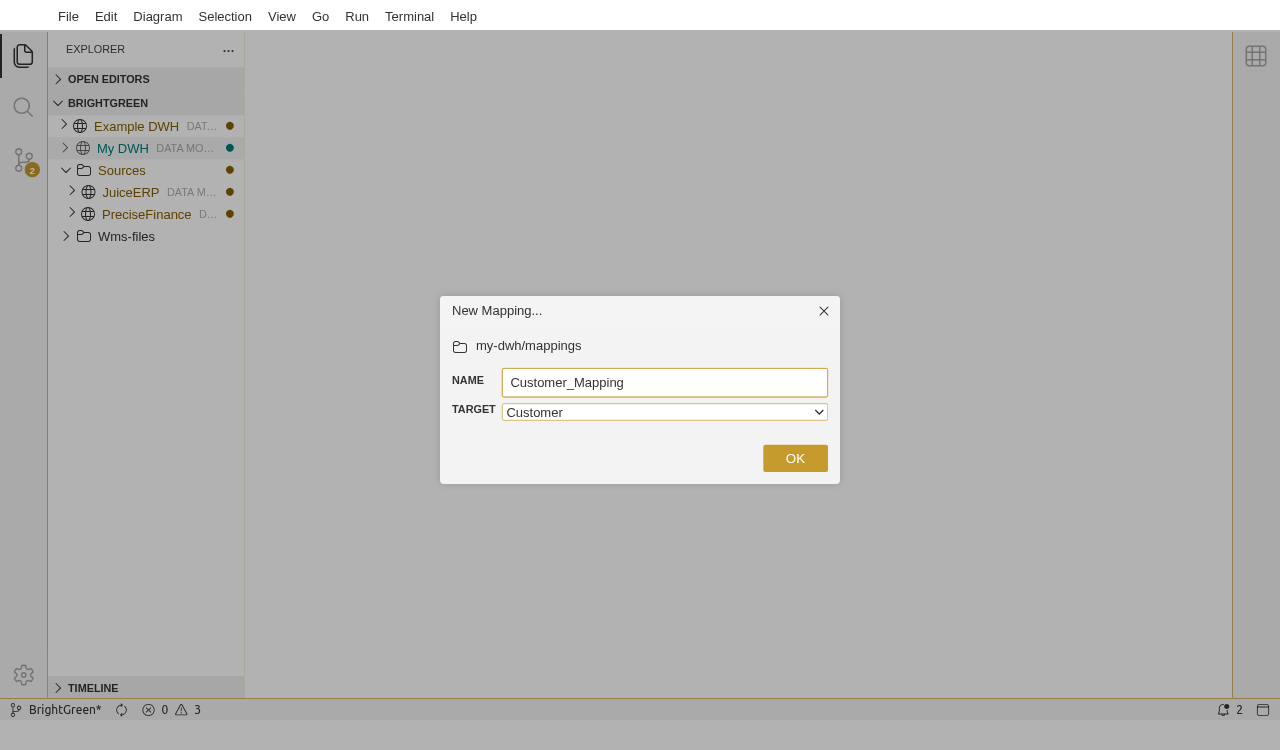
Now we supply a name for the mapping and select the target entity:
Add sources and attribute lineage
In the mapping canvas, we add the appropriate source entity Customer from the JuiceERP model. This can be done by dragging the entity from the Model Explorer or adding it via the toolbox (Create Source Object)
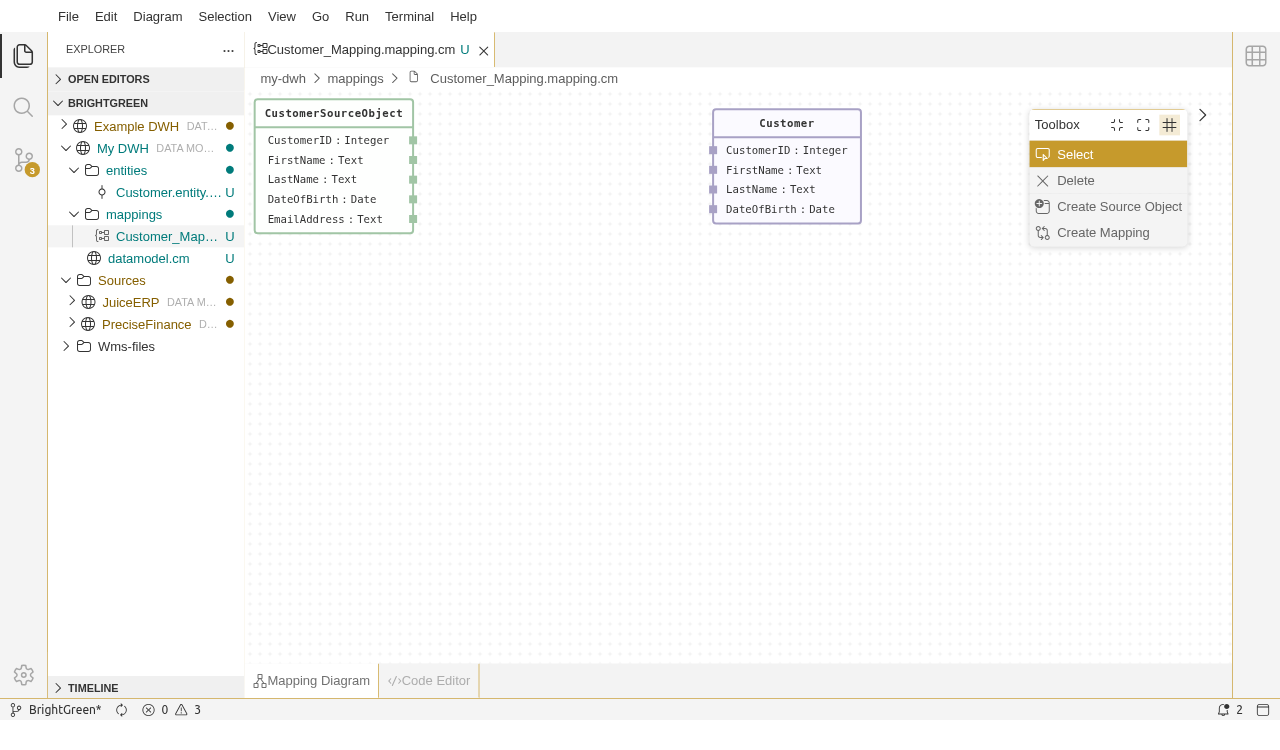
Now select the Create Mapping action in the toolbox and connect the relevant source and target attributes by dragging lines between their connectors.
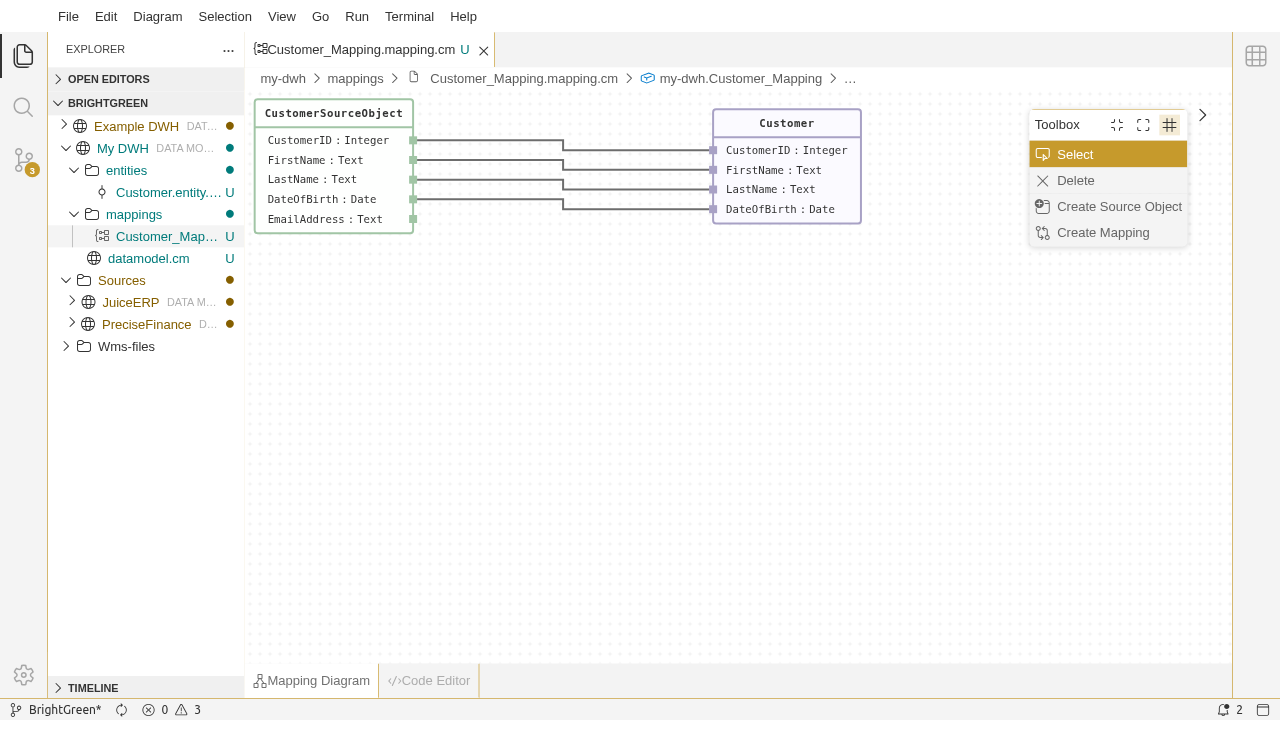
That's it!
We have created a first one on one mapping where we define the lineage between entities in different systems on attribute level. In subsequent exercises we'll extend a mapping with logic and we'll create a mapping that uses multiple sources.
A shortcut: create target attributes by dragging
The steps above did the work twice over. You typed the target attributes into the Customer entity by hand, then drew a mapping line to each one. When a target attribute exists only to receive a source attribute, the palette can do both in one gesture.
Select Create Attribute from the toolbox - it sits next to Create Mapping - and drag a source attribute onto the target entity. CrossModel creates a matching attribute on the target and the mapping between them.
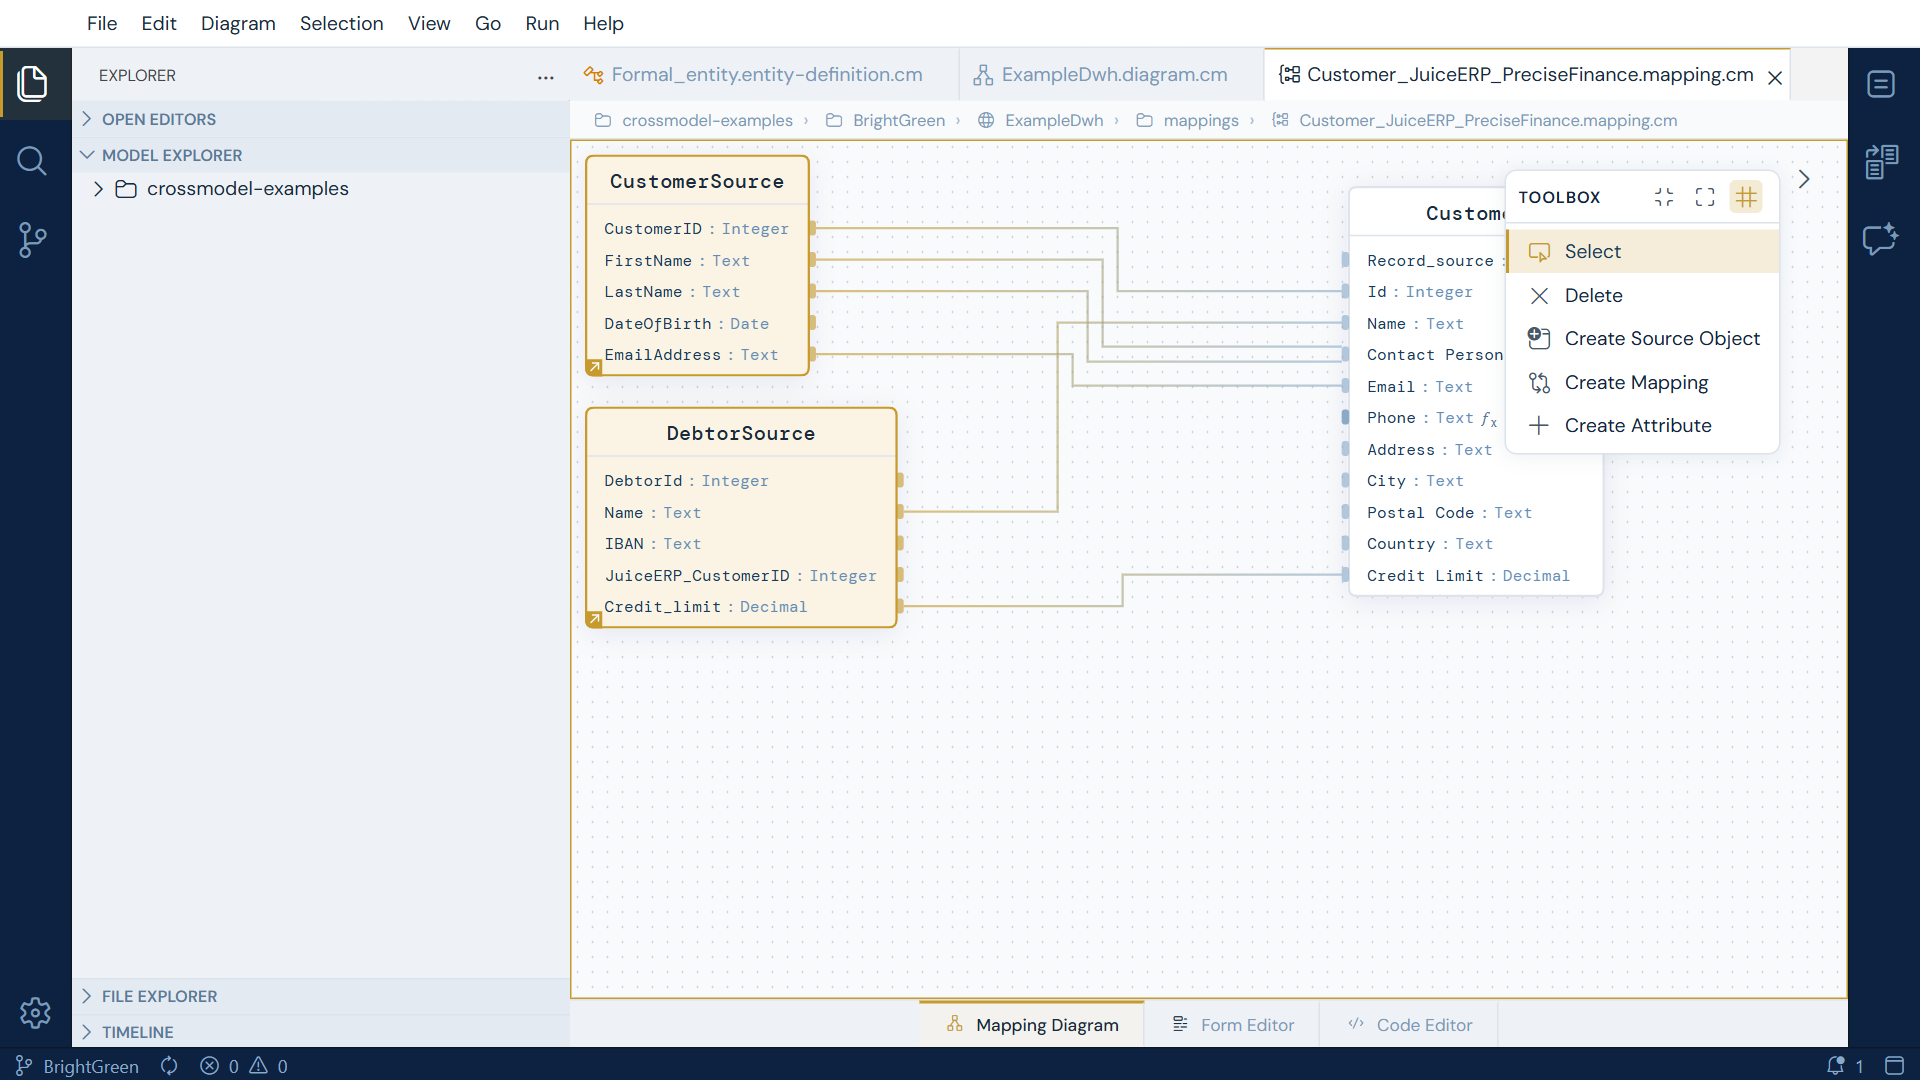
Select several source attributes first and drag them together to do a whole batch at once.
Two tools, two gestures
Create Mapping connects an existing source attribute to an existing target attribute. Create Attribute creates the target attribute and connects it. They are deliberately separate entries rather than one clever tool, because the same drag would otherwise mean two different things depending on where you released the mouse.
When the name is already taken
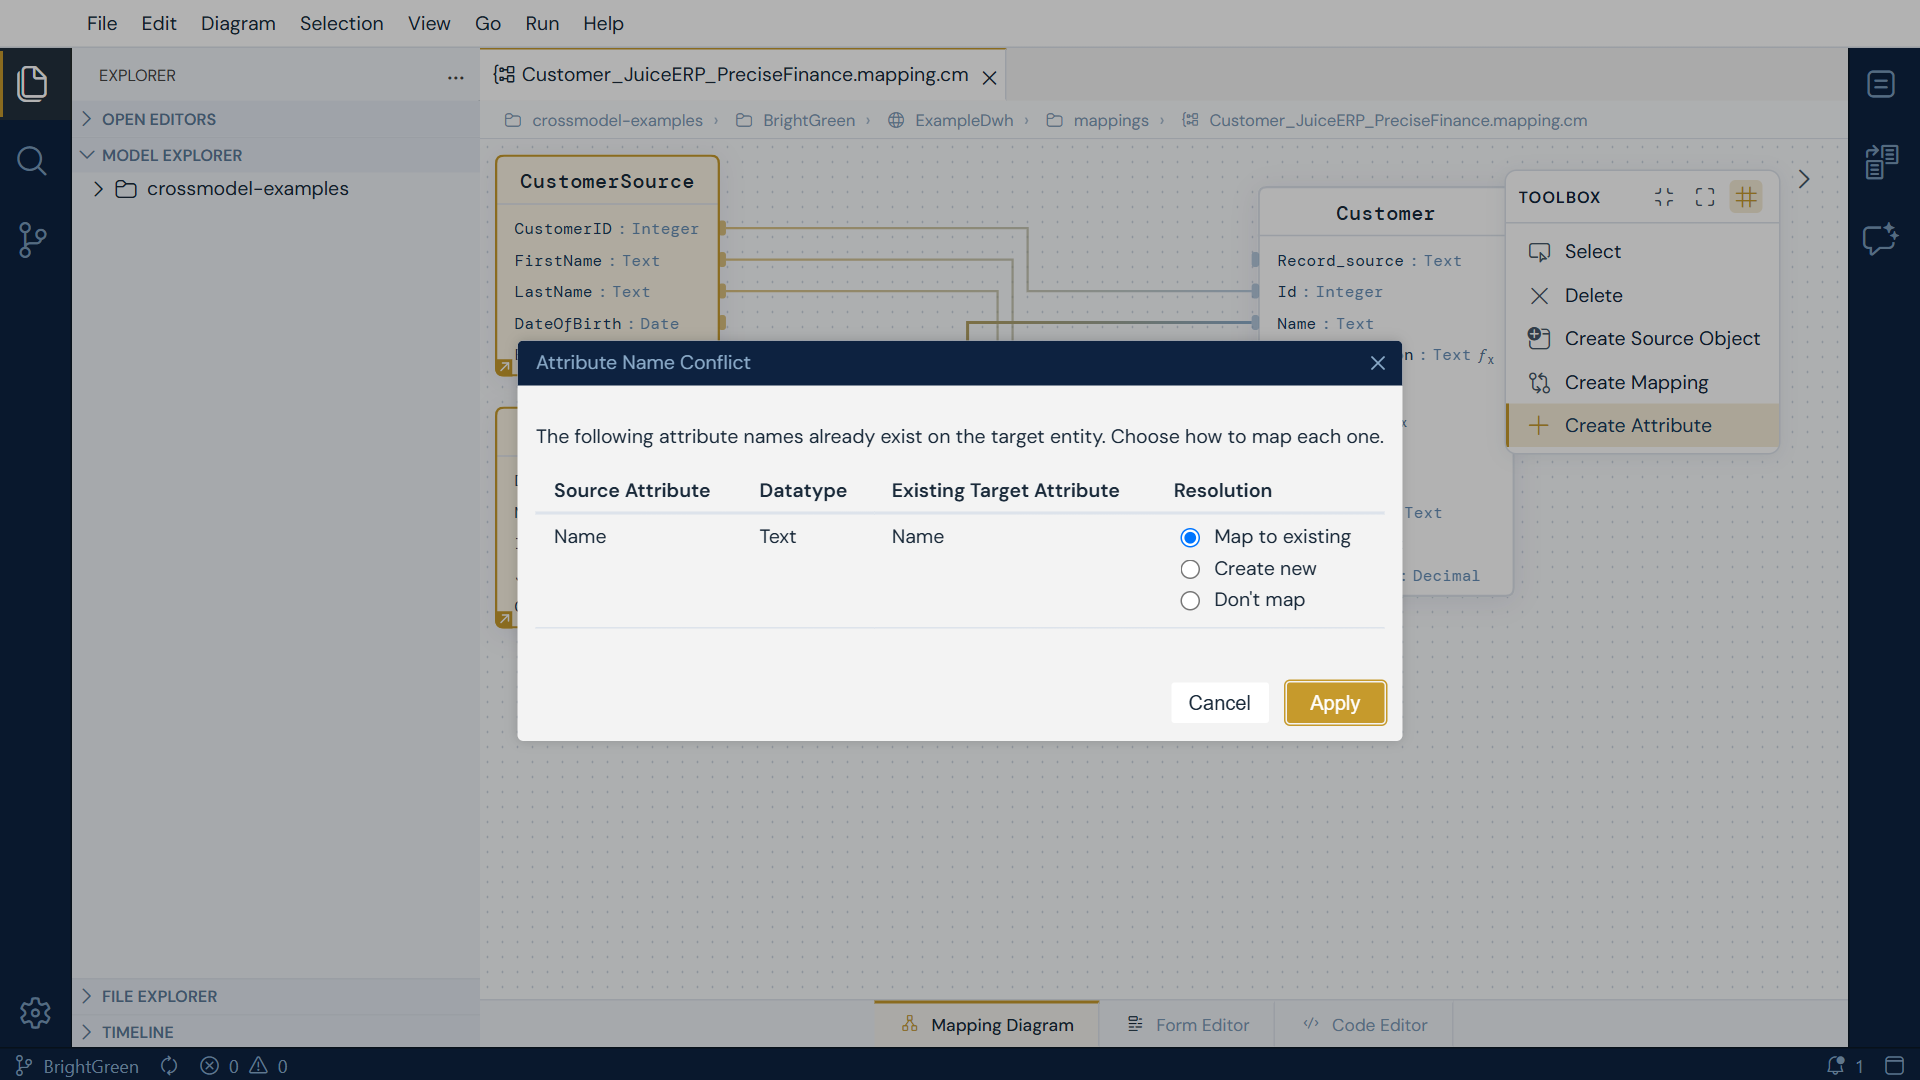
If a dragged attribute's name already exists on the target, CrossModel does not guess. An Attribute Name Conflict dialog lists every clash with its source attribute, datatype and the existing target attribute it collides with, and offers three ways to resolve each row:
| Resolution | What happens |
|---|---|
| Map to existing | No new attribute. The source is mapped to the target attribute that is already there. This is the default, and usually what you want |
| Create new | A second attribute is created alongside the existing one |
| Don't map | The dragged attribute is skipped entirely |
With more than one clash you also get a Set all to: row to apply one choice to everything, which is worth using when you have dragged twenty attributes into a target that already has five of them. Press Apply to carry out the choices.
Build the target from the source
On a fresh target entity with no attributes at all, select every source attribute and drag the lot across. You get a target entity mirroring the source, fully mapped, and can then delete the attributes the warehouse does not need - which is often faster than adding the ones it does.