CrossModel User Interface
Understanding the main components of the CrossModel User Interface
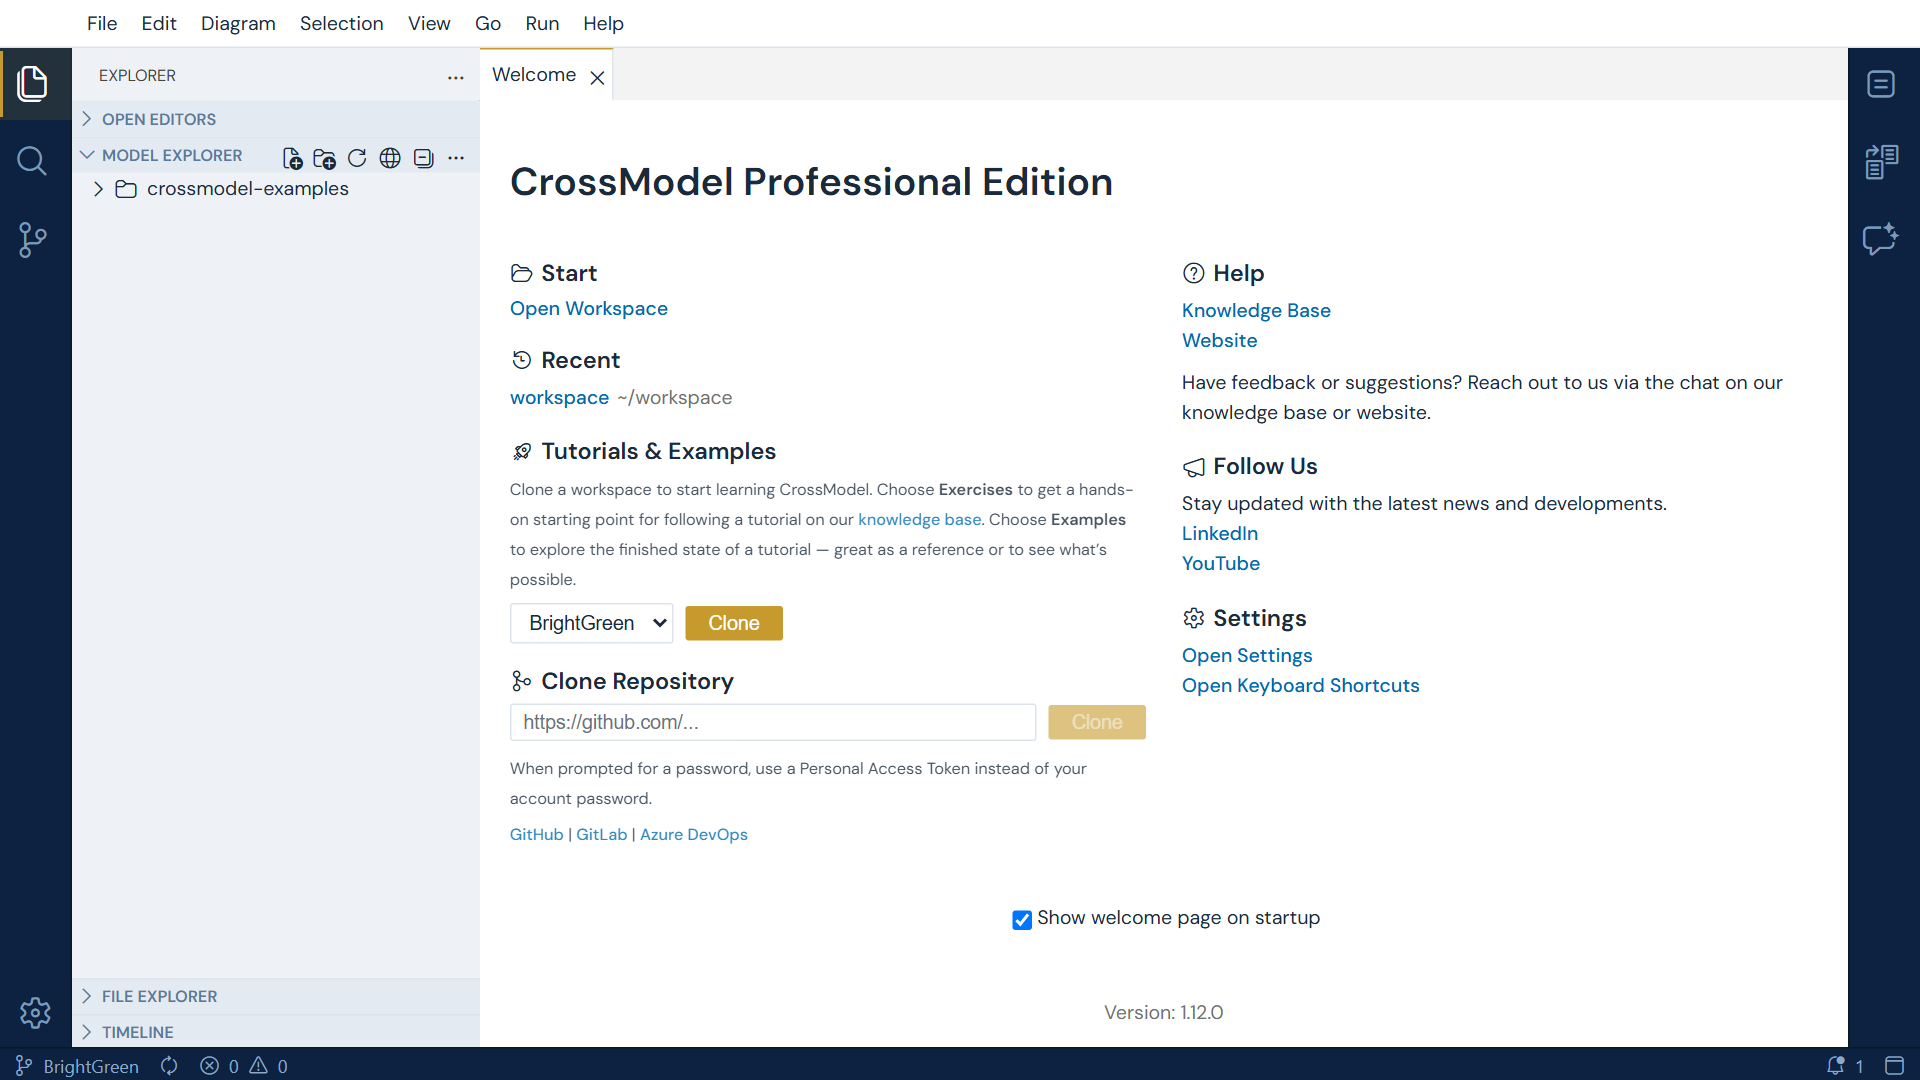
When you open a CrossModel workspace you are greeted by the welcome page, described in full below:
Close it, or open a model from the Model Explorer, and you are looking at the workbench itself:
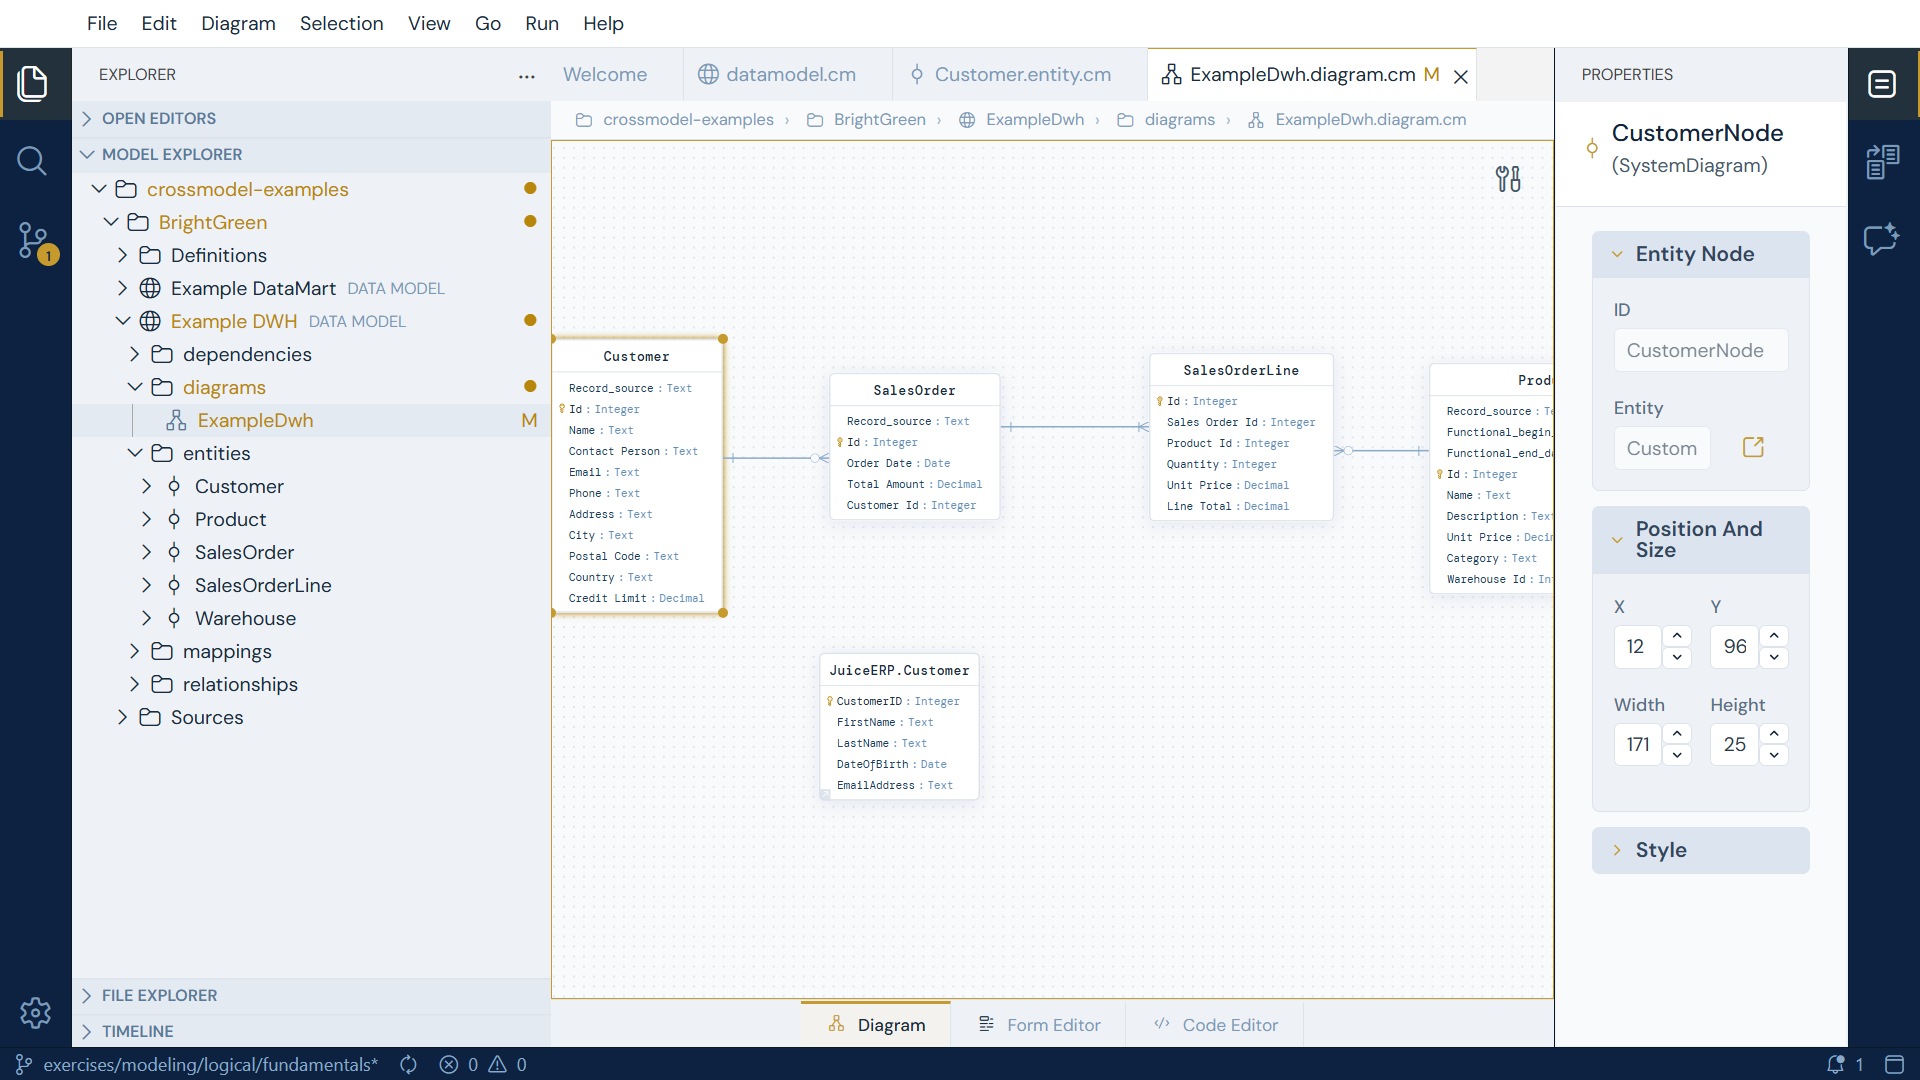
The workbench has four regions:
- The left bar - switches the left panel between the Explorer, Search and Source Control.
- The left panel - navigate your workspace. This is where the Model Explorer lives.
- The editor - the centre area, showing the selected model item: a form, a diagram, or the code view.
- The right bar and panel - the Properties view, CrossGenerate and the AI Chat.
The welcome page
The welcome page is more than a splash screen - it is the fastest way into a working workspace. It is the screenshot at the top of this page, and each of its sections offers something different:
| Section | What it offers |
|---|---|
| Start / Recent | Open a workspace, or return to one you used recently |
| Tutorials & Examples | Clone a ready-made workspace straight from the CrossModel examples repository |
| Clone Repository | Clone any Git repository by URL - see Git Provider Authentication |
| Help | Links to this knowledge base and the CrossModel website |
| Settings | Open the settings editor or the keyboard shortcuts editor |
Tutorials & Examples is worth knowing about before you start the tutorials. Pick a topic from the cascading dropdowns and press Clone, and CrossModel fetches a prepared workspace for you:
- BrightGreen is the base data model on its own, and is the starting point for the tutorials that build from scratch.
- tutorials gives you the starting point for a tutorial that continues from an earlier one - it contains the previous tutorial's result, without the answers to this one.
- examples gives you the finished result, useful as a reference or to see what is possible without doing the work first.
What happens after you press Clone
CrossModel asks you two questions before the models appear. Both matter:
- Choose a folder to clone into. The picker opens one level above your workspace, so the
folder it offers by default is next to your workspace rather than inside it. Select your
workspacefolder, then press Select as Repository Destination. Cloning anywhere else leaves the files outside the workspace, where the Model Explorer will not find them. - "Would you like to open the cloned repository, or add it to the current workspace?" Press Close. Because you cloned into your workspace folder, the repository is already part of the workspace and there is nothing to open or add. The other options move you to a different workspace root, which is not what the tutorials assume.
The models then appear in the Model Explorer under crossmodel-examples.
Each dropdown is one level deeper: the choices come from the branch names in the public
crossmodel-examples repository, where every / in a branch name starts a new dropdown.
Choosing tutorials → mapping → with-multiple-sources clones the branch
tutorials/mapping/with-multiple-sources.
All of these branches build on BrightGreen, the shared base data model used throughout the tutorials, so every workspace you clone drops you into the same familiar landscape with only the material for that topic added. The tutorials index lists which workspace belongs to which tutorial.
You can reopen the welcome page at any time from Help → Welcome, and turn off the startup behaviour with the Show welcome page on startup checkbox at the bottom.
Reopening a session is not the same as restarting the workspace (as of v1.12.0)
Reload the browser tab of a session that is still running and the workbench comes back exactly as you left it: the same editors open, and the same one in front. Stop the workspace and Start it again and it does not. You get the welcome page and nothing else. The open editors belong to the running session rather than to the workspace, so a screenshot of a workbench with several tabs open is someone mid-session, not what a freshly started workspace looks like.
The left bar
| View | Shortcut | What it does |
|---|---|---|
| Explorer | Ctrl+Shift+E |
Navigate your workspace - contains the Model Explorer and the File Explorer |
| Search | Ctrl+Shift+F |
Search for files by name or content across the whole workspace |
| Source Control | Ctrl+Shift+G |
Work with models from a Git repository - stage, commit, branch and push |
At the bottom of the left bar, the gear icon opens the Manage menu, which is the route to settings, keyboard shortcuts and themes.
The Explorer contains two trees
The Explorer is not a single tree. It holds several collapsible sections:
- Open Editors - everything you currently have open.
- Model Explorer - your workspace as model objects, labelled by name, with entities expanding into their attributes and identifiers. This is the view you will use most.
- File Explorer - the raw files and folders on disk, including non-model files such as
README.mdand.gitignore. - Timeline - the history of the selected file.
Because the two trees answer different questions, it is worth reading The Model Explorer to see when to reach for each.
The right bar
| View | Shortcut | What it does |
|---|---|---|
| Properties | Alt+Shift+P |
Shows and edits details of whatever is selected - an entity in a diagram, an attribute mapping, a source object |
| CrossGenerate | - | The code generation panel: pick a model object, write a template, preview and generate |
| AI Chat | Ctrl+Alt+I |
The AI modeling assistant |
Other views
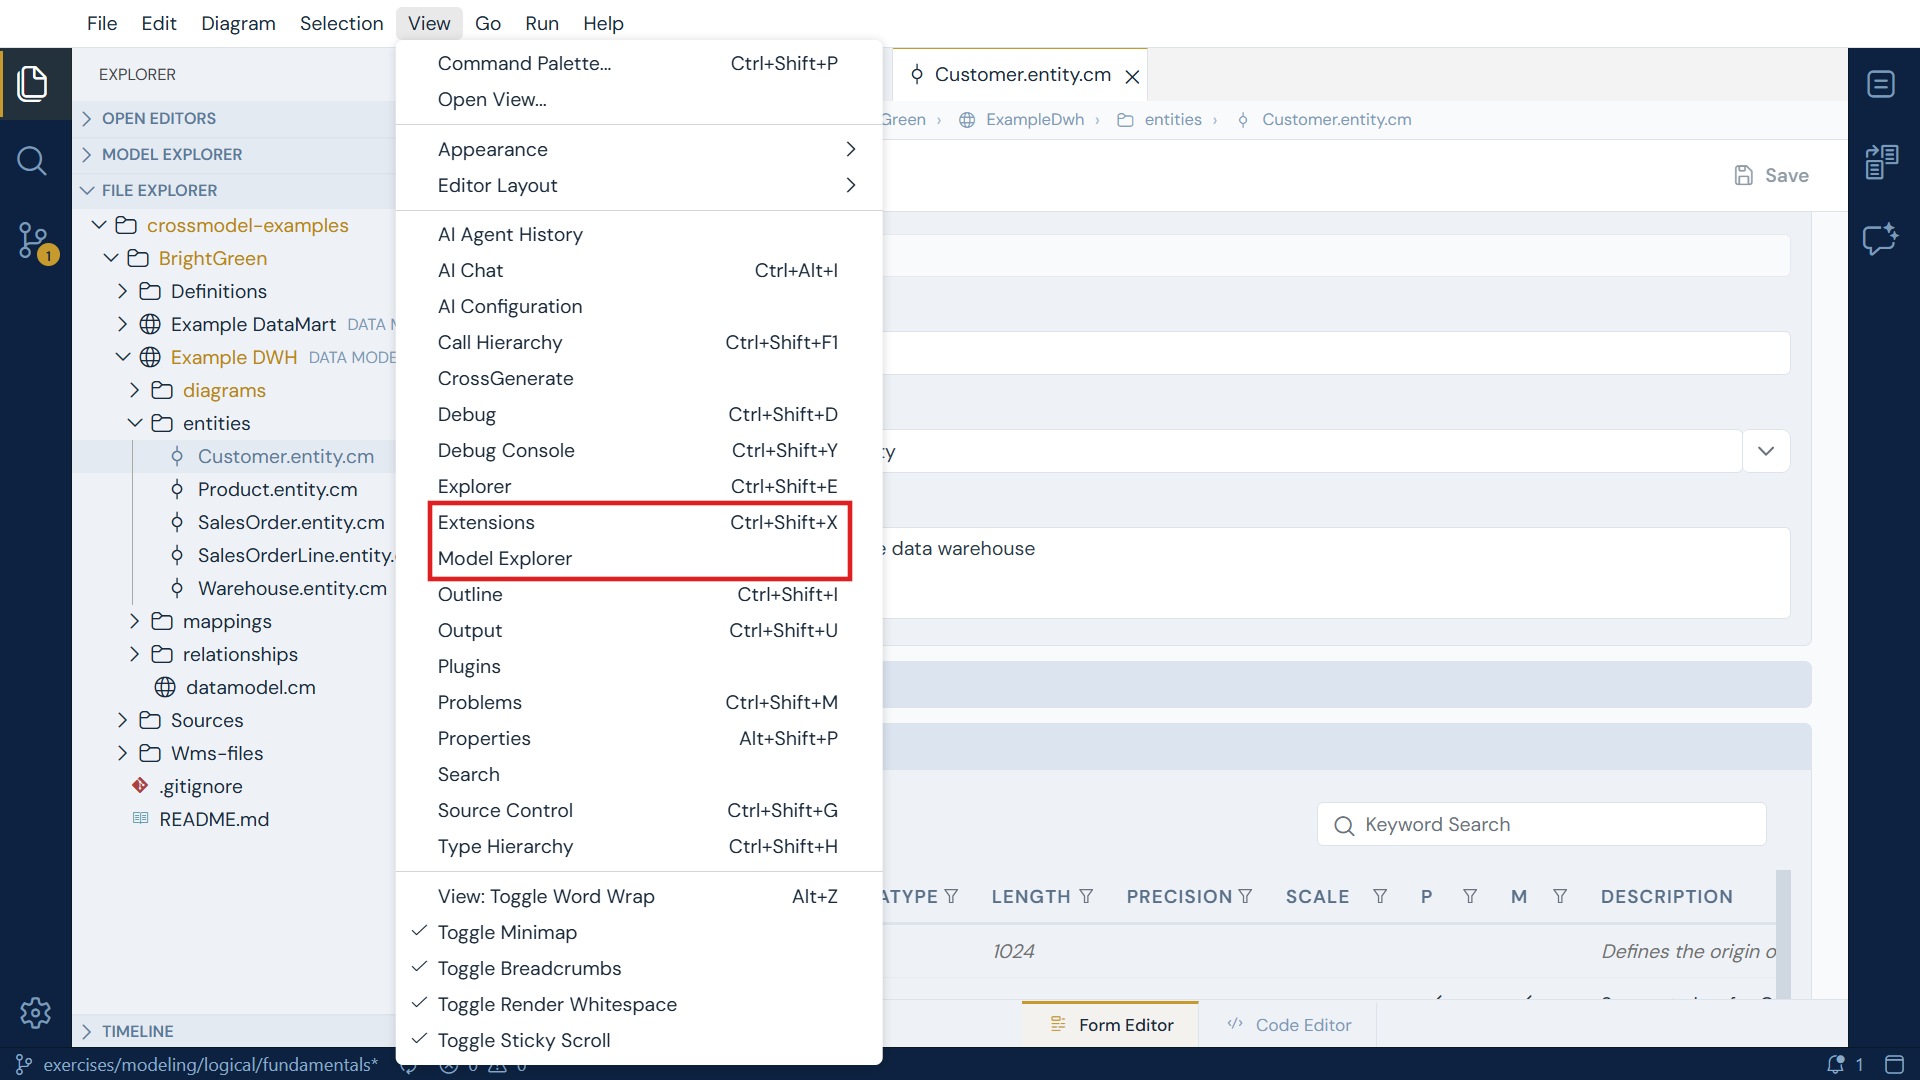
Not every view is pinned to a bar. Open any of them from the View menu:
| View | Shortcut |
|---|---|
| Problems - warnings and errors when a model is in an invalid state | Ctrl+Shift+M |
| Extensions - install and manage extensions from Open VSX | Ctrl+Shift+X |
| Output | Ctrl+Shift+U |
| Outline | Ctrl+Shift+I |
| Model Explorer, AI Configuration, AI Agent History | - |
VS Code compatibility and extensions
The CrossModel workbench is VS Code compatible. The keyboard shortcuts, the command palette
(Ctrl+Shift+P), the editor behaviour and the settings model are the ones you already know, so if
you work in VS Code you will find your way around immediately.
That compatibility is not only skin deep: CrossModel can run VS Code extensions, installed from
the Open VSX registry. Open the Extensions view with Ctrl+Shift+X or
from View → Extensions, search for what you need and press Install. The extension applies to
the session you are working in.
This is worth knowing because the editors you use around your models are ordinary editors. A PDF viewer, for example, turns documentation that a colleague dropped in the workspace from raw text into a readable document - useful when you are handing that documentation to the AI modeling assistant. The same goes for syntax highlighting of the template languages you write for code generation.
Settings
Open settings from Welcome → Open Settings, from the gear in the left bar, or with the
command palette (Ctrl+Shift+P). Settings have two scopes, shown as tabs:
- User - applies to you, across every workspace.
- Workspace - applies to this workspace only, and is stored in a
.crossmodelfolder inside it. Because that folder lives in the workspace, workspace settings are versioned in Git alongside your models and are shared with your team.
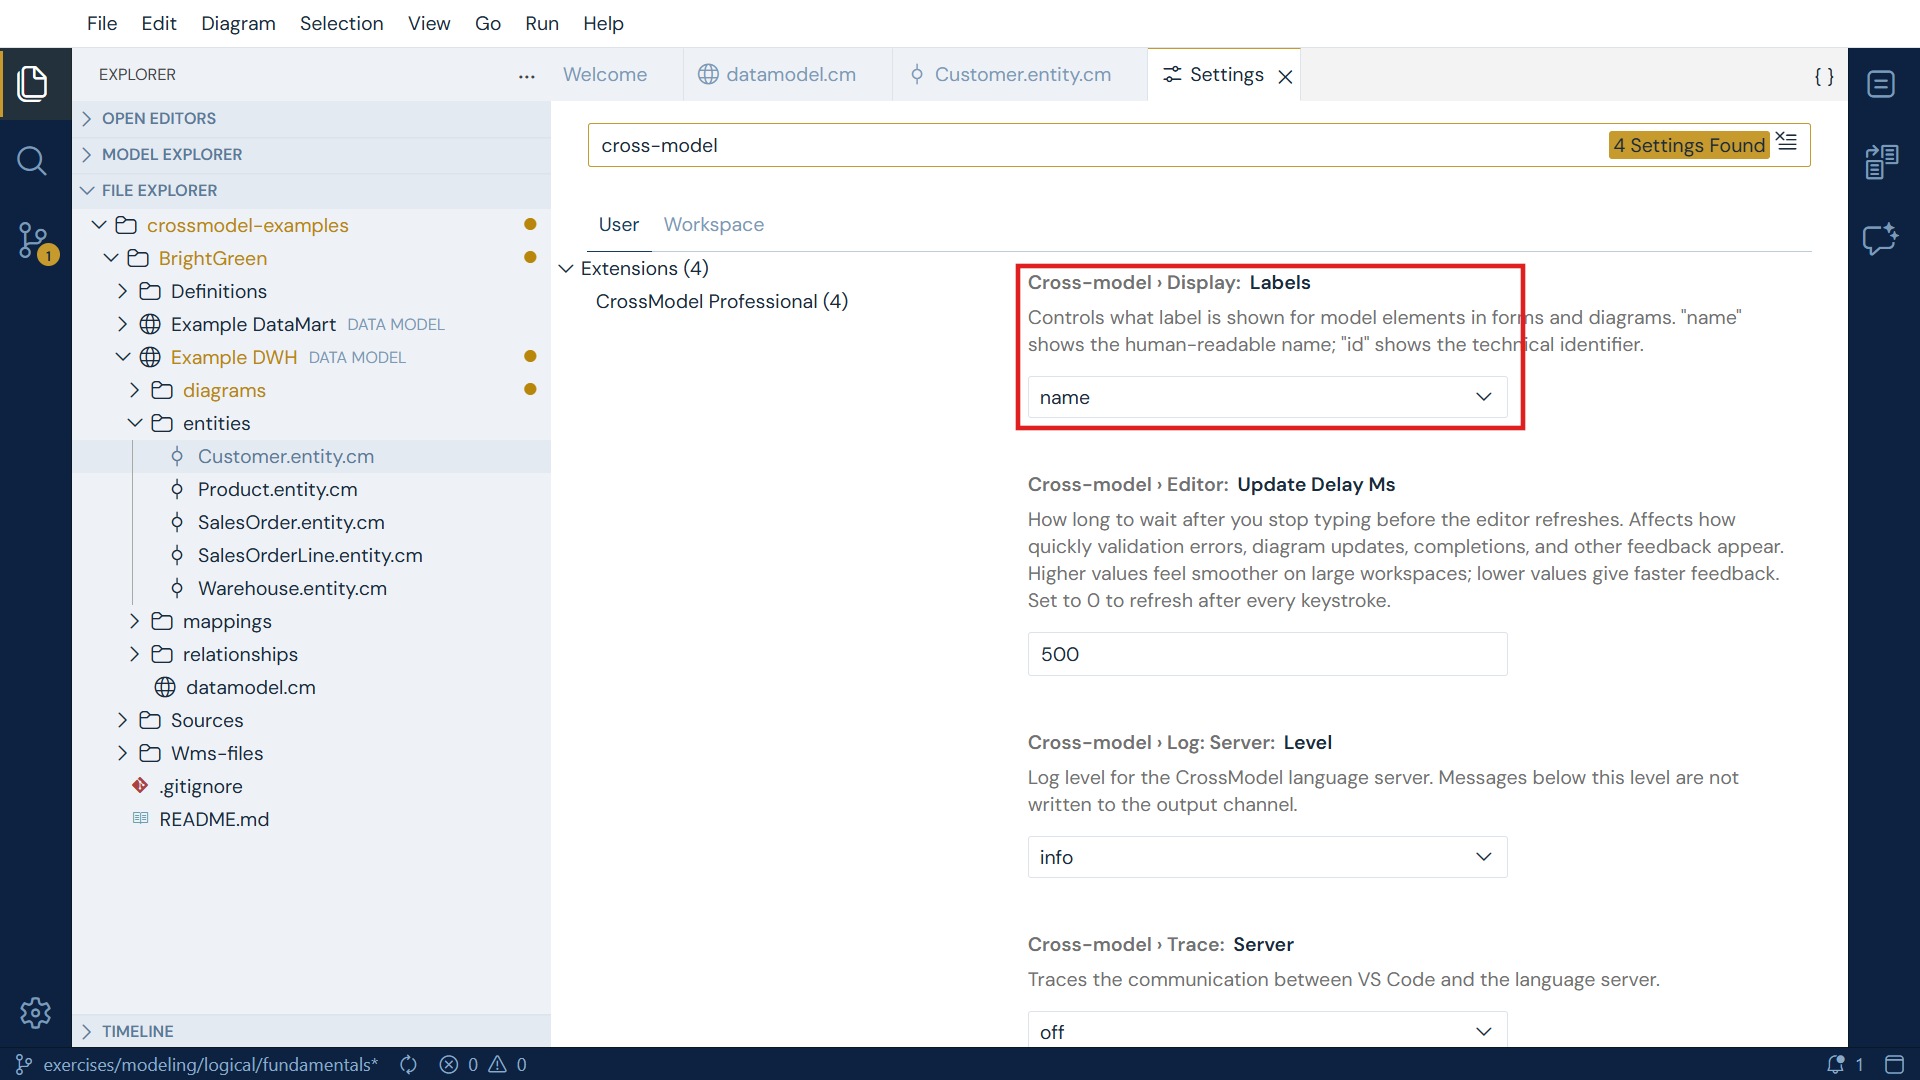
Search for cross-model to find the CrossModel-specific settings:
| Setting | Default | What it controls |
|---|---|---|
| Display: Labels | name |
Whether model elements are labelled by their human-readable name or their technical id |
| Editor: Update Delay Ms | 500 |
How long after you stop typing before validation, diagrams and completions refresh |
| Log: Server: Level | info |
How much the CrossModel language server writes to the output channel |
| Trace: Server | off |
Traces communication with the language server - for diagnosing problems |
Choosing between names and ids
Every model object has two labels: a name you choose for people to read, and an id
that is unique and stable for machines. Postal Code and PostalCode are the same
attribute - the first is its name, the second its id.
By default CrossModel shows names everywhere: in the Model Explorer, in form fields, in
grid cells, and on diagram nodes. Switch Display: Labels to id when you want to see
the technical identifiers instead - useful when you are writing
code generation templates or expressions, which refer to
objects by id rather than by name.
The setting changes only what is displayed. It never changes the model itself, so it is safe to flip back and forth while you work.
The editor delay is worth tuning on large workspaces
Editor: Update Delay Ms trades responsiveness against effort. Lower it towards 0
for immediate feedback on a small model; raise it on a large workspace where constant
revalidation feels heavy.