Add expressions to a mapping
Learn how to extend a mapping with logic by using expressions
Now that we have created a basic mapping in the previous tutorial, we'll explore how to use expressions to model business logic.
Start from the prepared workspace
You do not have to have done the previous tutorial. Clone the starting point straight from
the welcome page: Tutorials & Examples → tutorials → mapping → with-expression.
It already contains the mapping built in Mapping Fundamentals.
To see the finished result instead, clone examples → mapping → with-expression. See
Getting the workspace for a tutorial.
Create a simple expression
We'll use the mapping from the previous tutorial and extend it with an expression on the name field. Open the mapping canvas and notice that we have created two mappings on the Name field of the target Customer entity.
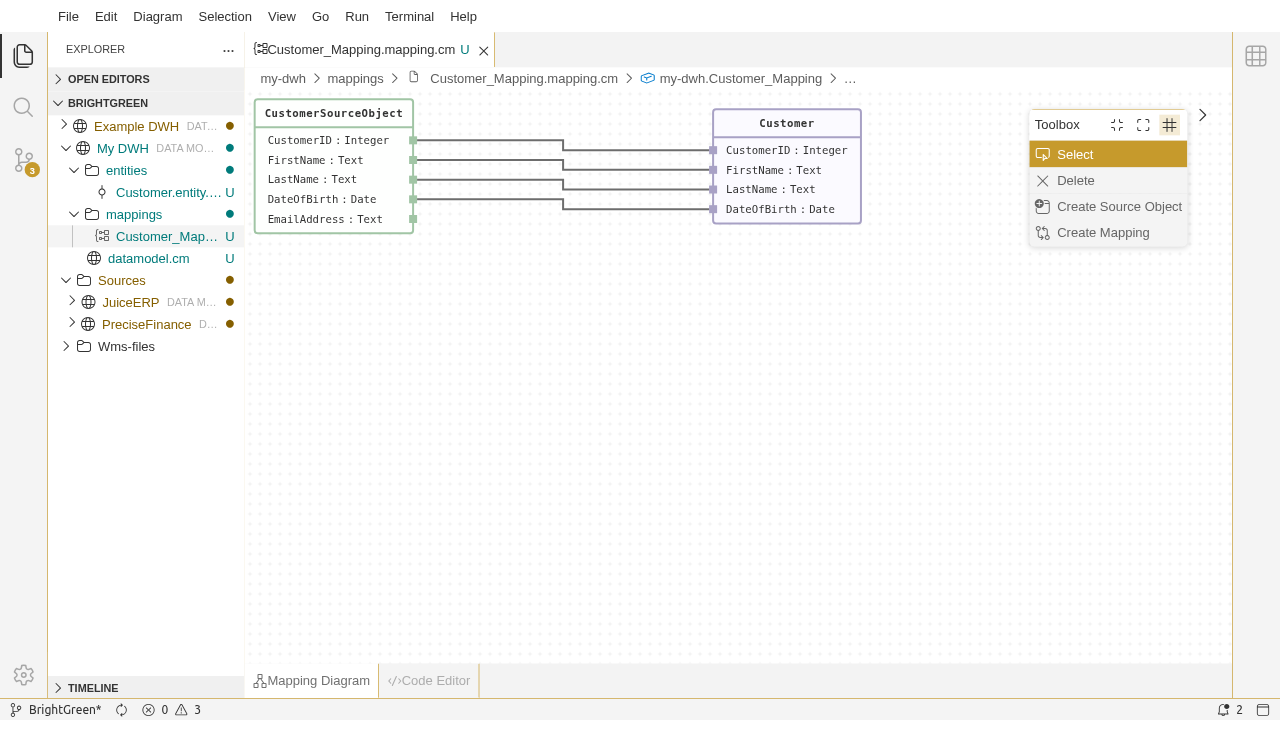
Now make sure the toolbox action Select is active and click on the Name field in the target Customer entity. Now open the properties panel on the right (tip: you can close the explorer panel on the left to keep more room for the mapping canvas).
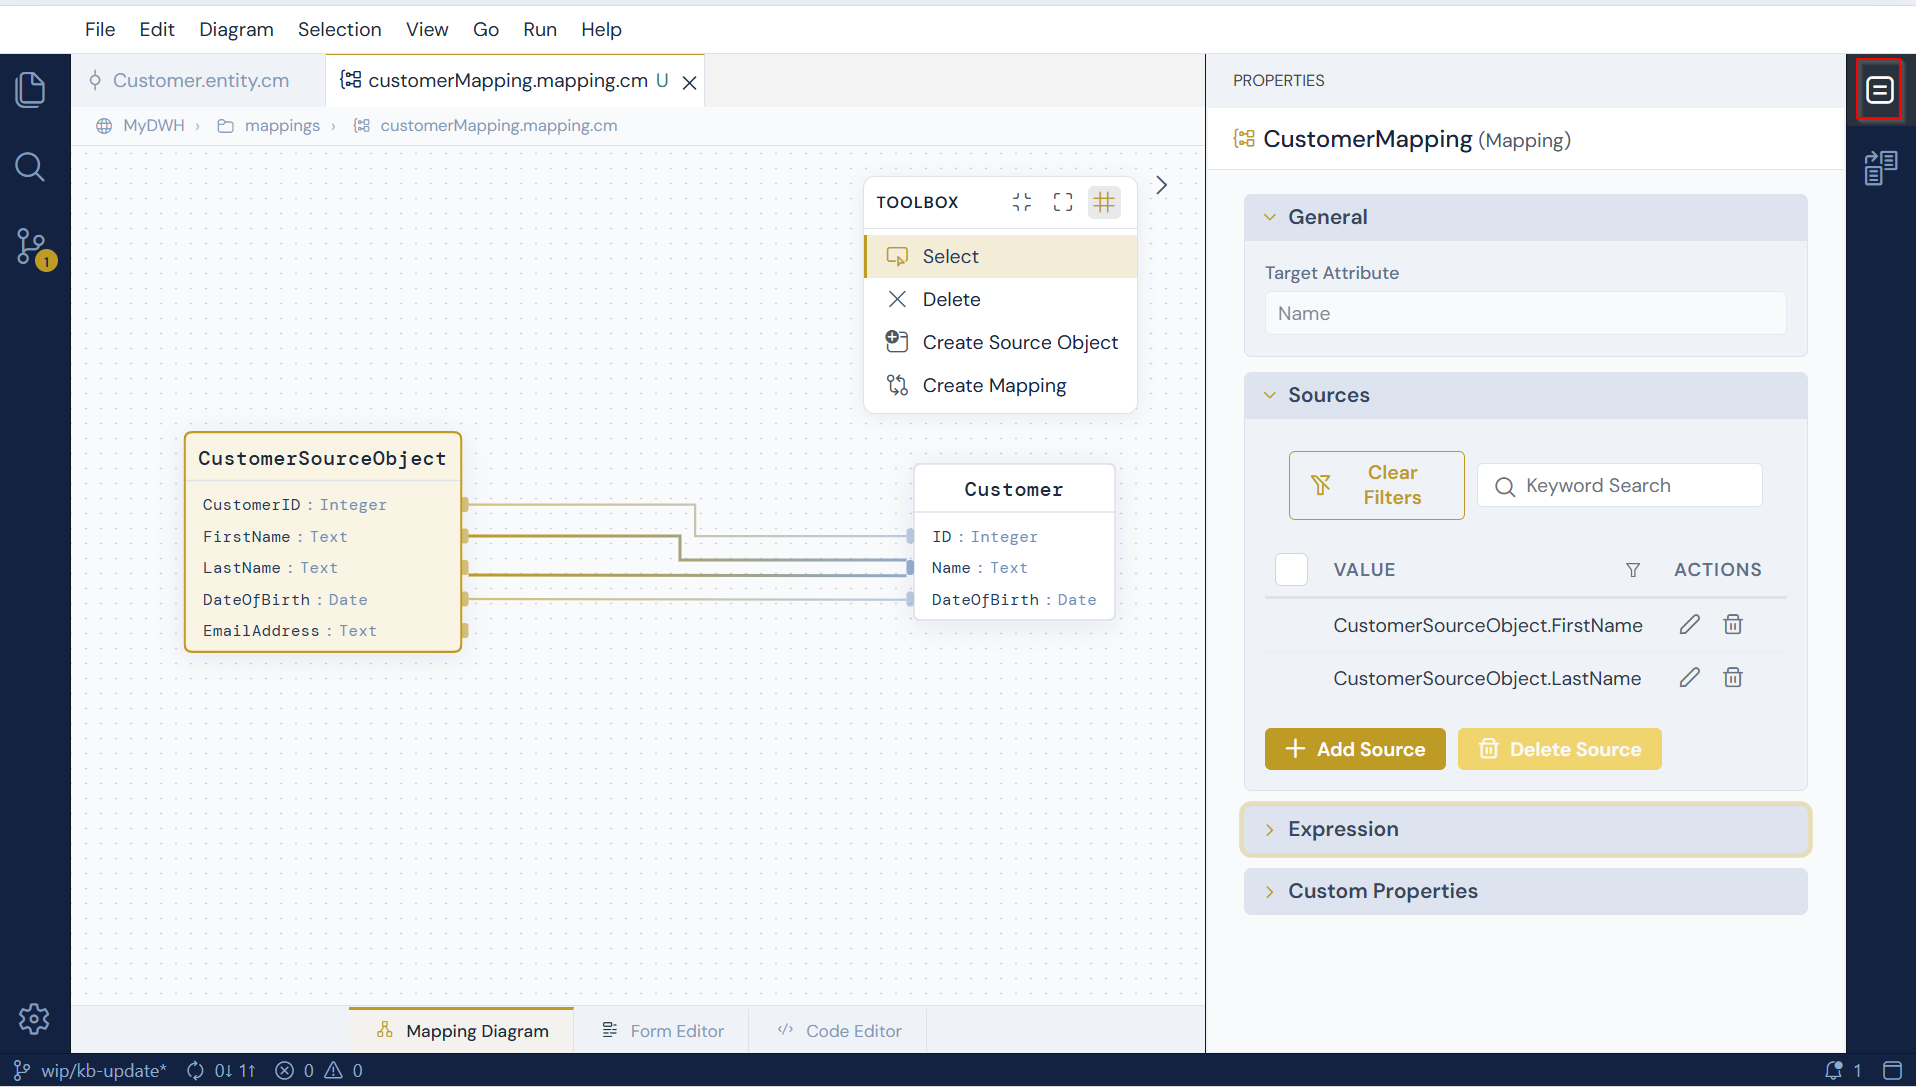
Expand the expression panel and type the following expression. Notice that when you type {{ you can select any of the source attributes that are mapped to the target attribute.
CONCAT_WS(' ',{{CustomerSourceObject.FirstName}},{{CustomerSourceObject.LastName}})
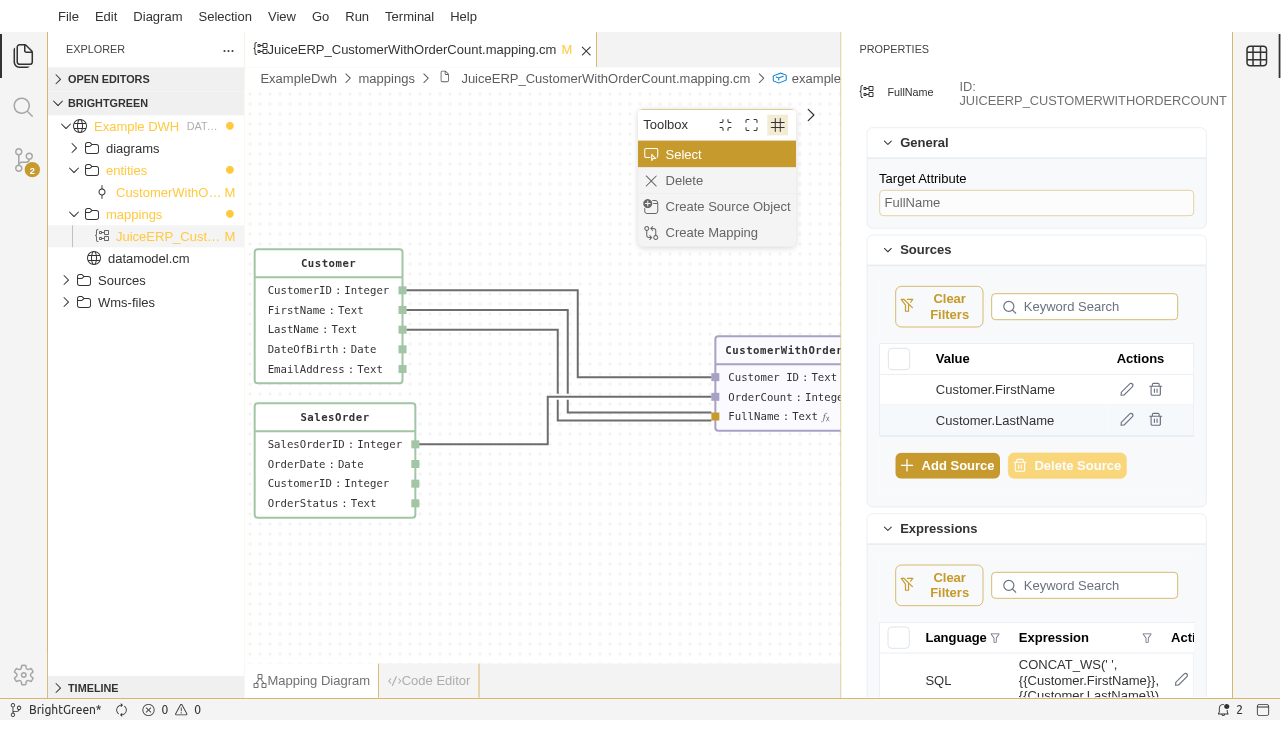
Note :
when referencing source attributes in an expression, make sure to enclose them in double brackets so CrossModel can evaluate them properly.
Notice that both input fields are set under sources in the property panel. Also notice that in the mapping canvas, target attributes that are mapped with an expression are marked with fx
Reading an expression
Once saved, each referenced attribute is displayed as a chip rather than as raw text, so you can see at a glance which attributes an expression draws on:
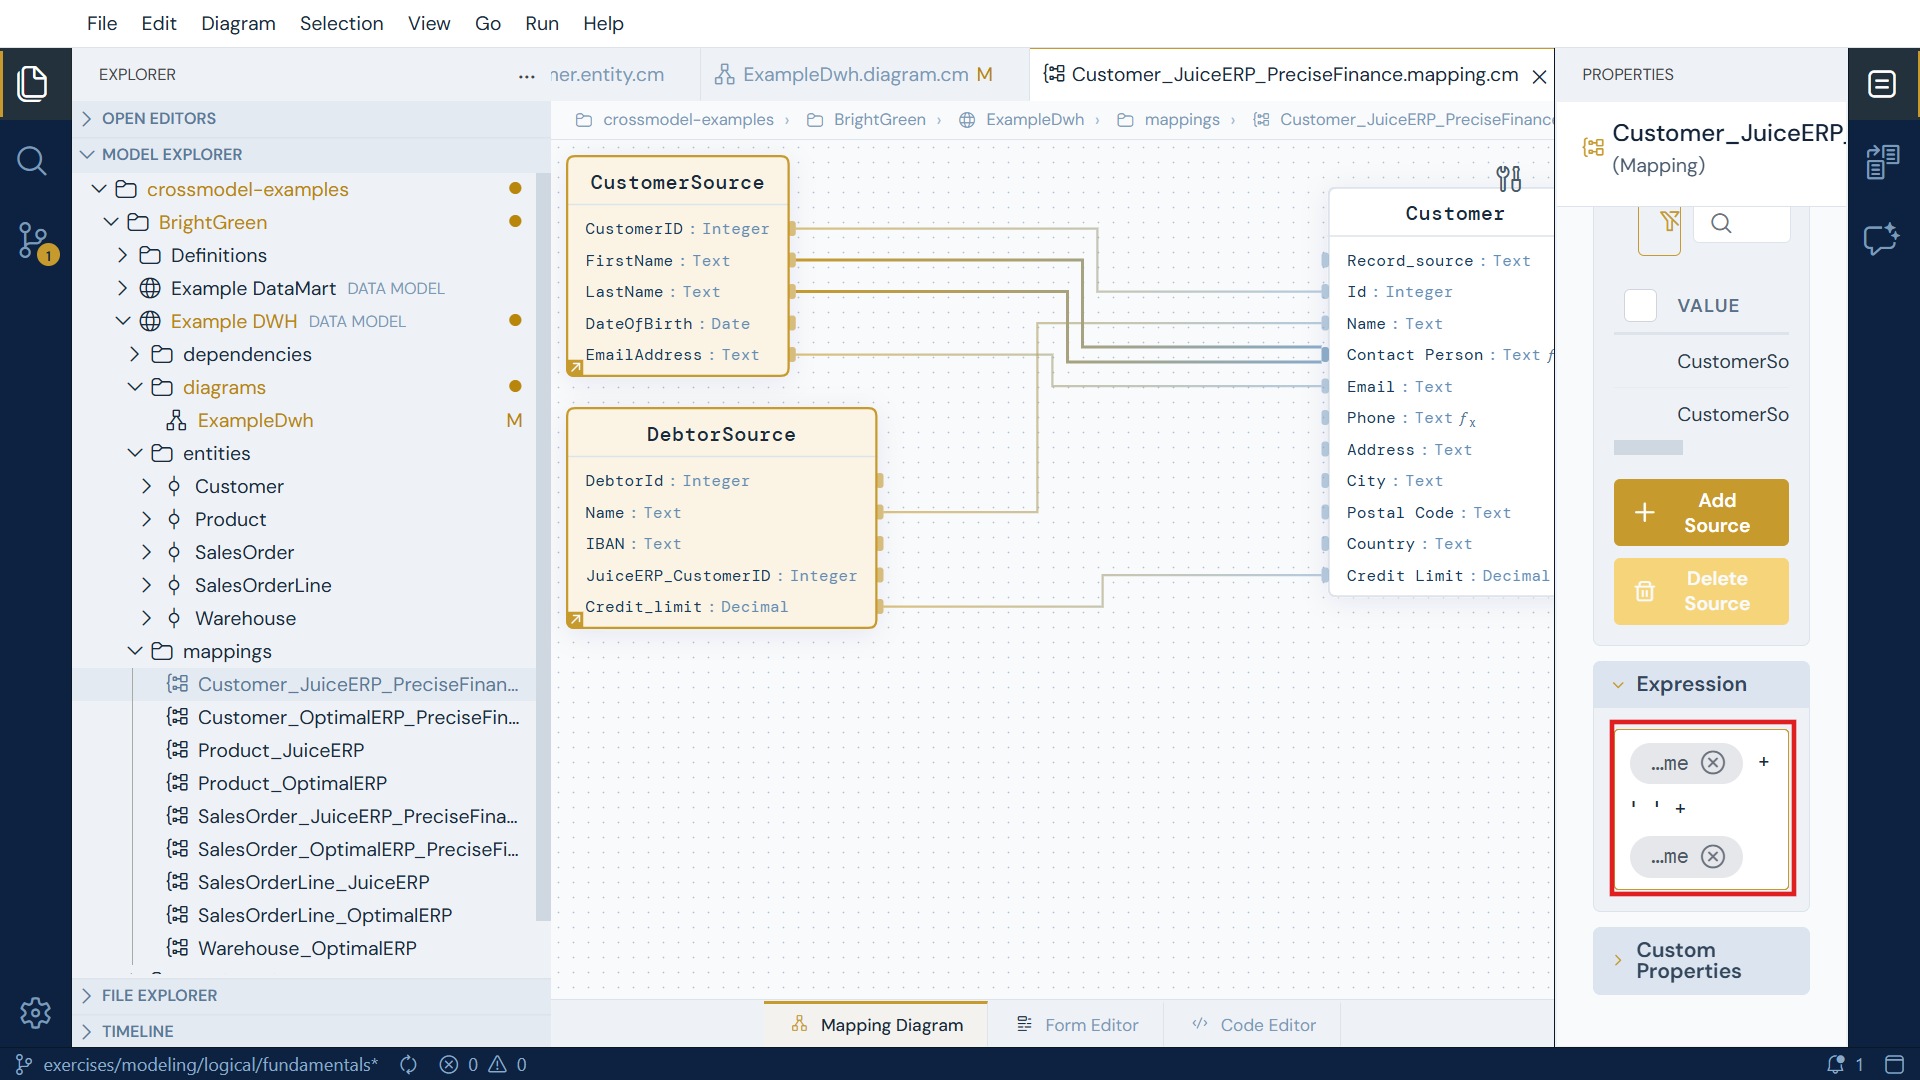
A few details worth knowing about the expression editor:
- Chips are clipped from the left, not the right, so the part you actually need - the attribute name after the dot - always stays visible even in a narrow properties panel. Hover a chip to see the full qualified name.
- The ⊗ on a chip removes that reference from the expression.
- Typing
{{opens the suggestion list of source attributes mapped to this target attribute. The list is positioned to stay on screen, so it is not clipped when the panel is narrow or the editor sits inside a dialog. - The Sources grid above lists every attribute the expression uses. It updates as you edit the expression, so it is a quick way to check that the expression references what you intended.
In the next tutorial we'll see how to add multiple source objects to a mapping, making it possible to model mappings that contain integration logic.