Creating a mapping with multiple sources
Model integration logic using mappings with multiple sources
Now that we have created basic mappings and extended them with expressions it is time to see how we can add multiple sources to a mapping.
To demonstrate this, we'll extend the ExampleDWH model with a new Product entity that is sourced from JuiceERP.
Start from the prepared workspace
You do not have to have done the previous tutorials. Clone the starting point straight from
the welcome page: Tutorials & Examples → tutorials → mapping → with-multiple-sources.
It already contains the mapping and expression built in the two previous tutorials.
To see the finished result instead, clone examples → mapping → with-multiple-sources. See
Getting the workspace for a tutorial.
Create a new entity
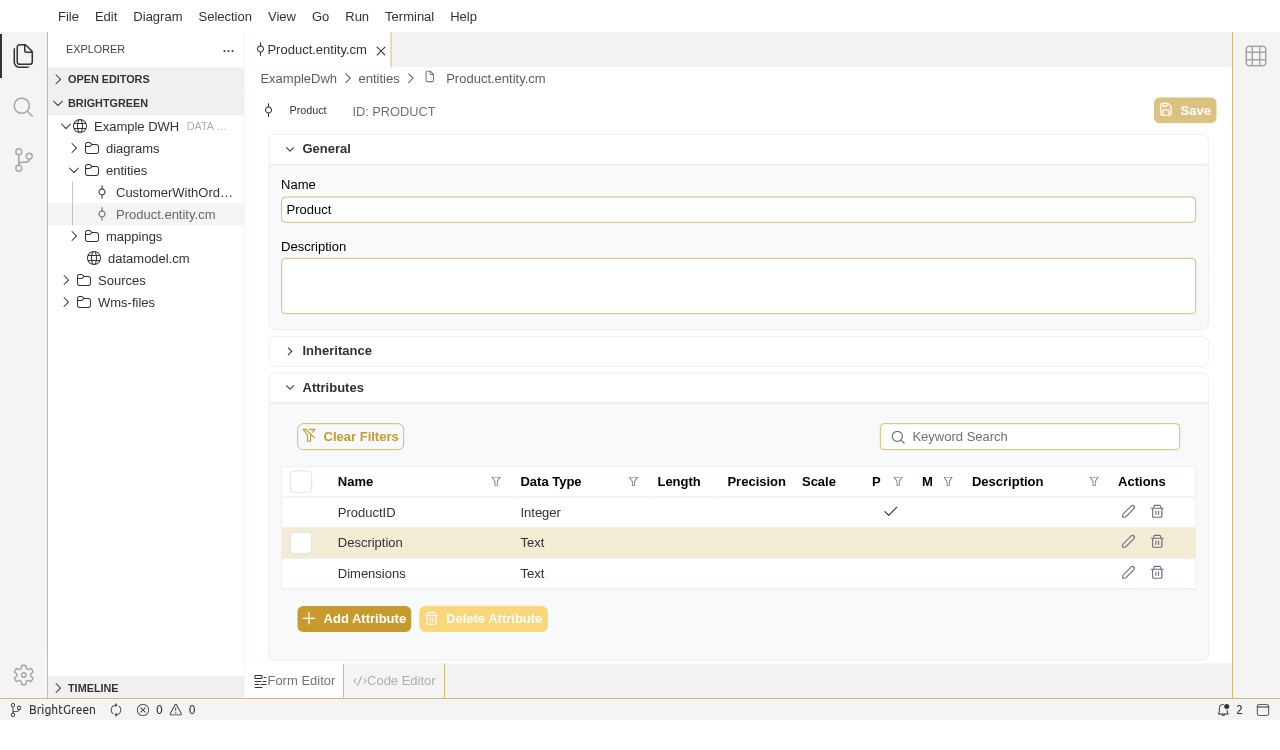
Open the ExampleDWH model and create a new entity Product. Add the following attributes: ProductID (Intger), Description (Text) and Dimensions (Text).
Create a multi-sourced mapping
Create a new mapping by right clicking on the Product in the Model Explorer and select "Derive mapping...". Provide a suitable name and hit OK. In the mapping canvas, Add the Product and PhysicalProduct entities from JuiceERP as Source objects.
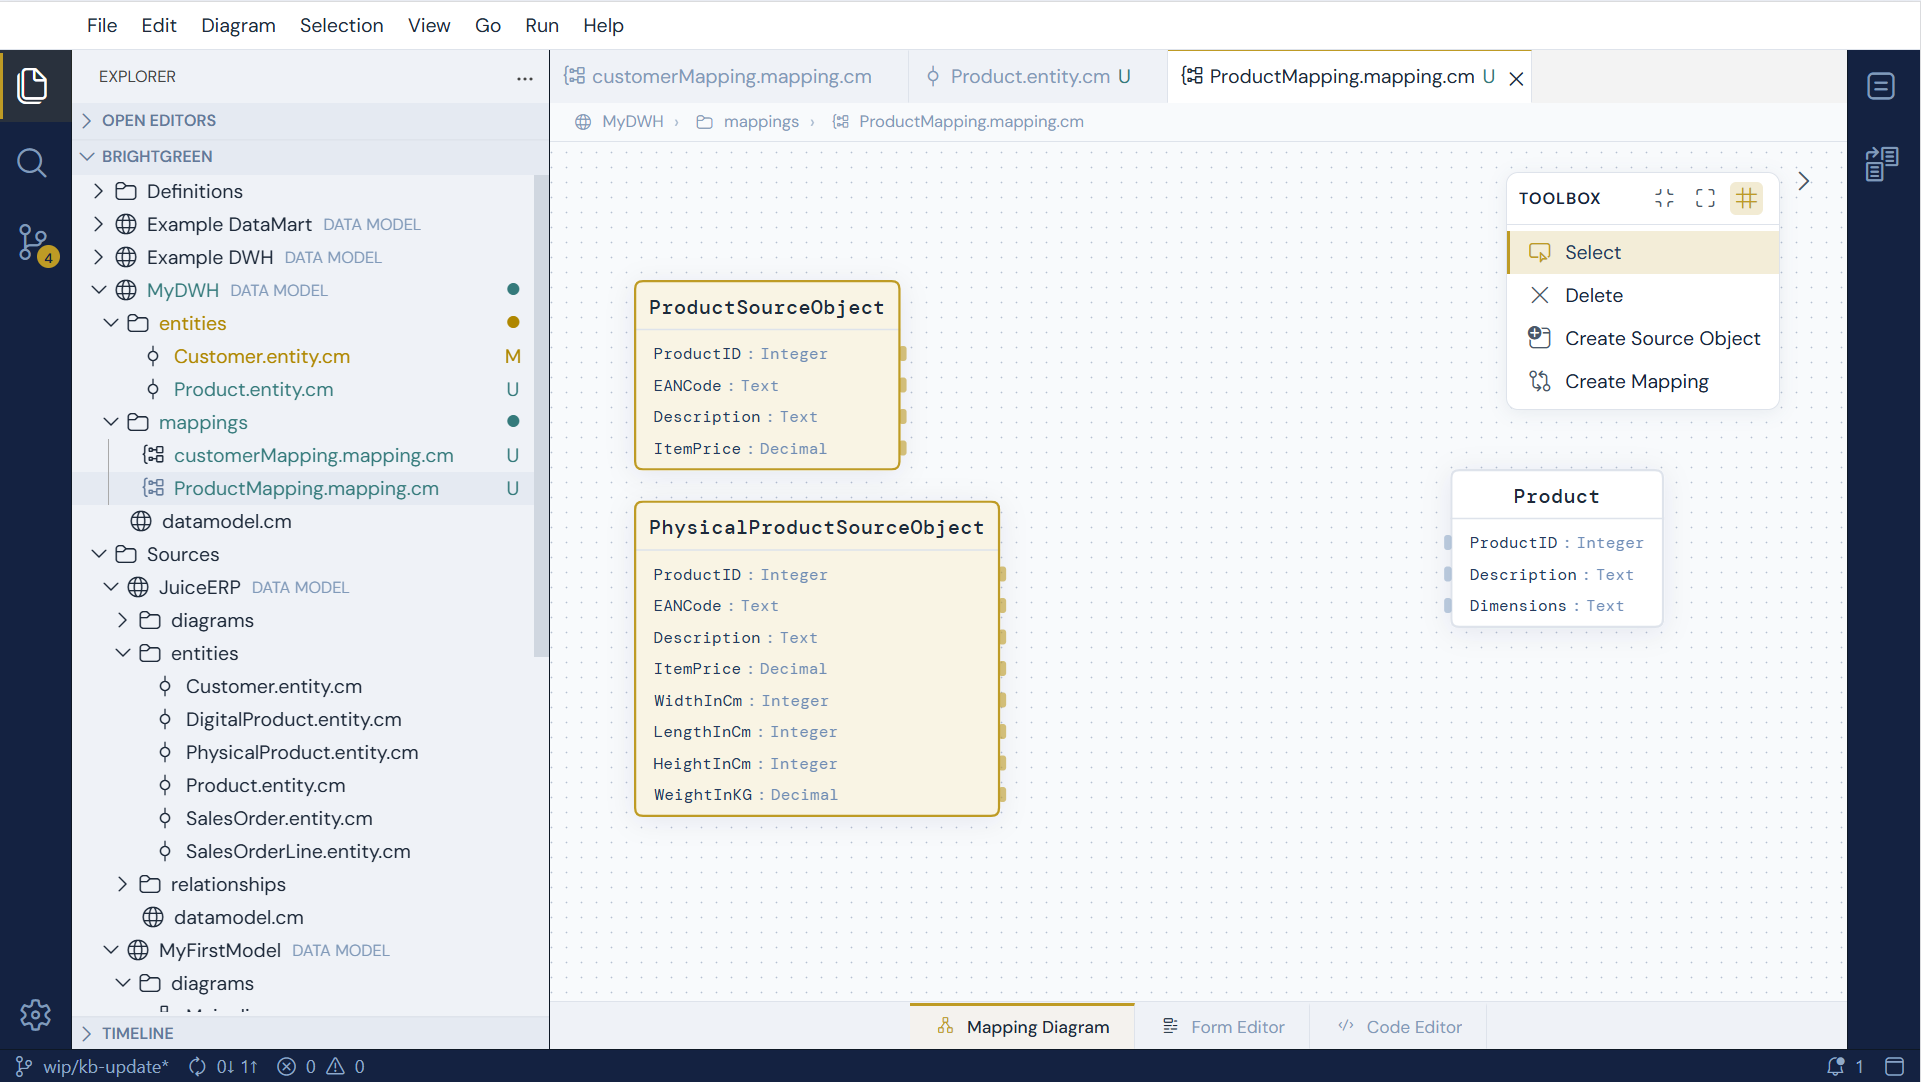
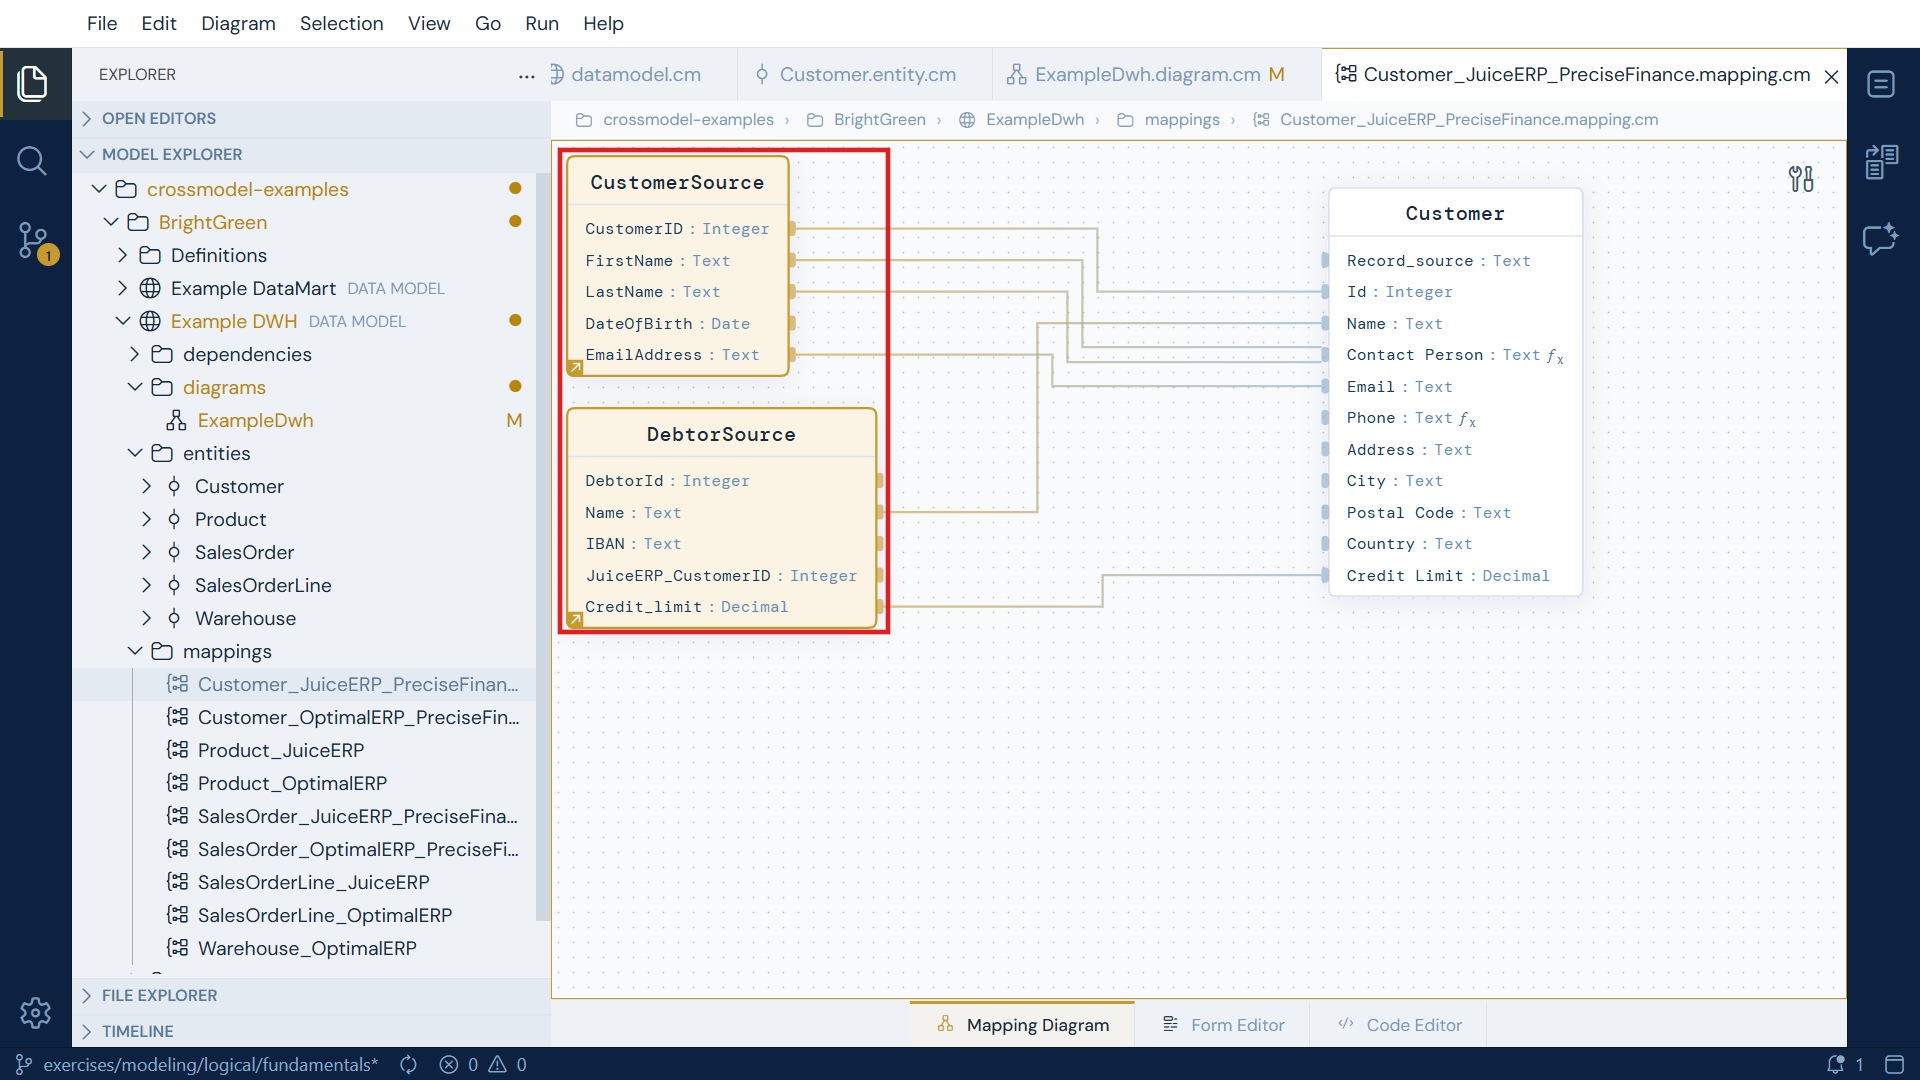
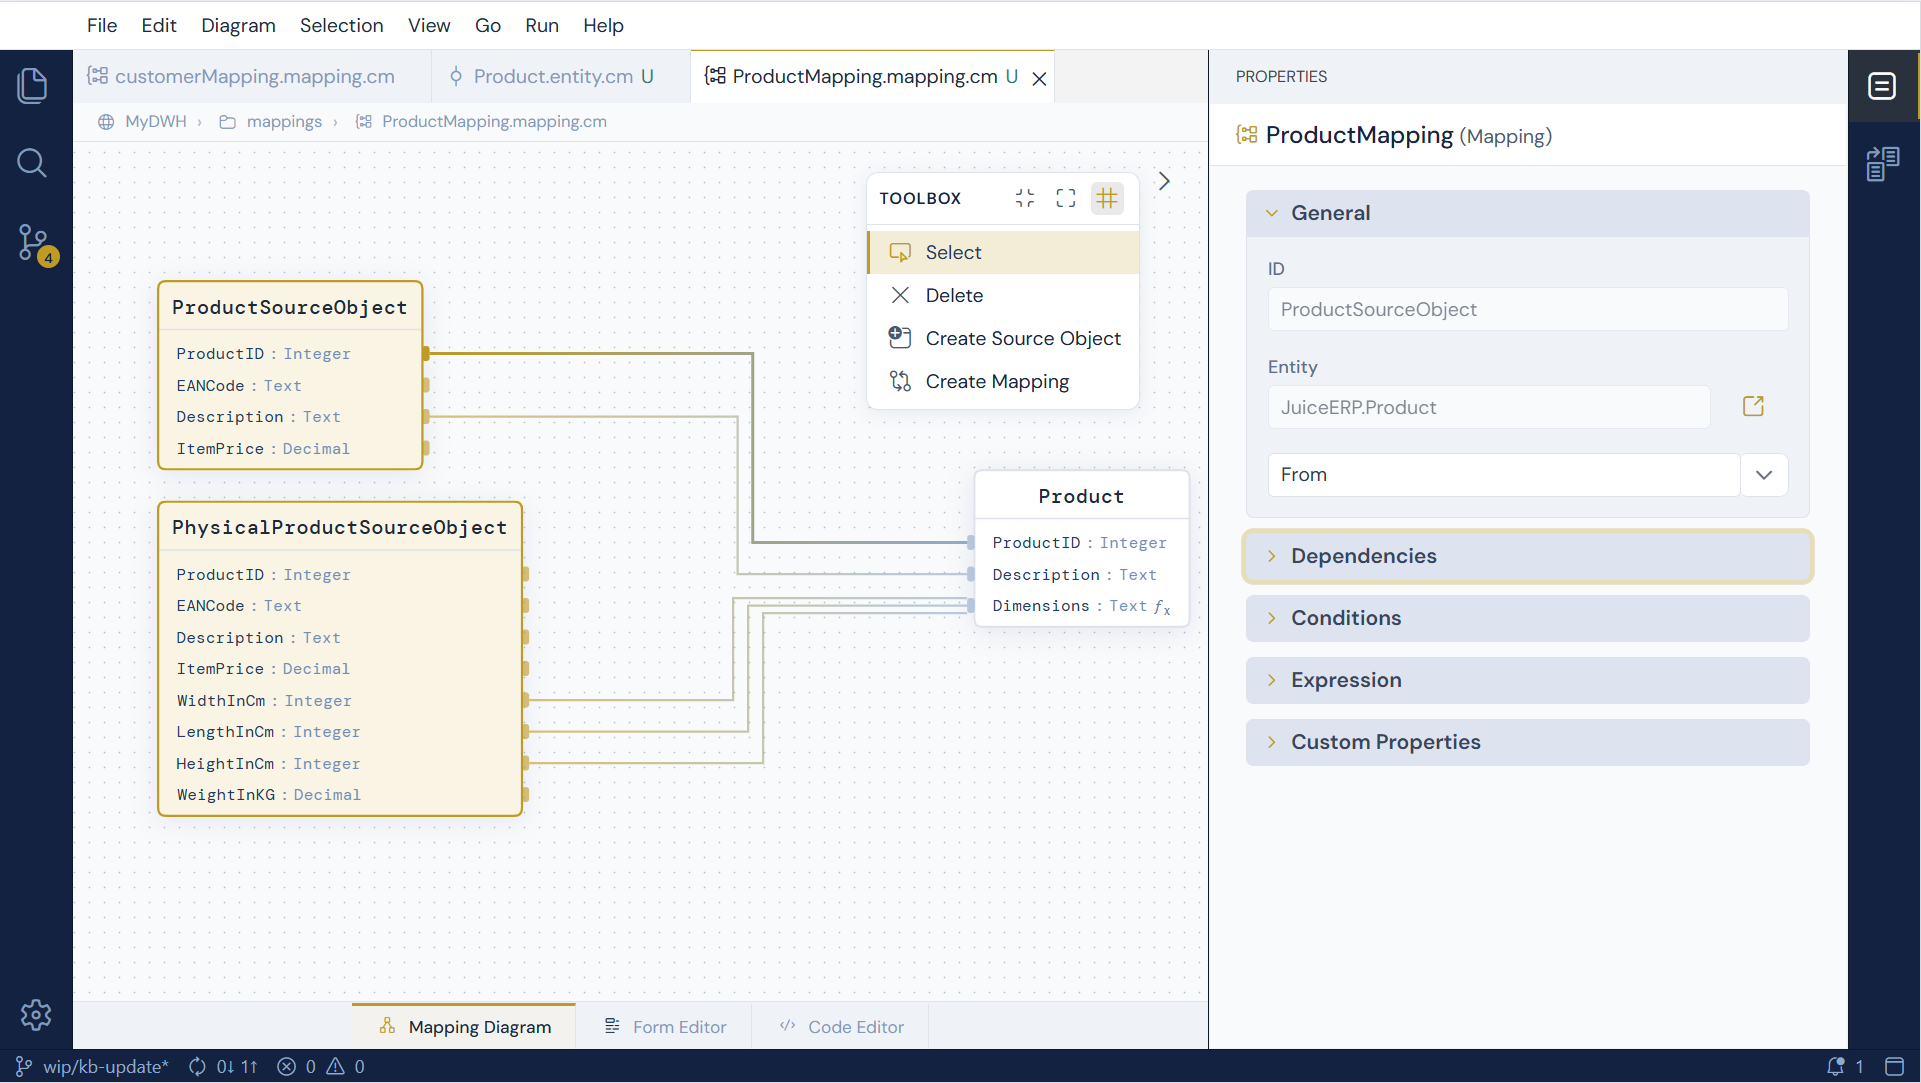
A finished multi-source mapping looks like this - two source objects on the left feeding a single target entity on the right. Target attributes that are filled by an expression rather than a straight copy are marked with a small fx:
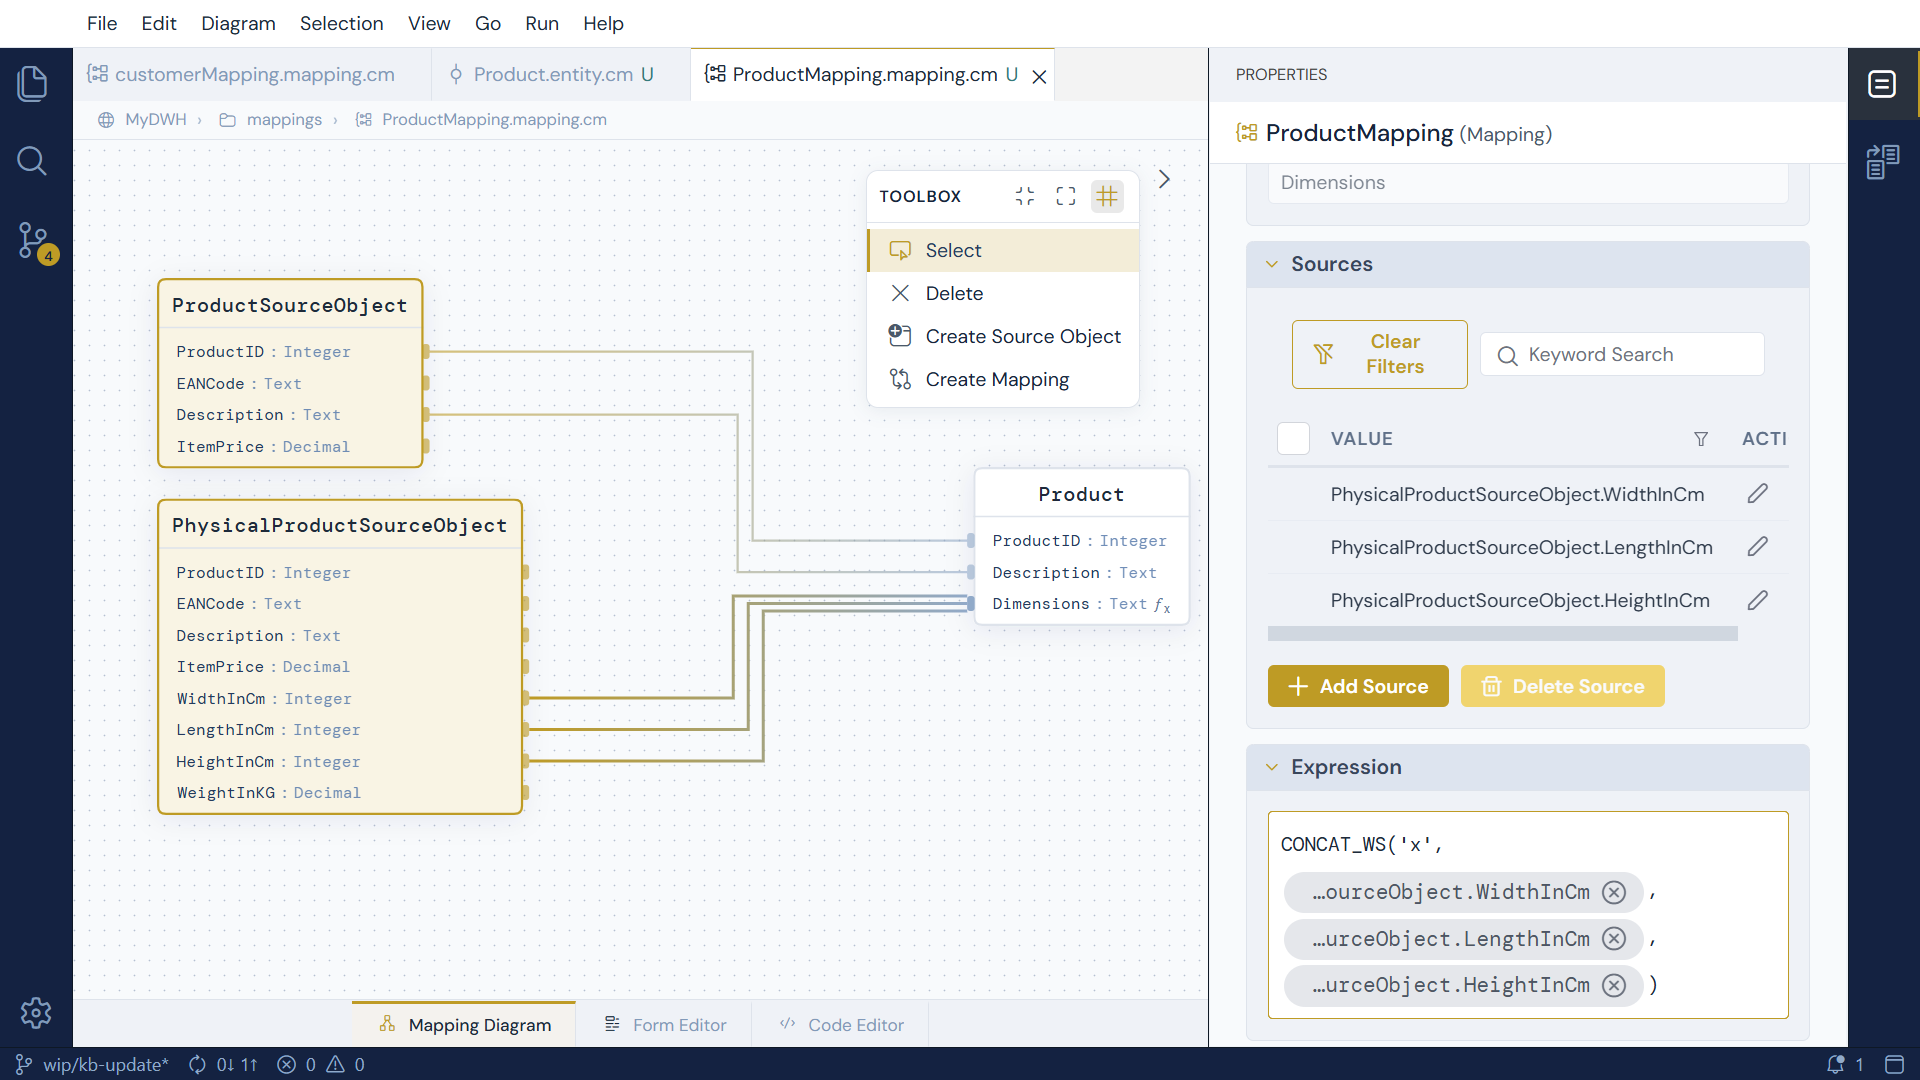
Set the attribute mappings: ProductID and Description from the Juice ERP Product table. Map the WidhtInCm, HeightInCm and LengthInCm attributes from PhysicalProduct to the Dimensions attribute. Add an expression on the Dimension field that concatenates WidthInCm, LengthInCm and HeightInCm with a suitable separator.
Set the source object dependencies
Now leave the property panel open and click the ProductSourceObject. Verify that this source object references the Product entity from JuiceERP and type is set to From.
In a mapping that uses more than one source, we need to define how the sources should be related to each other in the context of the mapping. We can define this using the properties panel on the Source Objects. Click the PhysicalProduct source object, open the properties panel. Set the join type to Left join. Add a dependency to the ProductSourceObject. Add a condition to relate both tables on the ProductID column.
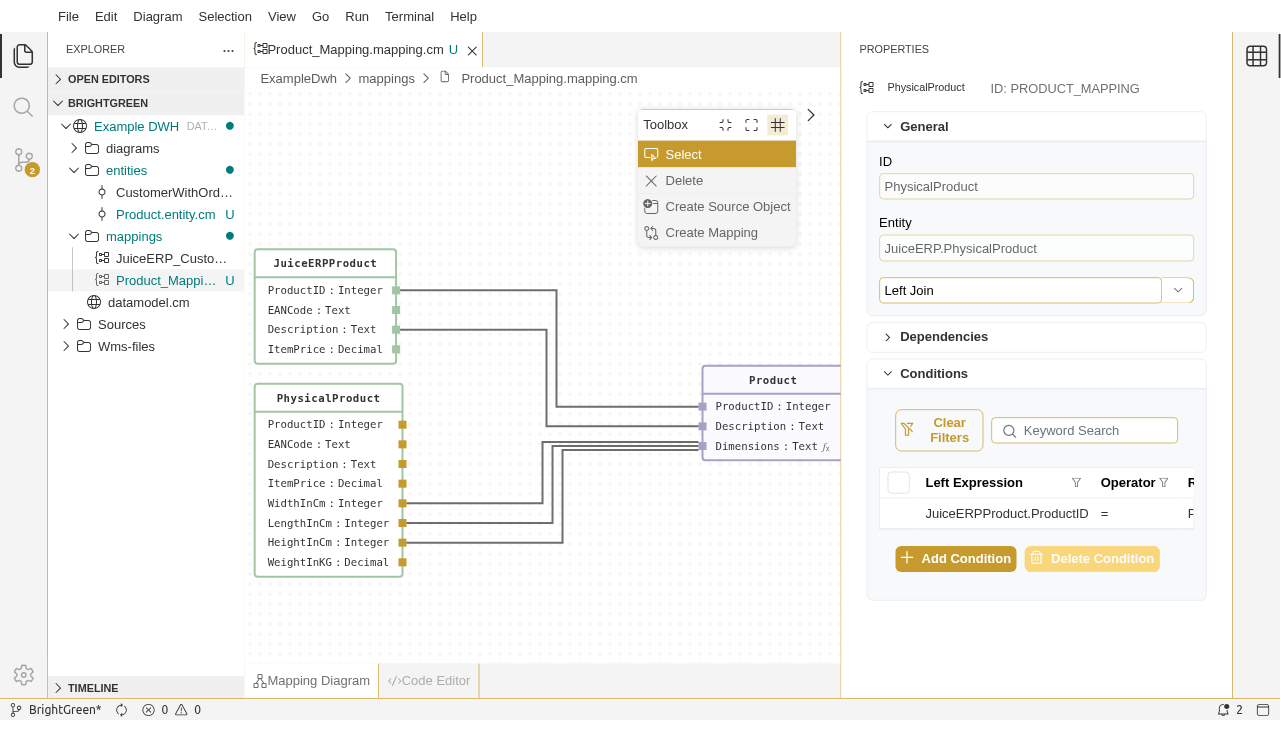
We have created a complete, multi-sourced mapping.
Reuse a relationship instead of writing join conditions
Writing the join conditions by hand works, but it duplicates knowledge that is
already in your model: if Product and PhysicalProduct are connected by a
relationship, the columns to join on are already recorded there. Repeating them
in every mapping means every one of them has to be corrected by hand when the
relationship changes.
A dependency can therefore point at an existing relationship instead. Select a source object and open the properties panel: the Dependencies grid has a Relationship column next to Source.
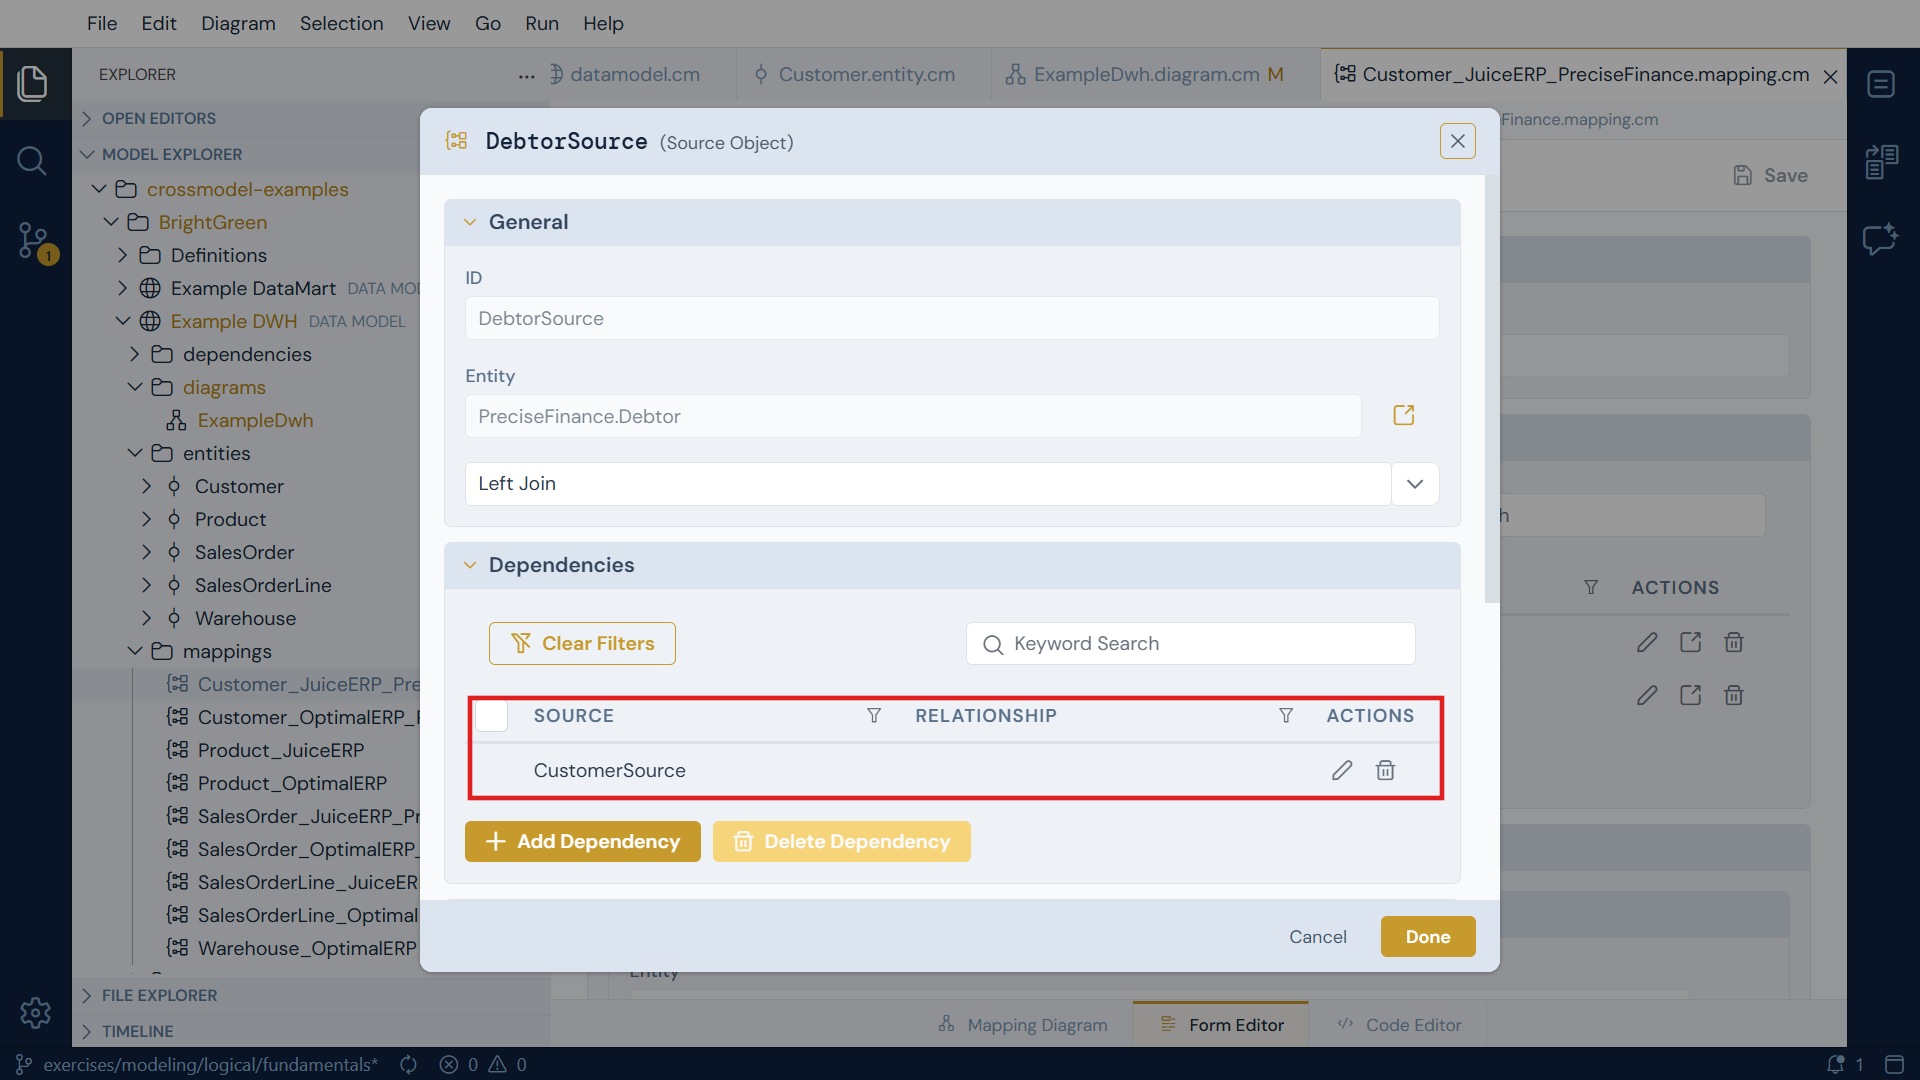
In the mapping above the Relationship column is empty, so the join is expressed by the manual condition in the Conditions grid underneath. Pick the relationship that connects the two entities and you no longer need that condition at all:
| Column | Meaning |
|---|---|
| Source | The other source object this one depends on |
| Relationship | Optional. An existing relationship between the two source objects' entities |
CrossModel then derives the join conditions from the relationship's attribute pairs and adds them, read-only, at the top of the Conditions grid. They are rendered in the same muted style as inherited values, cannot be edited or deleted, and are never written to the mapping file - they are recomputed from the relationship every time the model is loaded. Change the relationship's attribute pairs and every mapping that references it follows automatically.
A few things to know:
- Orientation is worked out for you. CrossModel checks which end of the relationship the current source object represents and assigns the parent and child aliases accordingly, so the generated condition reads the right way round regardless of the order in which you added the sources.
- The relationship must actually connect the two source objects. If neither end of the relationship matches this source object's entity, no conditions are derived.
- You can still add manual conditions. Derived rows and rows you add yourself live in the same grid; use manual conditions for anything the relationship doesn't express, such as a filter on a date range.
Which one should I use?
Reference a relationship whenever one exists - it keeps the mapping in step with the model and removes a whole class of copy-paste mistakes. Fall back to manual conditions for joins that are specific to this mapping and have no counterpart in the model, such as joining on a derived key or applying an extra filter.