The Model Explorer
Navigate your workspace by what your models mean
CrossModel stores every model as a file on disk, which is what makes Git version control
work so naturally. But files are not how you think about a model. You think in
entities, attributes and identifiers - not in SalesOrderLine.entity.cm.
The Model Explorer is a second tree in the Explorer panel that shows your workspace as the object model rather than as the file system. It sits above the File Explorer and is the view you will use most of the time.
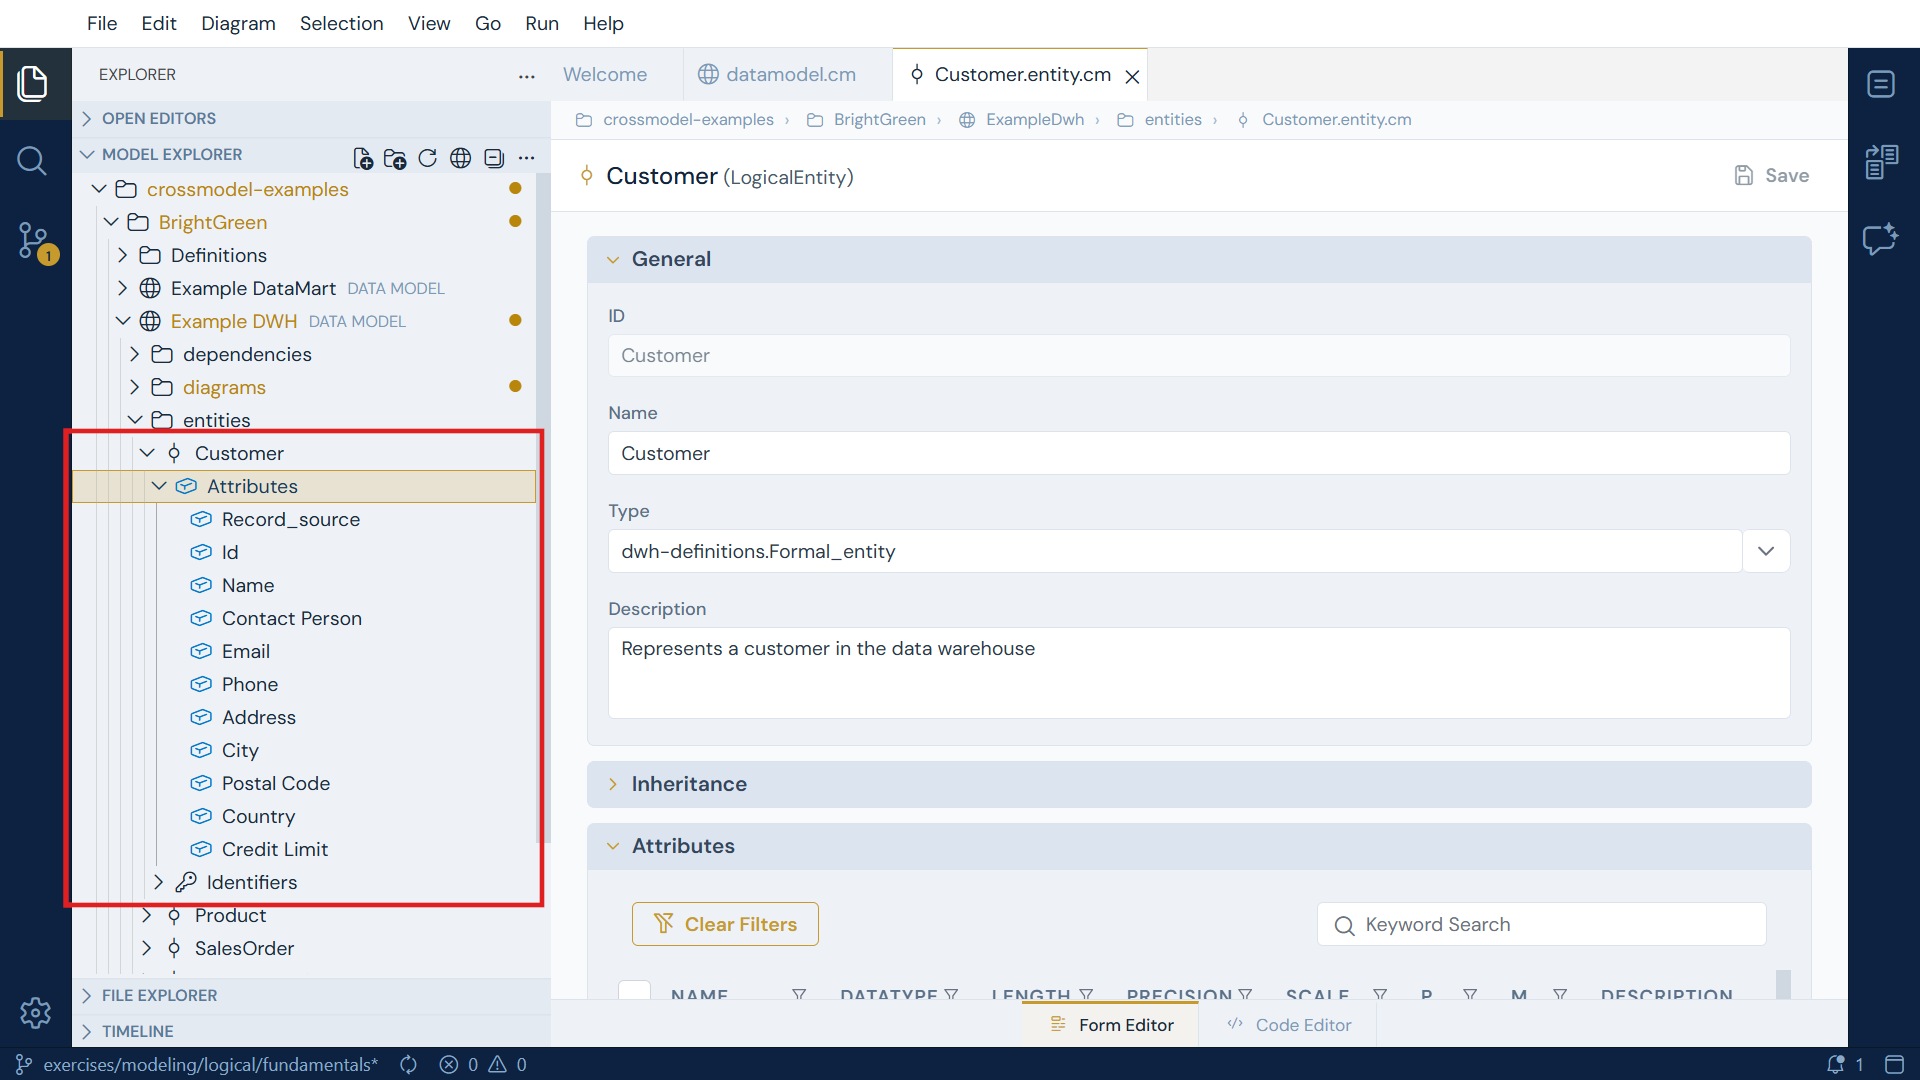
Model Explorer vs File Explorer
Both trees are always available in the Explorer panel; expand whichever you need. They show the same workspace from two angles:
| Model Explorer | File Explorer | |
|---|---|---|
| Shows | Model objects | Files and folders |
| Labels | The object's name | The file name |
datamodel.cm |
Hidden - the data model is the folder | Shown as a file |
| Non-model files | Hidden | Shown (README.md, .gitignore, …) |
| Entities | Expand into Attributes and Identifiers | Do not expand |
Dot-folders (.crossmodel) |
Hidden | Shown |
Here is the same data model in the File Explorer - the raw files behind what you saw above:
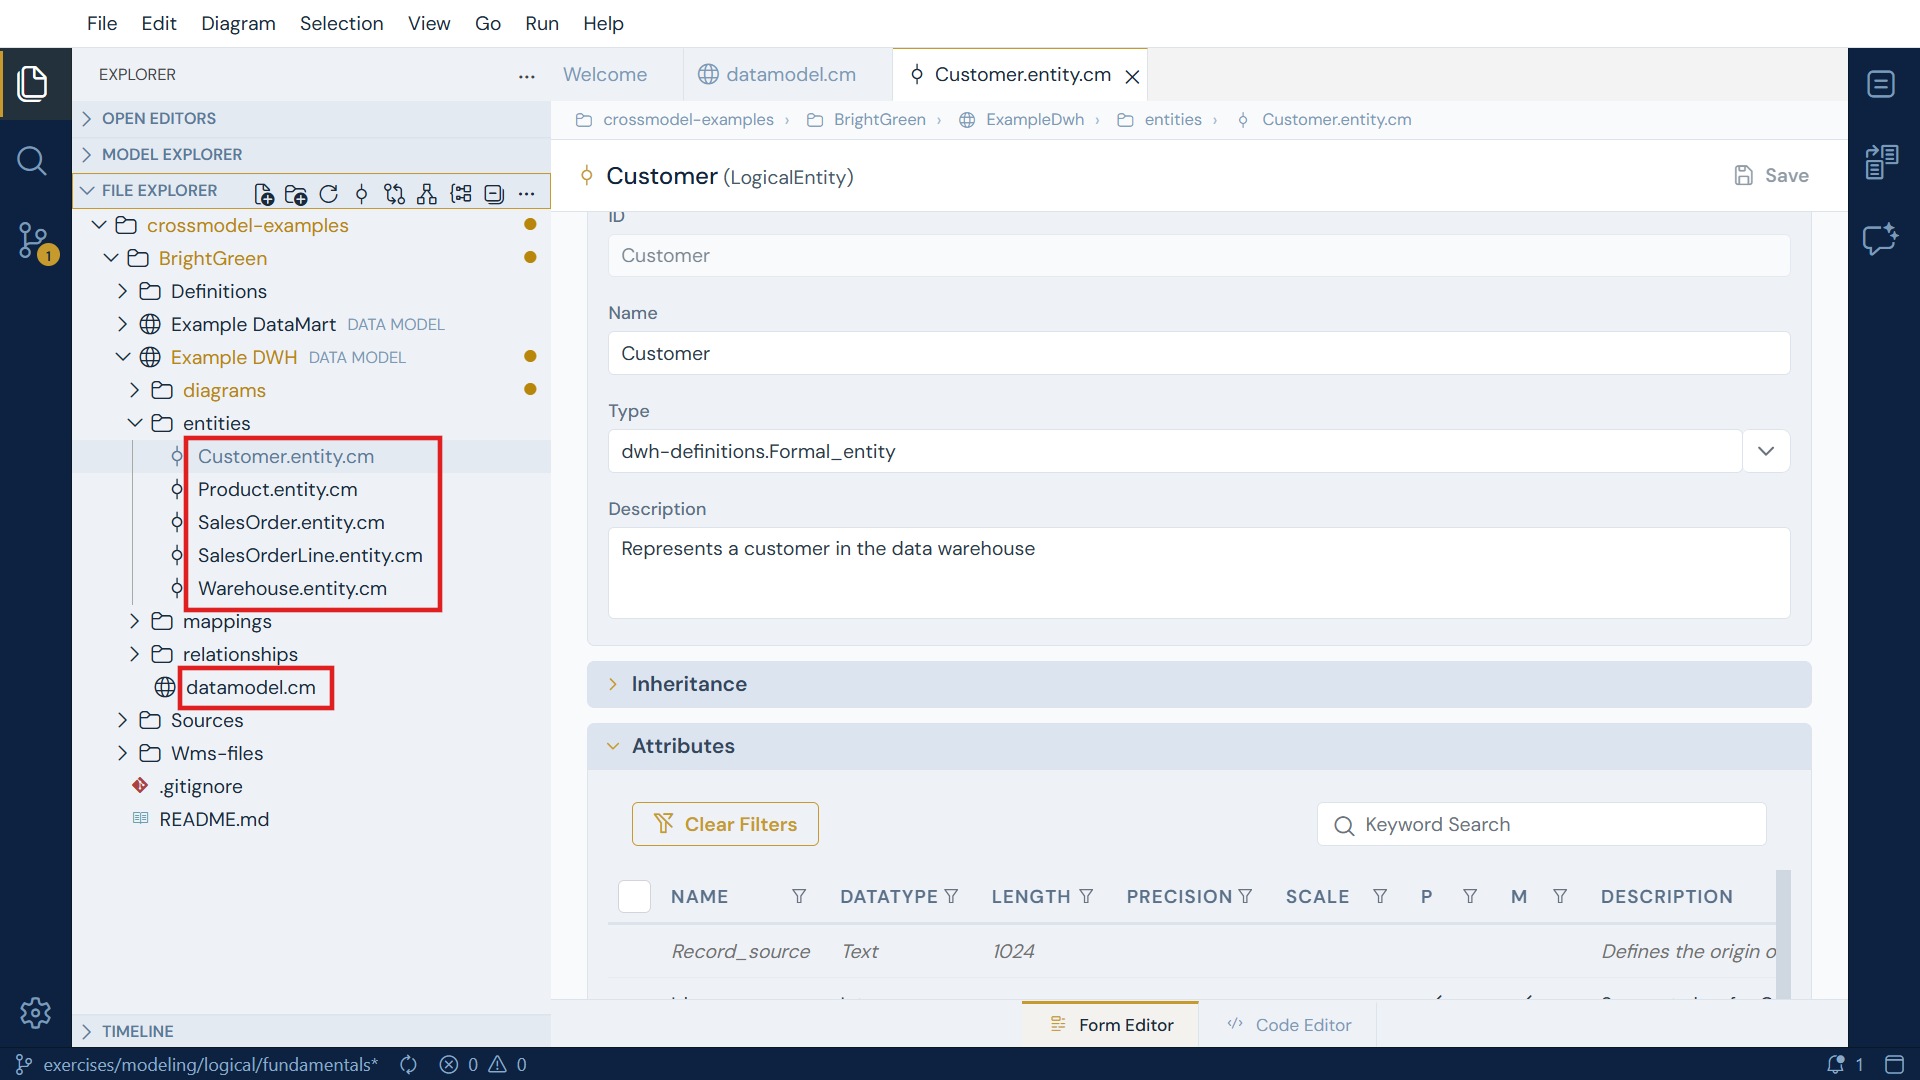
Notice that Customer.entity.cm in the File Explorer appears simply as Customer in the
Model Explorer, and that the Model Explorer hides datamodel.cm, README.md and
.gitignore because they are not model objects you navigate to.
When to use the File Explorer
Reach for the File Explorer when you are working with the repository rather than the
model: reviewing what Git will commit, opening a README, editing files under
.crossmodel, or copying files around.
What you can expand
Only objects that have something meaningful underneath them are expandable:
| Node | Expands into |
|---|---|
| Data model | Its folders (entities, relationships, diagrams, mappings, …) plus a dependencies node |
| Entity | Attributes and Identifiers |
The dependencies node is not a folder on disk - it is the data model's dependency list, surfaced in the tree so you can see at a glance which other models this one builds on.
Attributes and identifiers are shown as their effective set, which means inherited members appear alongside the entity's own. An inherited entry is labelled with where it came from, so a model that uses type definitions or entity inheritance still reads correctly in the tree.
Working in the tree
- Single click selects a node, and expands or collapses it if it is expandable.
- Double click opens the object in the editor. Double-clicking a data model's name opens its data model form.
- Clicking an attribute or identifier opens the model file that owns it.
- Type to search. Start typing while the tree has focus and CrossModel jumps to the
matching node. Because the tree is name-based, you search on the names you actually
use - spaces included, so
Postal Codefinds it. - Right-click for the context menu: create new objects, rename, delete, copy and paste, and Reveal in File Explorer to jump to the same object in the file tree.
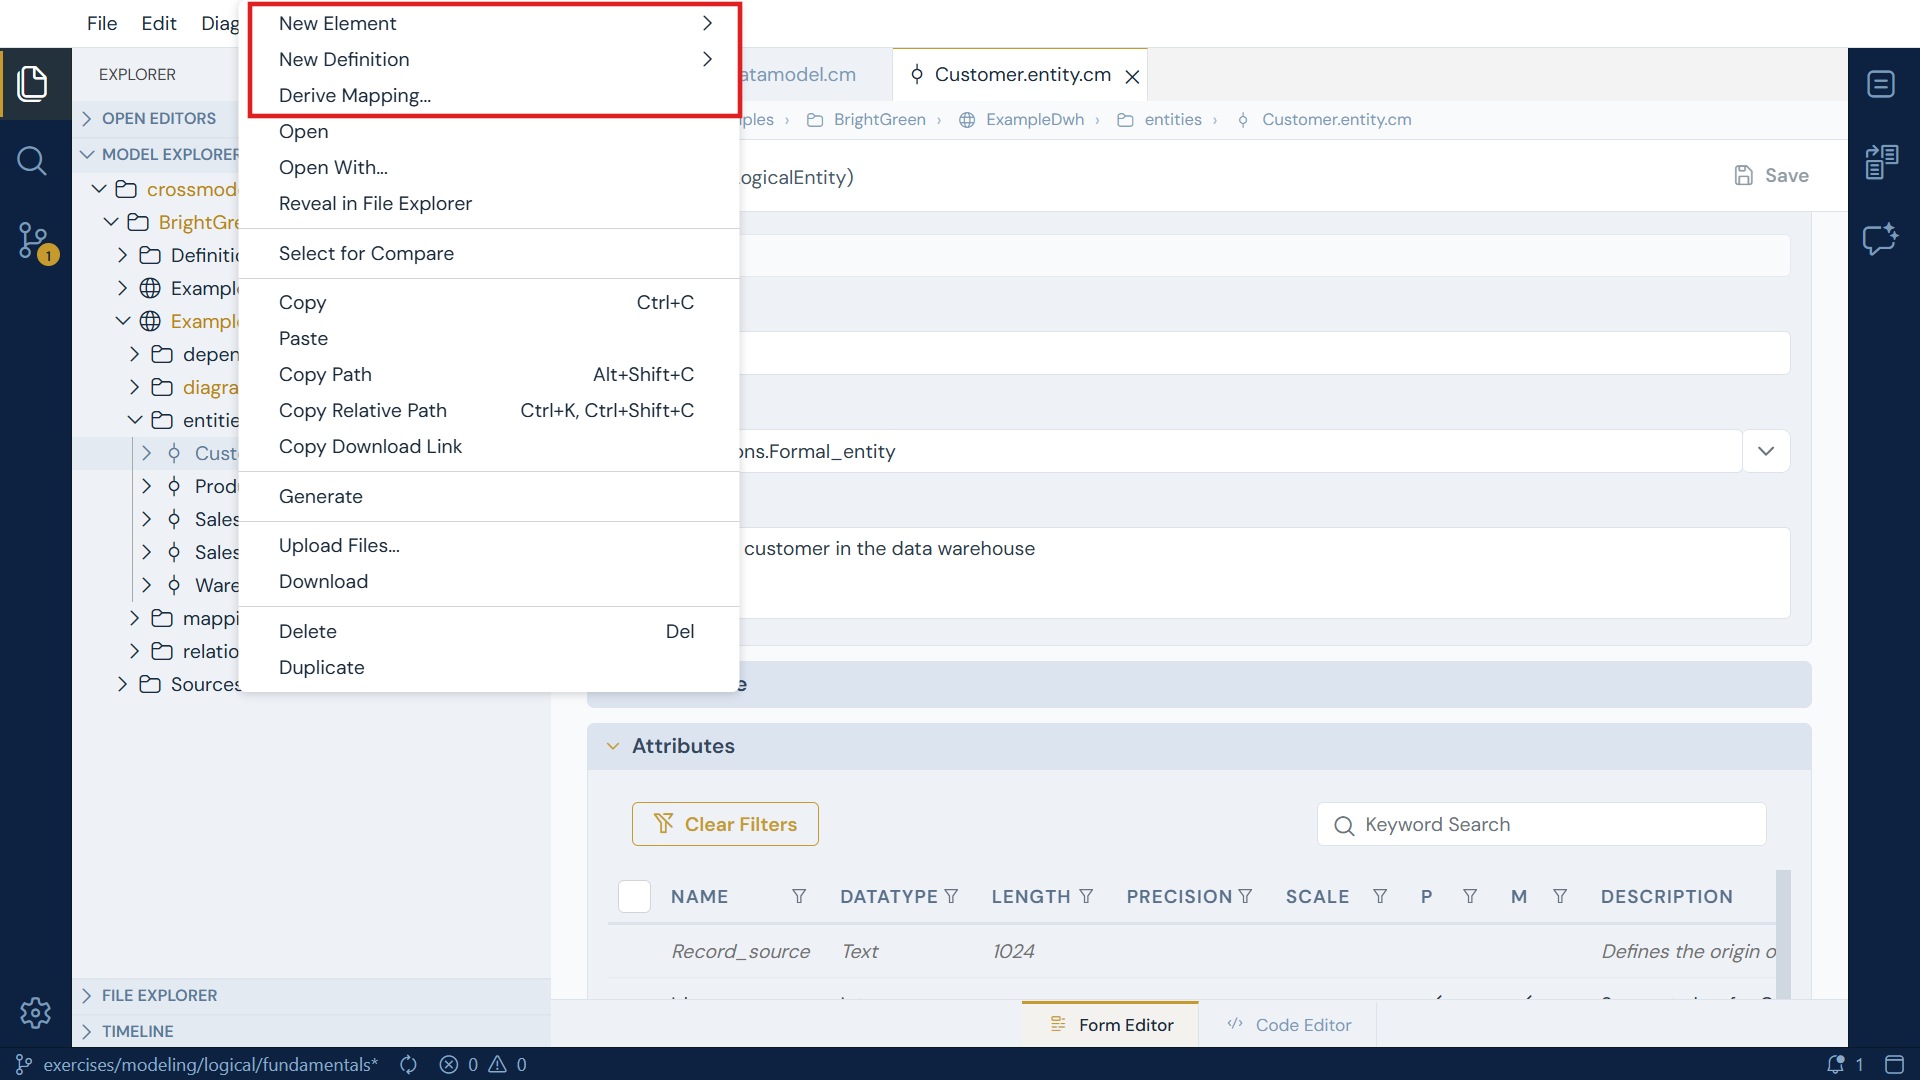
Labels stay in sync while you edit
The tree reads names from the live model, not from what is saved on disk. Rename an entity in the form editor and the Model Explorer label updates immediately, before you save. Discard the change and the label reverts. There is no refresh to press.
Copying and pasting models
You can copy a model file in either tree and paste it elsewhere, from the context menu or
with Ctrl+C / Ctrl+V. In the Model Explorer, copying an Attributes or
Identifiers node copies the model file that owns it; individual attributes and
identifiers are not separately copyable.
Pasting from outside CrossModel
Pasting files copied in another application reads the system clipboard, which your browser may ask permission for the first time. Copying inside CrossModel does not need that permission.
Showing names or technical ids
Every model object has both a human-readable name and a technical id. By default the Model Explorer - and forms, grids and diagrams - show the name. If you would rather see ids, change the Display labels setting; see CrossModel User Interface.
Where to go next
- CrossModel User Interface - the rest of the workbench.
- Datamodeling Fundamentals - build a model using the trees in practice.