In this set of exercises we'll work towards a workspace with a set of source models and a simple data warehouse model, covering most of the features of CrossModel along the way. We have organized the topics in a way that we feel is chronologically logical and we'll be using a fictional use case for the exercises. Each topic builds on to the previous one so you can continue working in the same workspace and set of models from day one. In case you want to skip topics or jump straight into a specific topic we provide example workspaces that contain everything you need to get started on that topic straight away.
Naturally you can use your own use case if you prefer.
The scenario: Building the data foundation for BrightGreen Electronics

BrightGreen Electronics is a thriving electronics store that sells products both from their stores as online. They sell TV's, computers, audio devices as well as downloadable content such as video's, music and software.
As an organization that started small but is growing fast, they discovered that, in order to make better informed decisions, they need a data platform that provides them with an integrated view on their sales, warehouse and staff.
You have been asked to assist BrightGreen by providing them with a logical overview of the current data landscape and a design for an integrated datamodel providing them with the necessary information elements.
Exercise one: visualize the logical datamodel for the sales application
In this exercise we'll cover the following topics:
- Signing in to CrossModel
- Creating our first workspace
- Manually creating a simple logical data model
- Exploring the different perspectives in CrossModel
BrightGreen uses a simple sales application that was built internally. The system consists of the following tables:
| Table | Description |
| Customer | A table that holds Customers, with their ID, Name, Date Of Birth and email address |
| SalesOrder | A table that holds all sales orders with an ID, reference to a customer, OrderDate |
| SalesOrderLine | A table that holds all sales order lines with an ID, reference to a SalesOrder, reference to a Product, Unit price and Quantity |
| Product | A table that holds all Products with an ID, name and unit price |
Since it is a fairly simple datamodel and you don't have access to the actual database for reverse engineering, you decide to manually create the datamodel in CrossModel.
Exercise steps
1 - Prepare your CrossModel workspace
Go to CrossModel, register for an account and follow these instructions to create and launch your CrossModel workspace.
When CrossModel is initialized you are presented with an empty workspace. Before we start modeling first checkout our example repository to get a proper example workspace:
-
Open the Command Pallette (via Ctrl+Shift+P or via the menu View -> Command Pallette).
- Type "git clone" and hit Enter
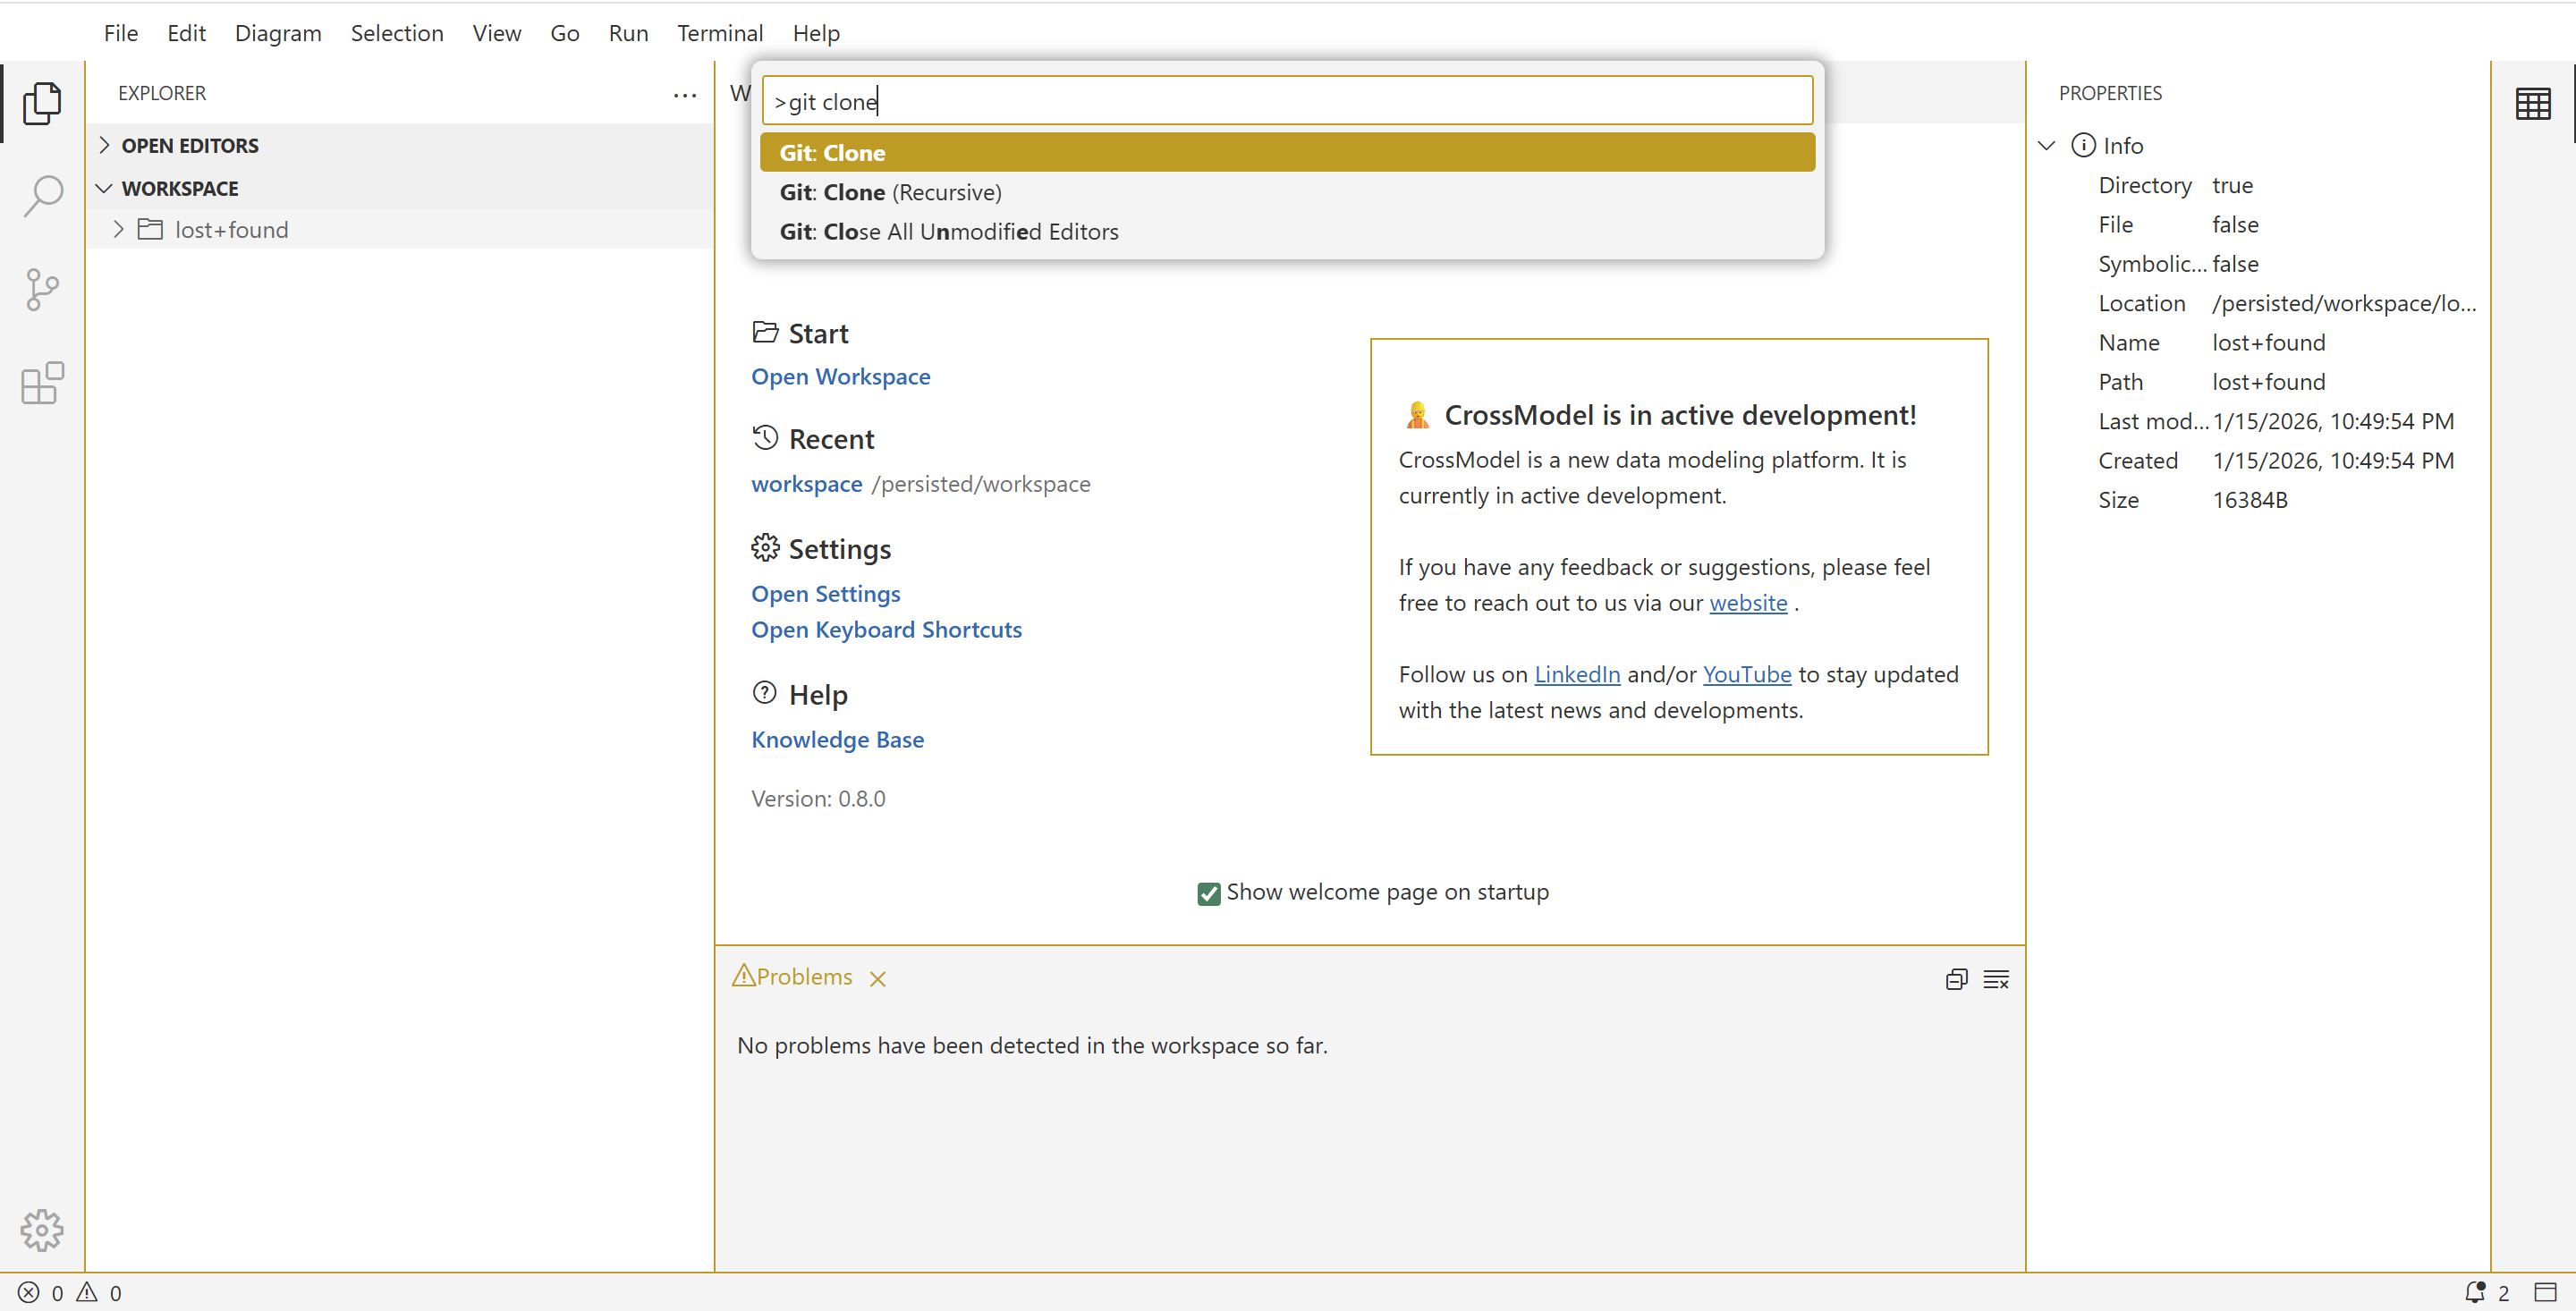
-
Enter the following repository: https://github.com/crossmodel/crossmodel-examples and hit Enter.

-
In the folder selection dialog, select the /persisted/workspace folder and press "Select as Repository Destination"

Now CrossModel prompts you to open the cloned repository either here or in a new window, select "Open".

Next select the proper example branche by clicking on "main' in the bottom left corner of the screen and then select the BrightGreen branch from the dropdown.

Now all you have to do is go to the menu File -> Open and select the BrightGreen folder. Then you will see all the models needed for this tutorial.
2 - Create a new data model
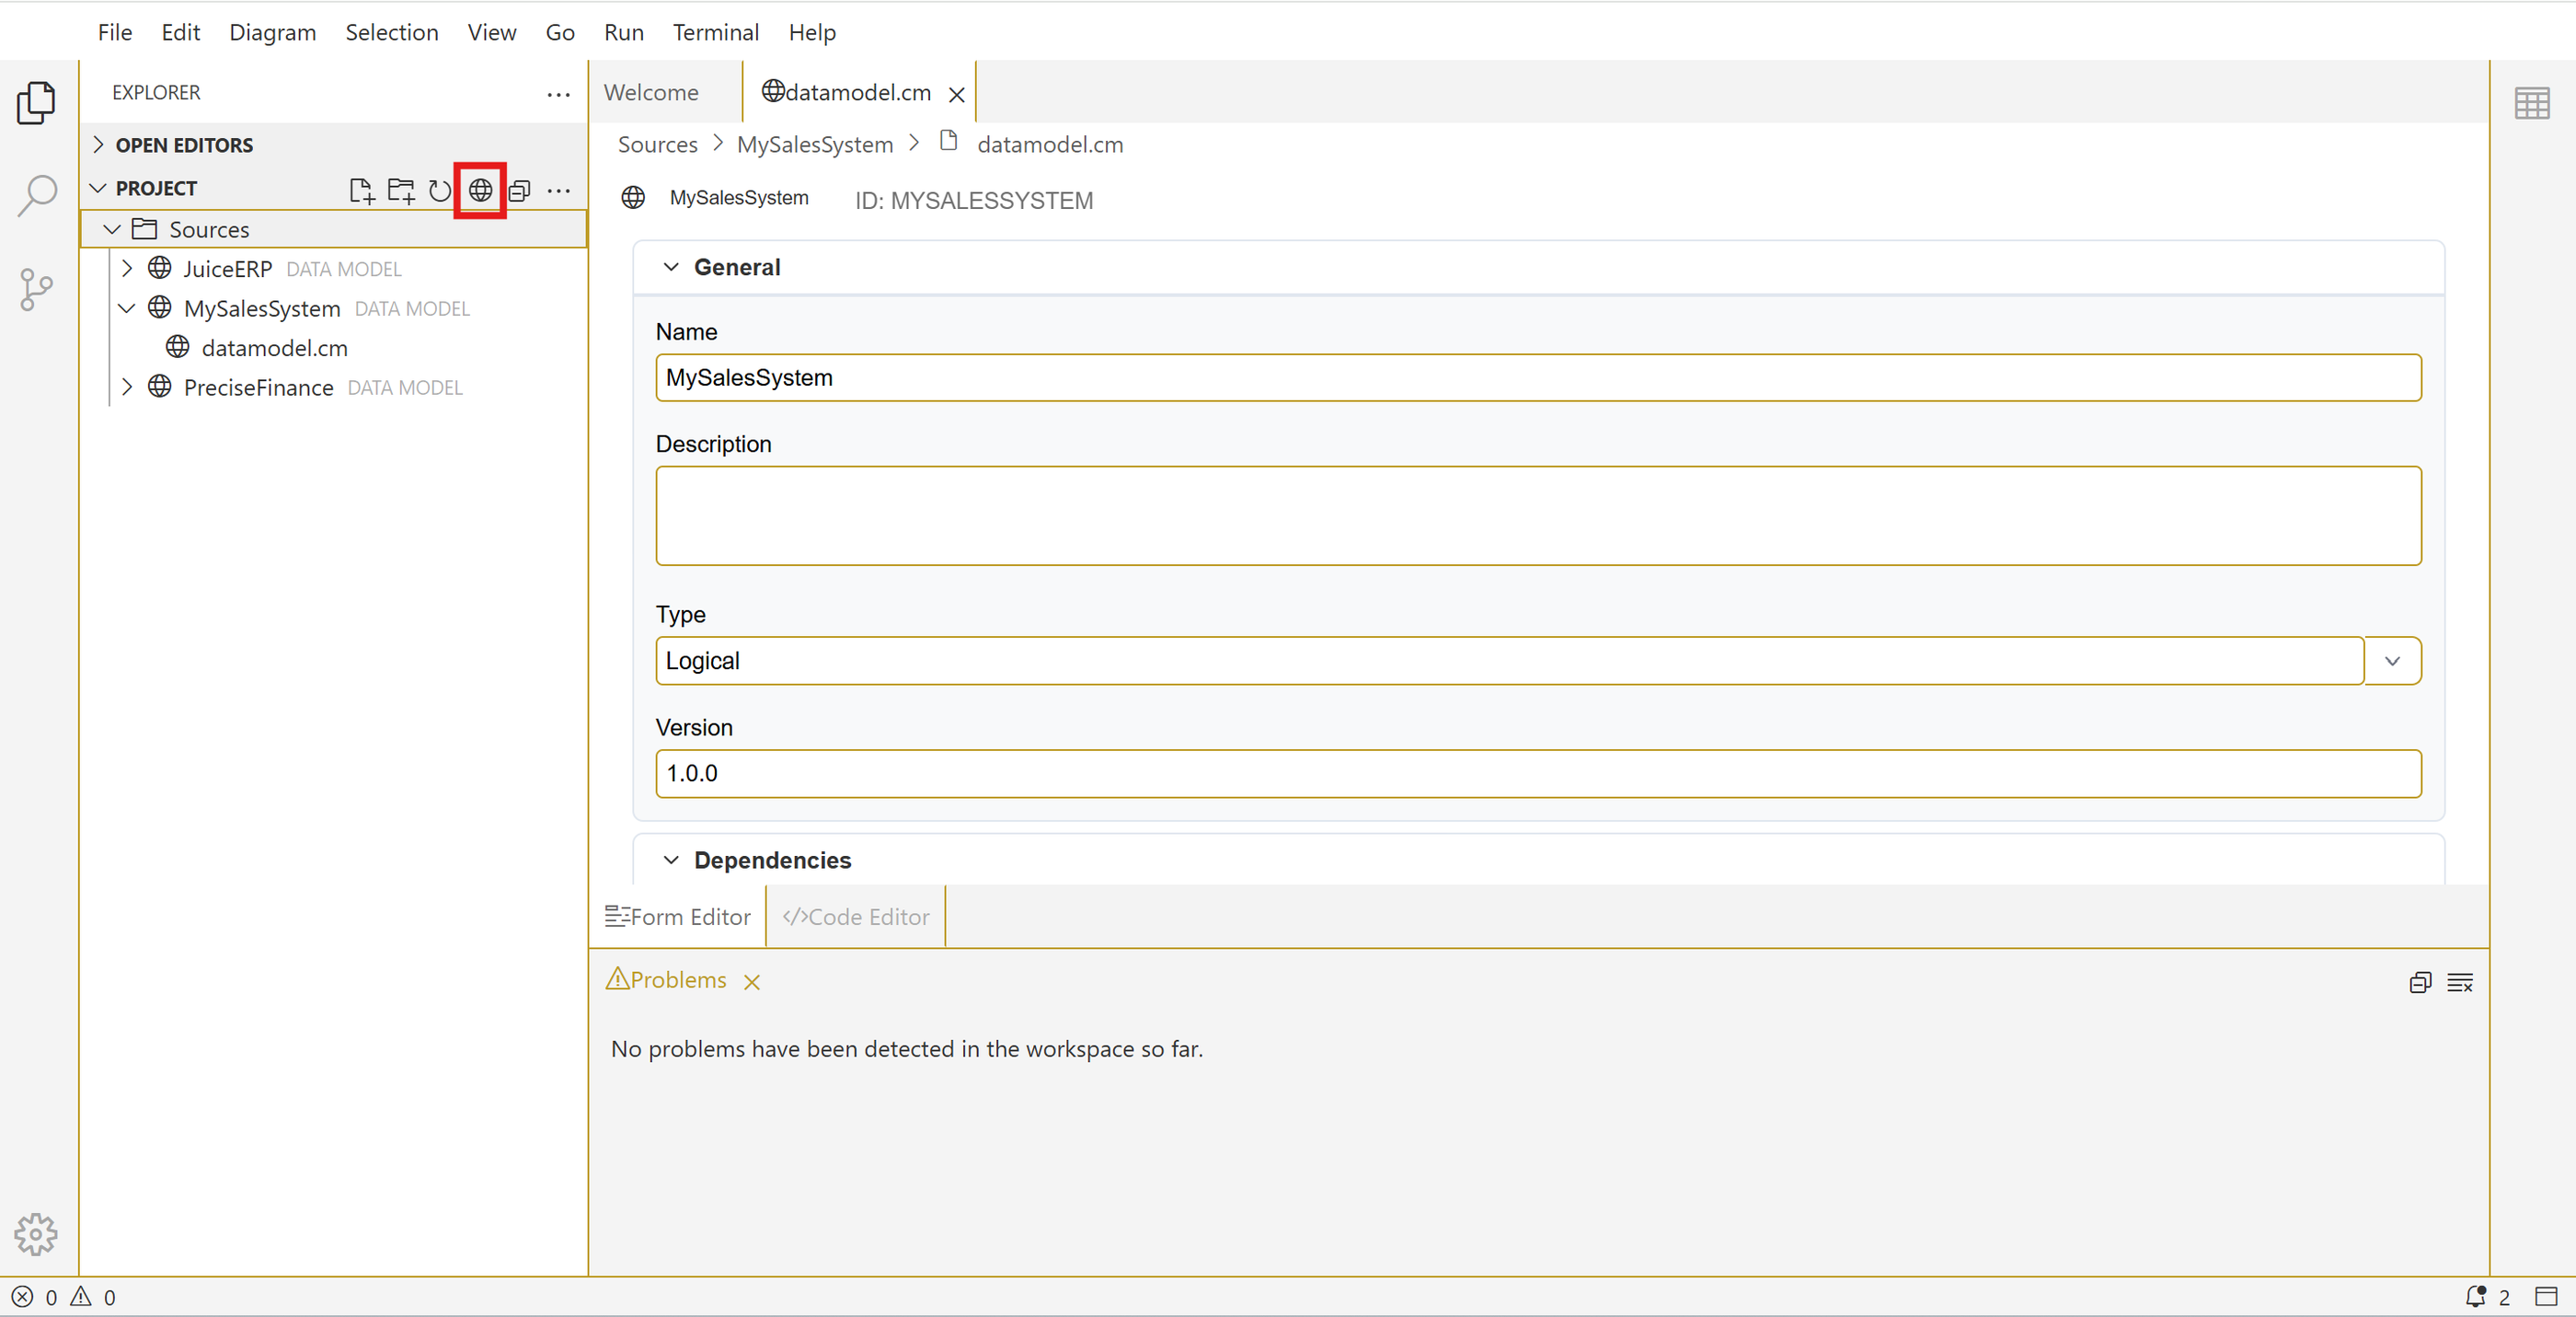
In the explorer pane, select the Sources folder and create a new data model using the appropriate button in the toolbar.
In the form that is then displayed, provide a suitable model name and hit save (CTRL+S). Now you have created a new logical data model.
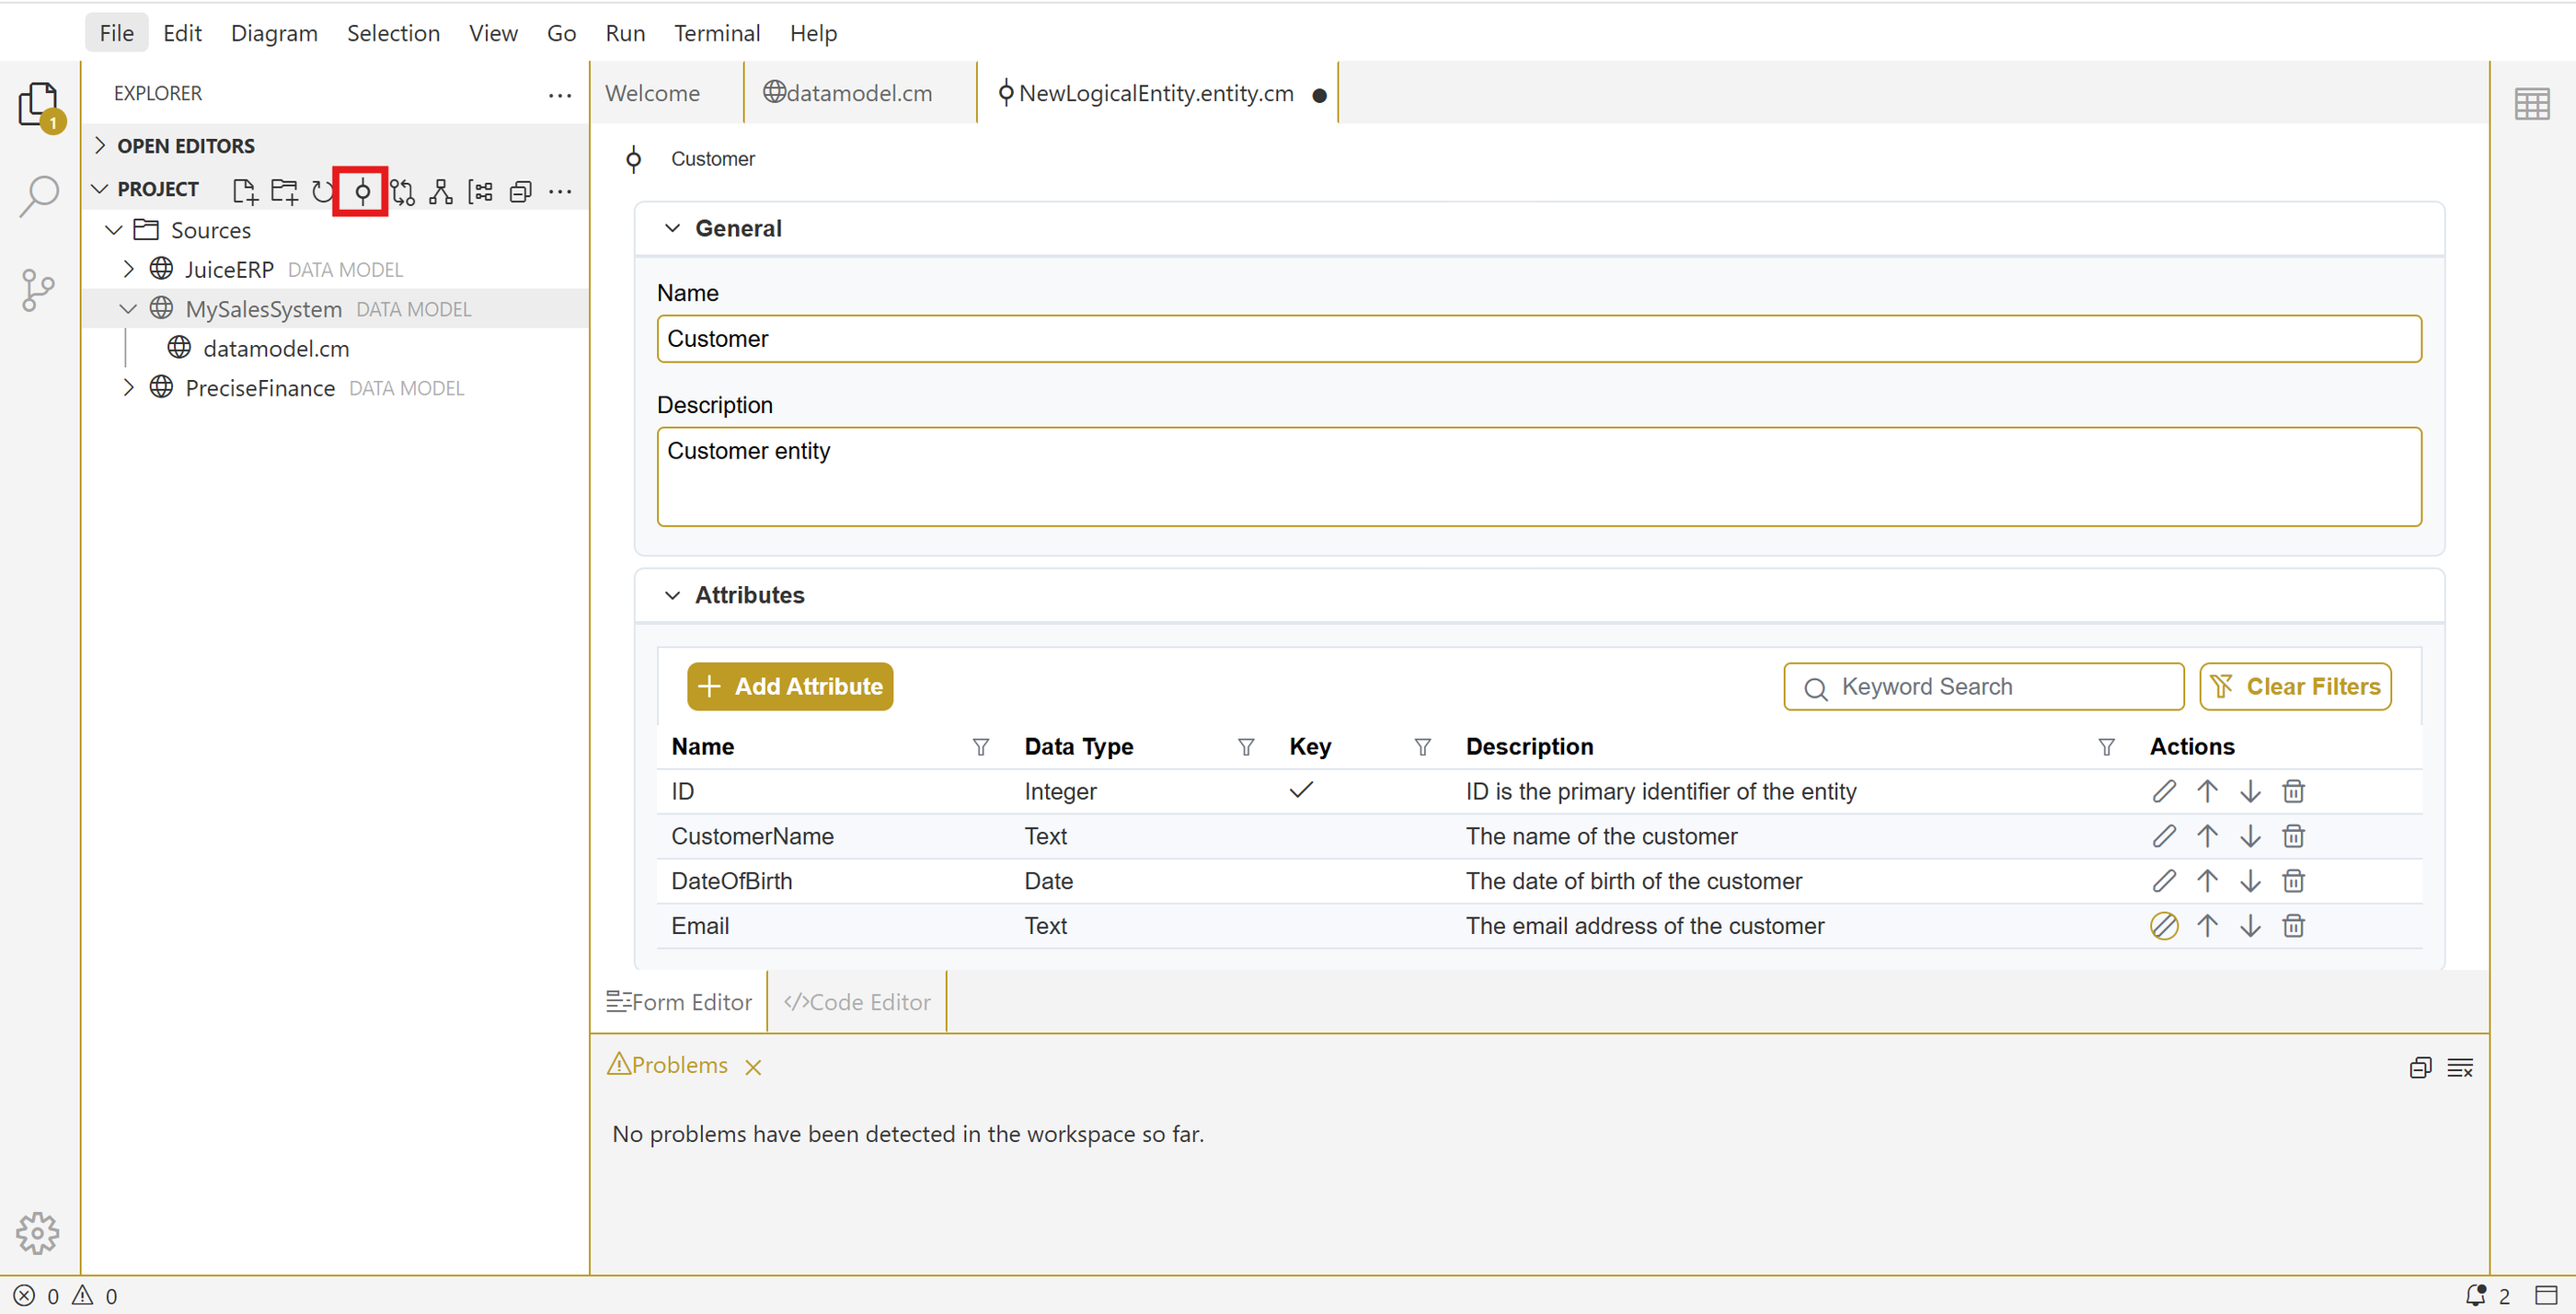
3 - Create entity using the form editor
In the explorer pane, select your newly created model and use the toolbar to create a new entity. In the form that is now displayed, create the Customer entity using the information from the table described earlier in this exercise. When you have set the entity name, description and defined the attributes, hit save (CTRL+S). That's it! you have created your first entity in CrossModel.
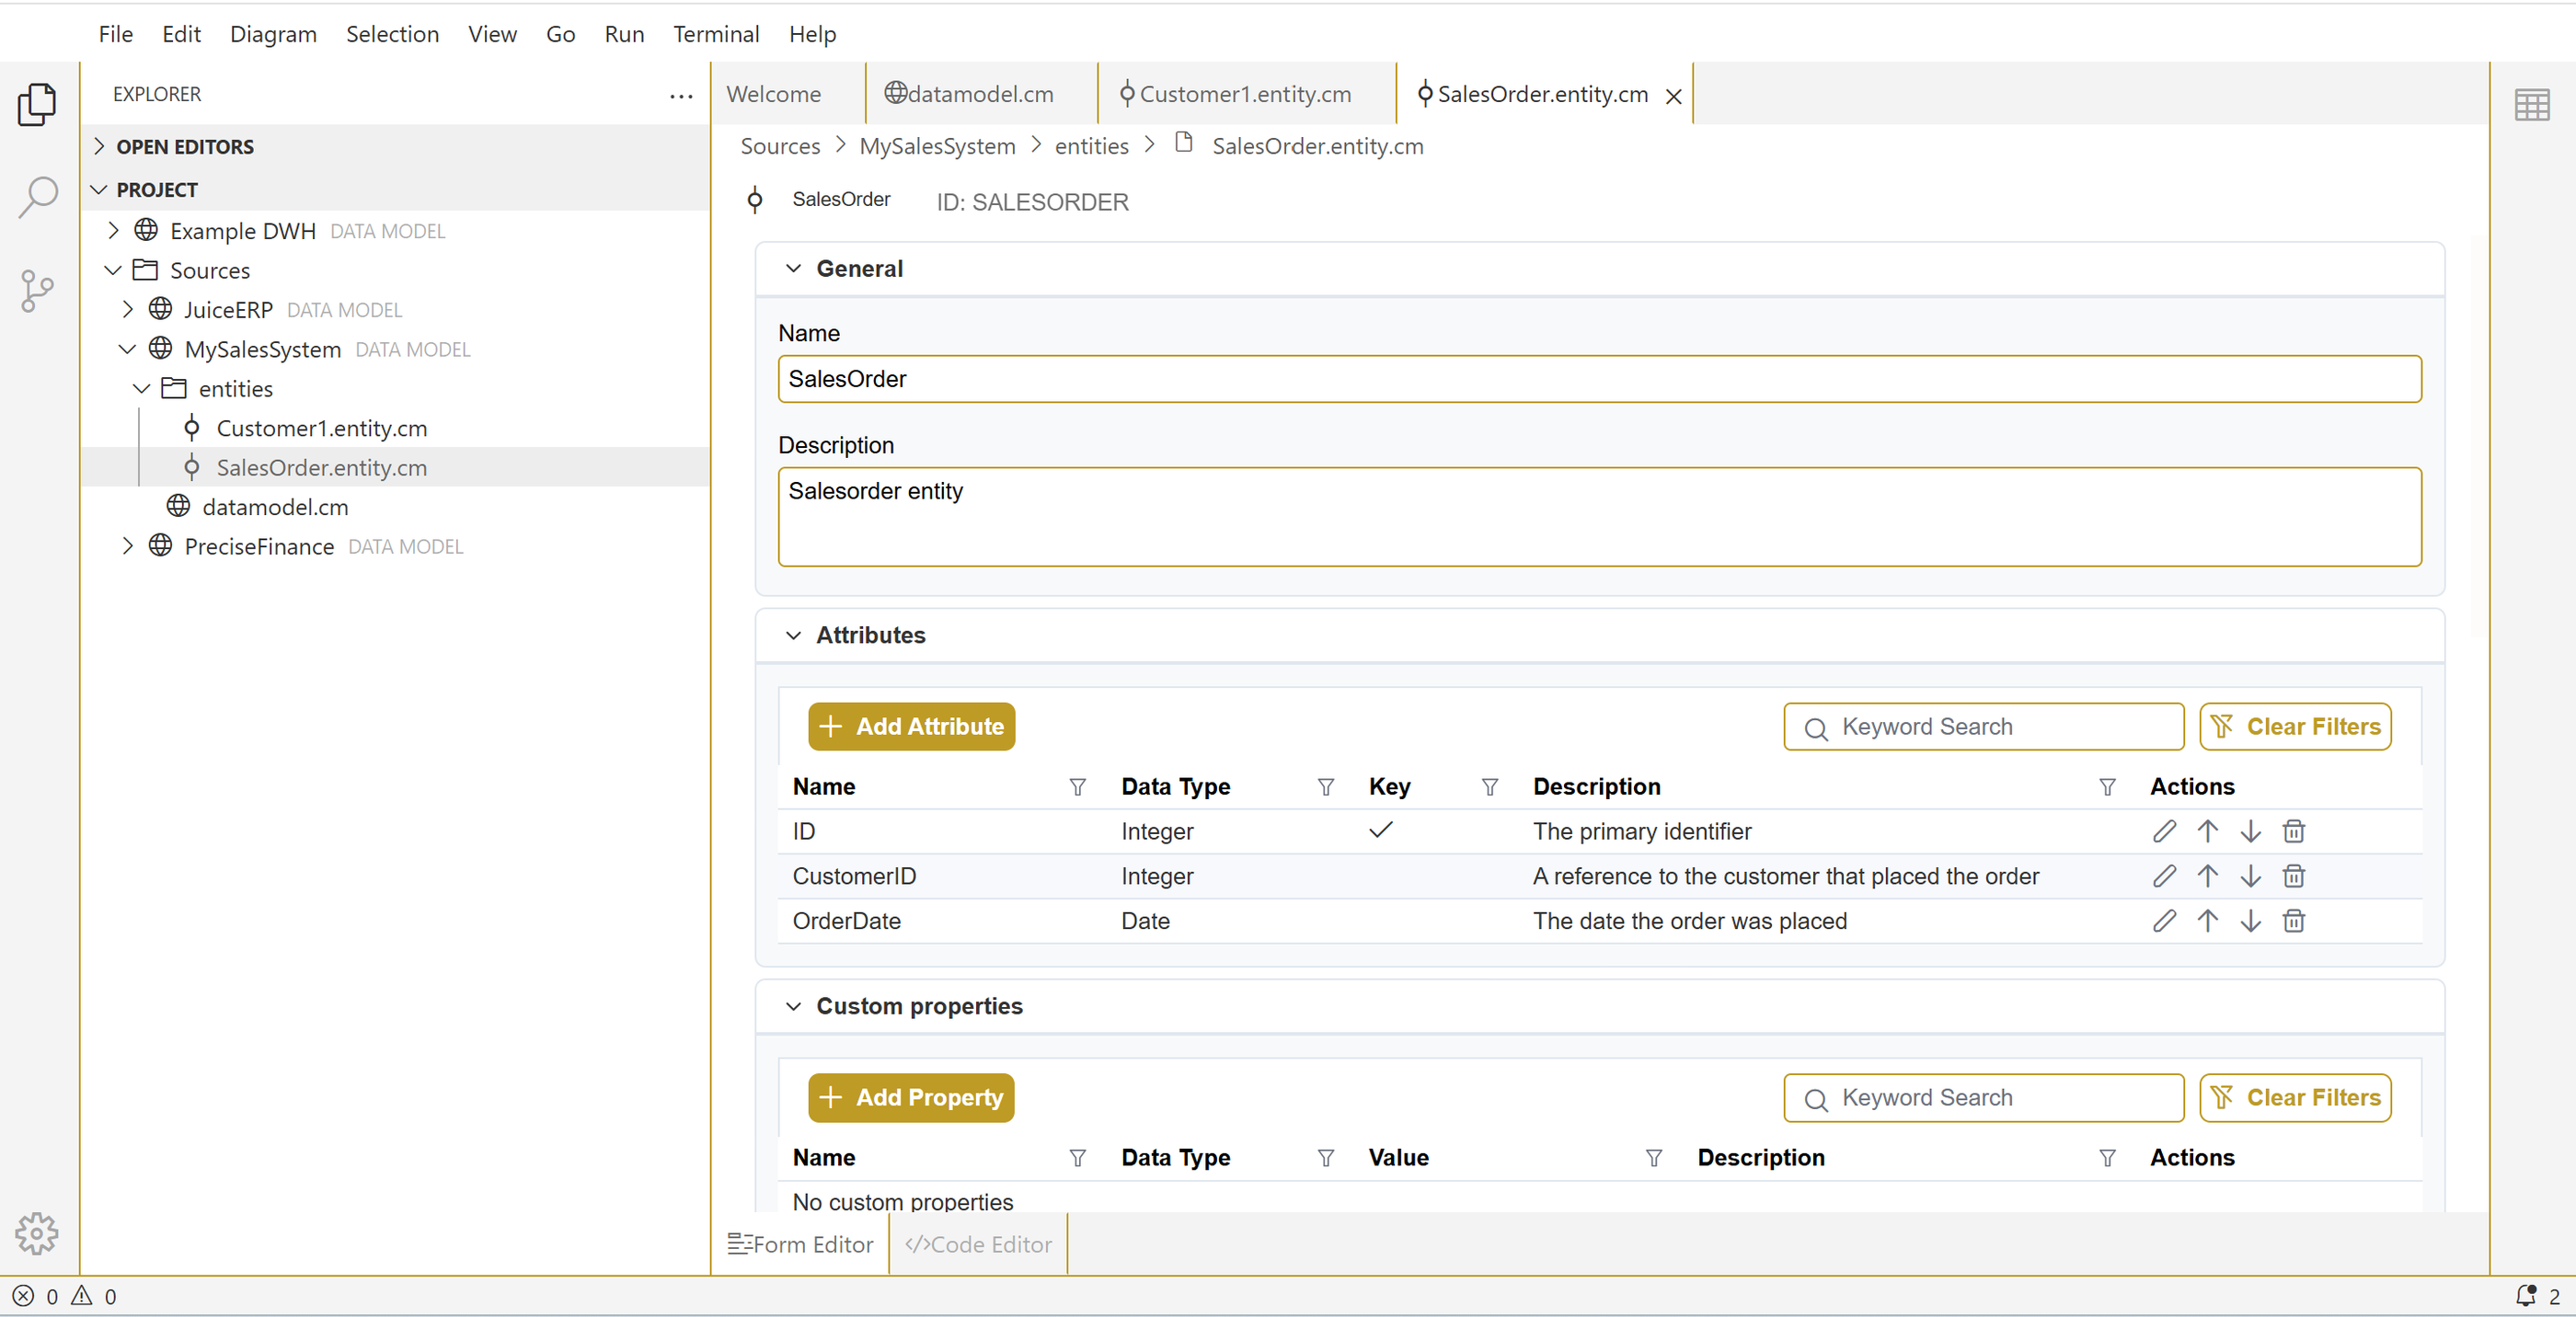
4 - Create entity using the code editor
In the explorer pane, either on the model name or on the entities folder underneath, hit the create entity button from the toolbar again (same as in the previous step). Instead of filling in the form now switch to the code editor and copy the following definition into this panel (overwrite what is already there).
entity:
    id: SalesOrder
    name: "SalesOrder"
    description: "Salesorder entity"
    attributes:
      - id: ID
        name: "ID"
        description: "The primary identifier"
        datatype: "Integer"
      - id: CustomerID
        name: "CustomerID"
        description: "A reference to the customer that placed the order"
        datatype: "Integer"
      - id: OrderDate
        name: "OrderDate"
        description: "The date the order was placed"
        datatype: "Date"
    identifiers:
      - id: Primary_Identifier
        name: "Primary Identifier"
        primary: true
        attributes:
          - ID
Now switch back to the form editor and see that your entity is properly populated. Hit ctrl + s to save and you now have two entities in your datamodel. This time you used the code editor to create the entity. This editor also enables you to do easy replacements in a model, for example update all Integer fields to a different data type.
5 - Create entity via a diagram
Let's create the last two entities using a more visual approach using the diagram. For this we first need to create a diagram. We can do this by selecting our model in the explorer and hit the create diagram button. After specifying a name for the diagram we are presented with a new empty diagram.
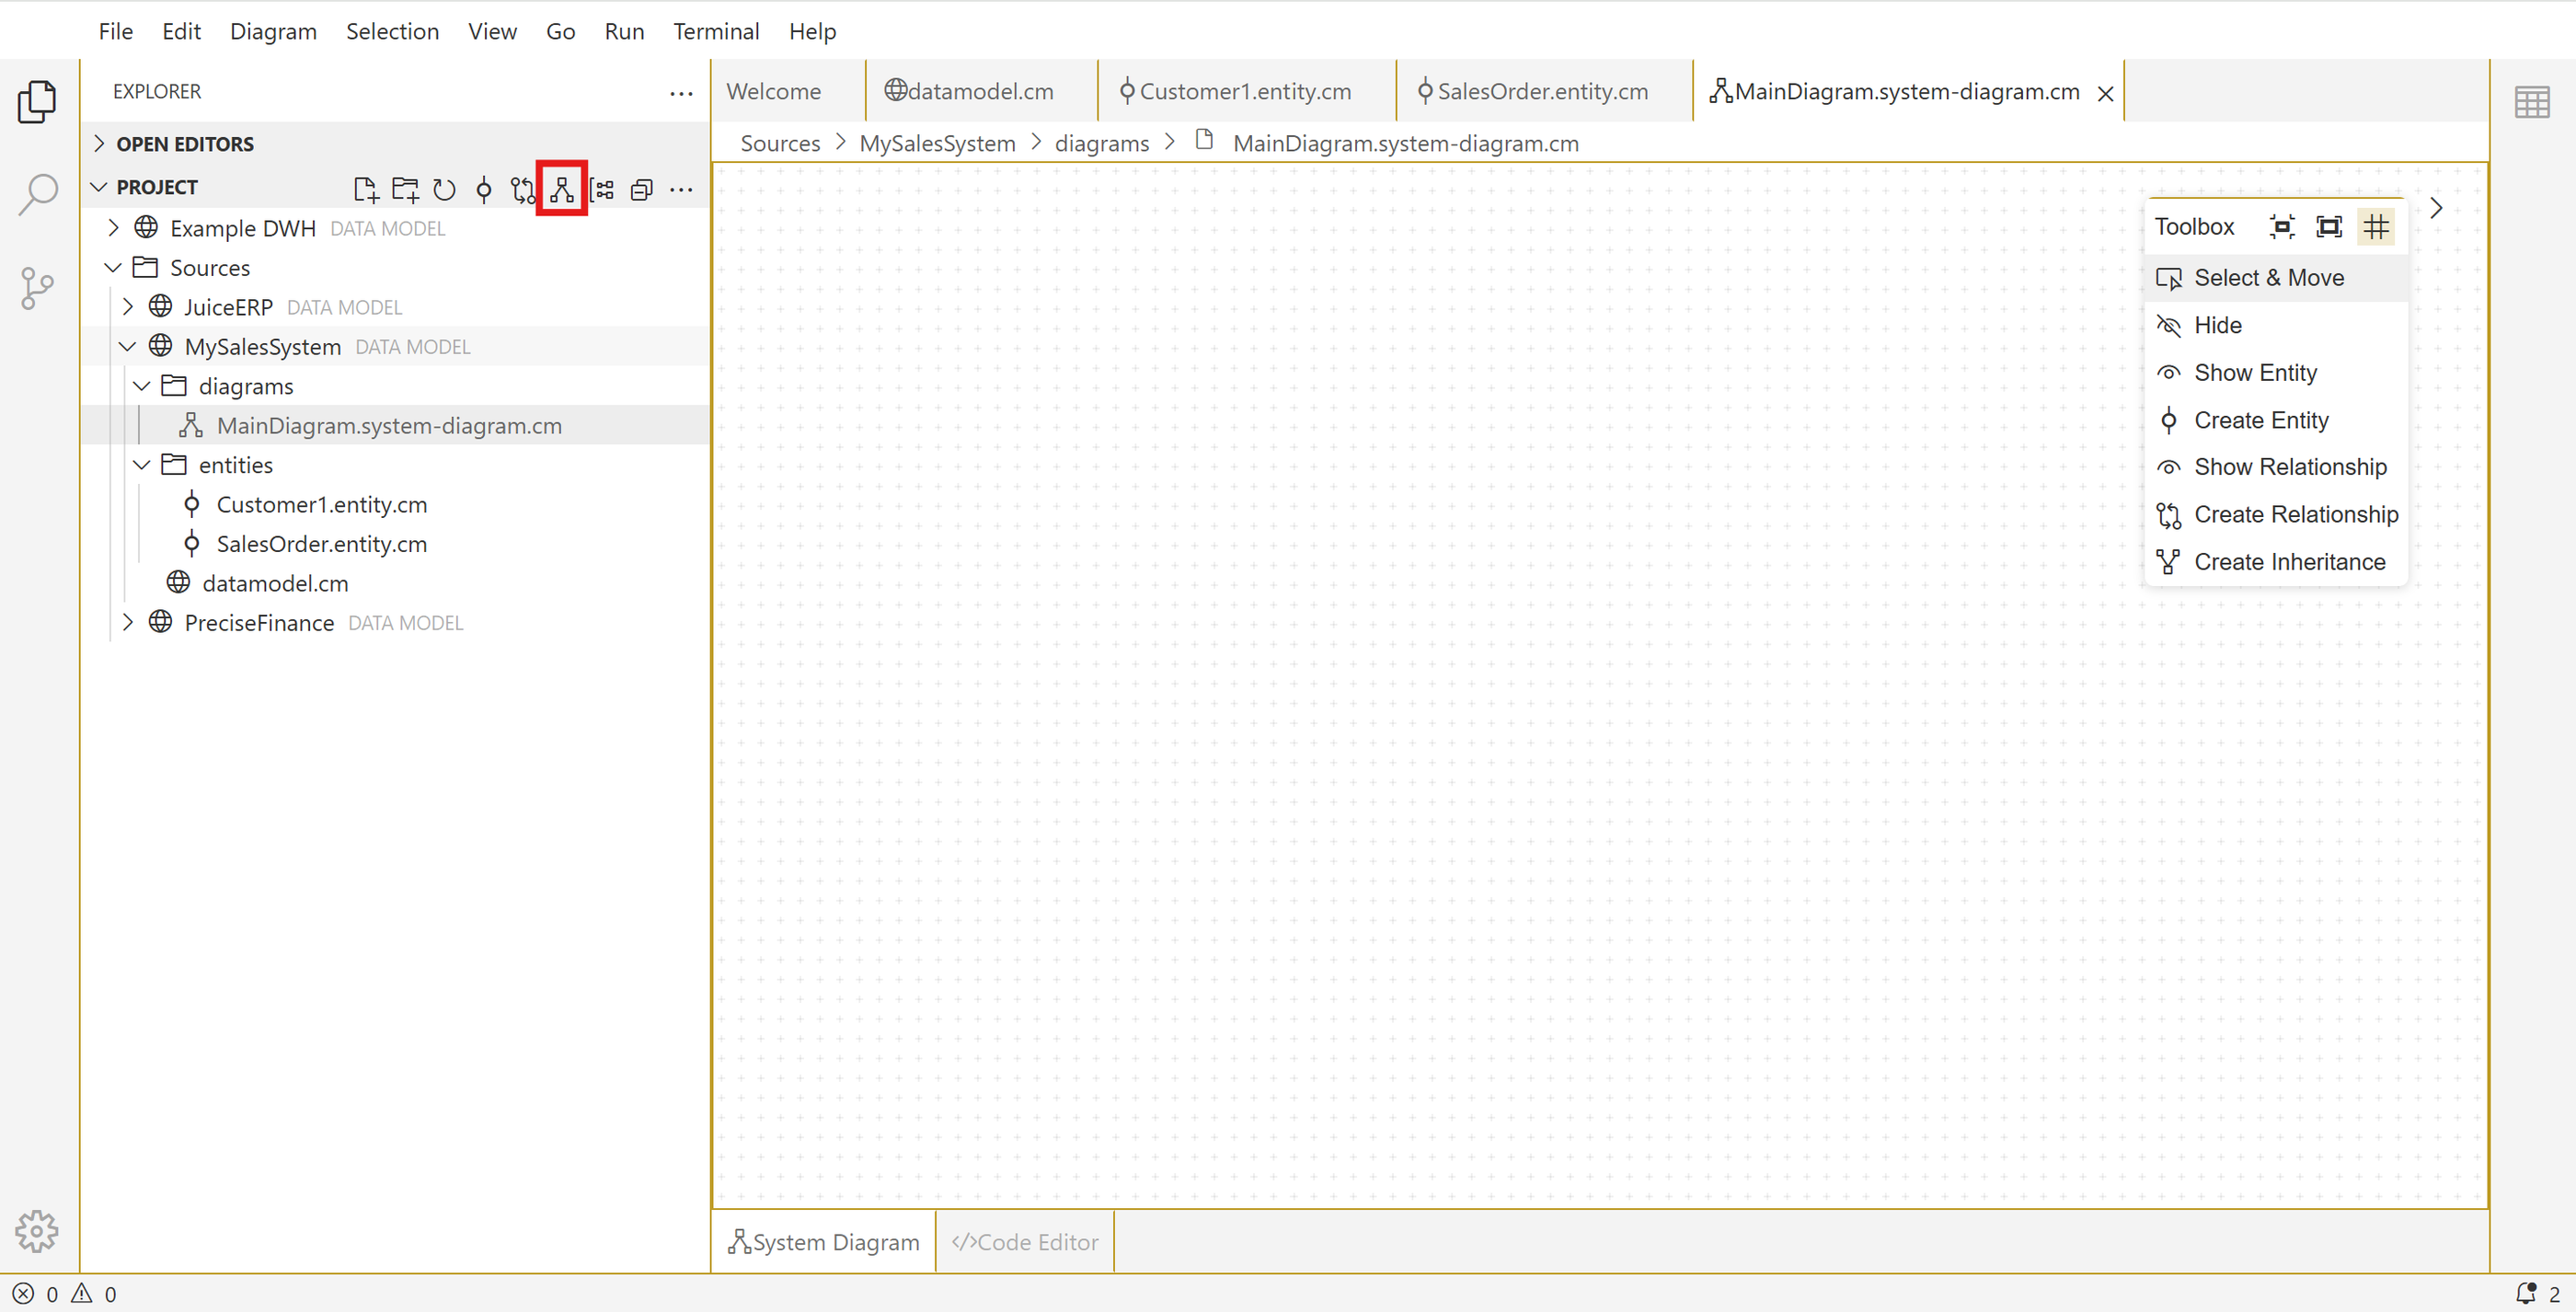
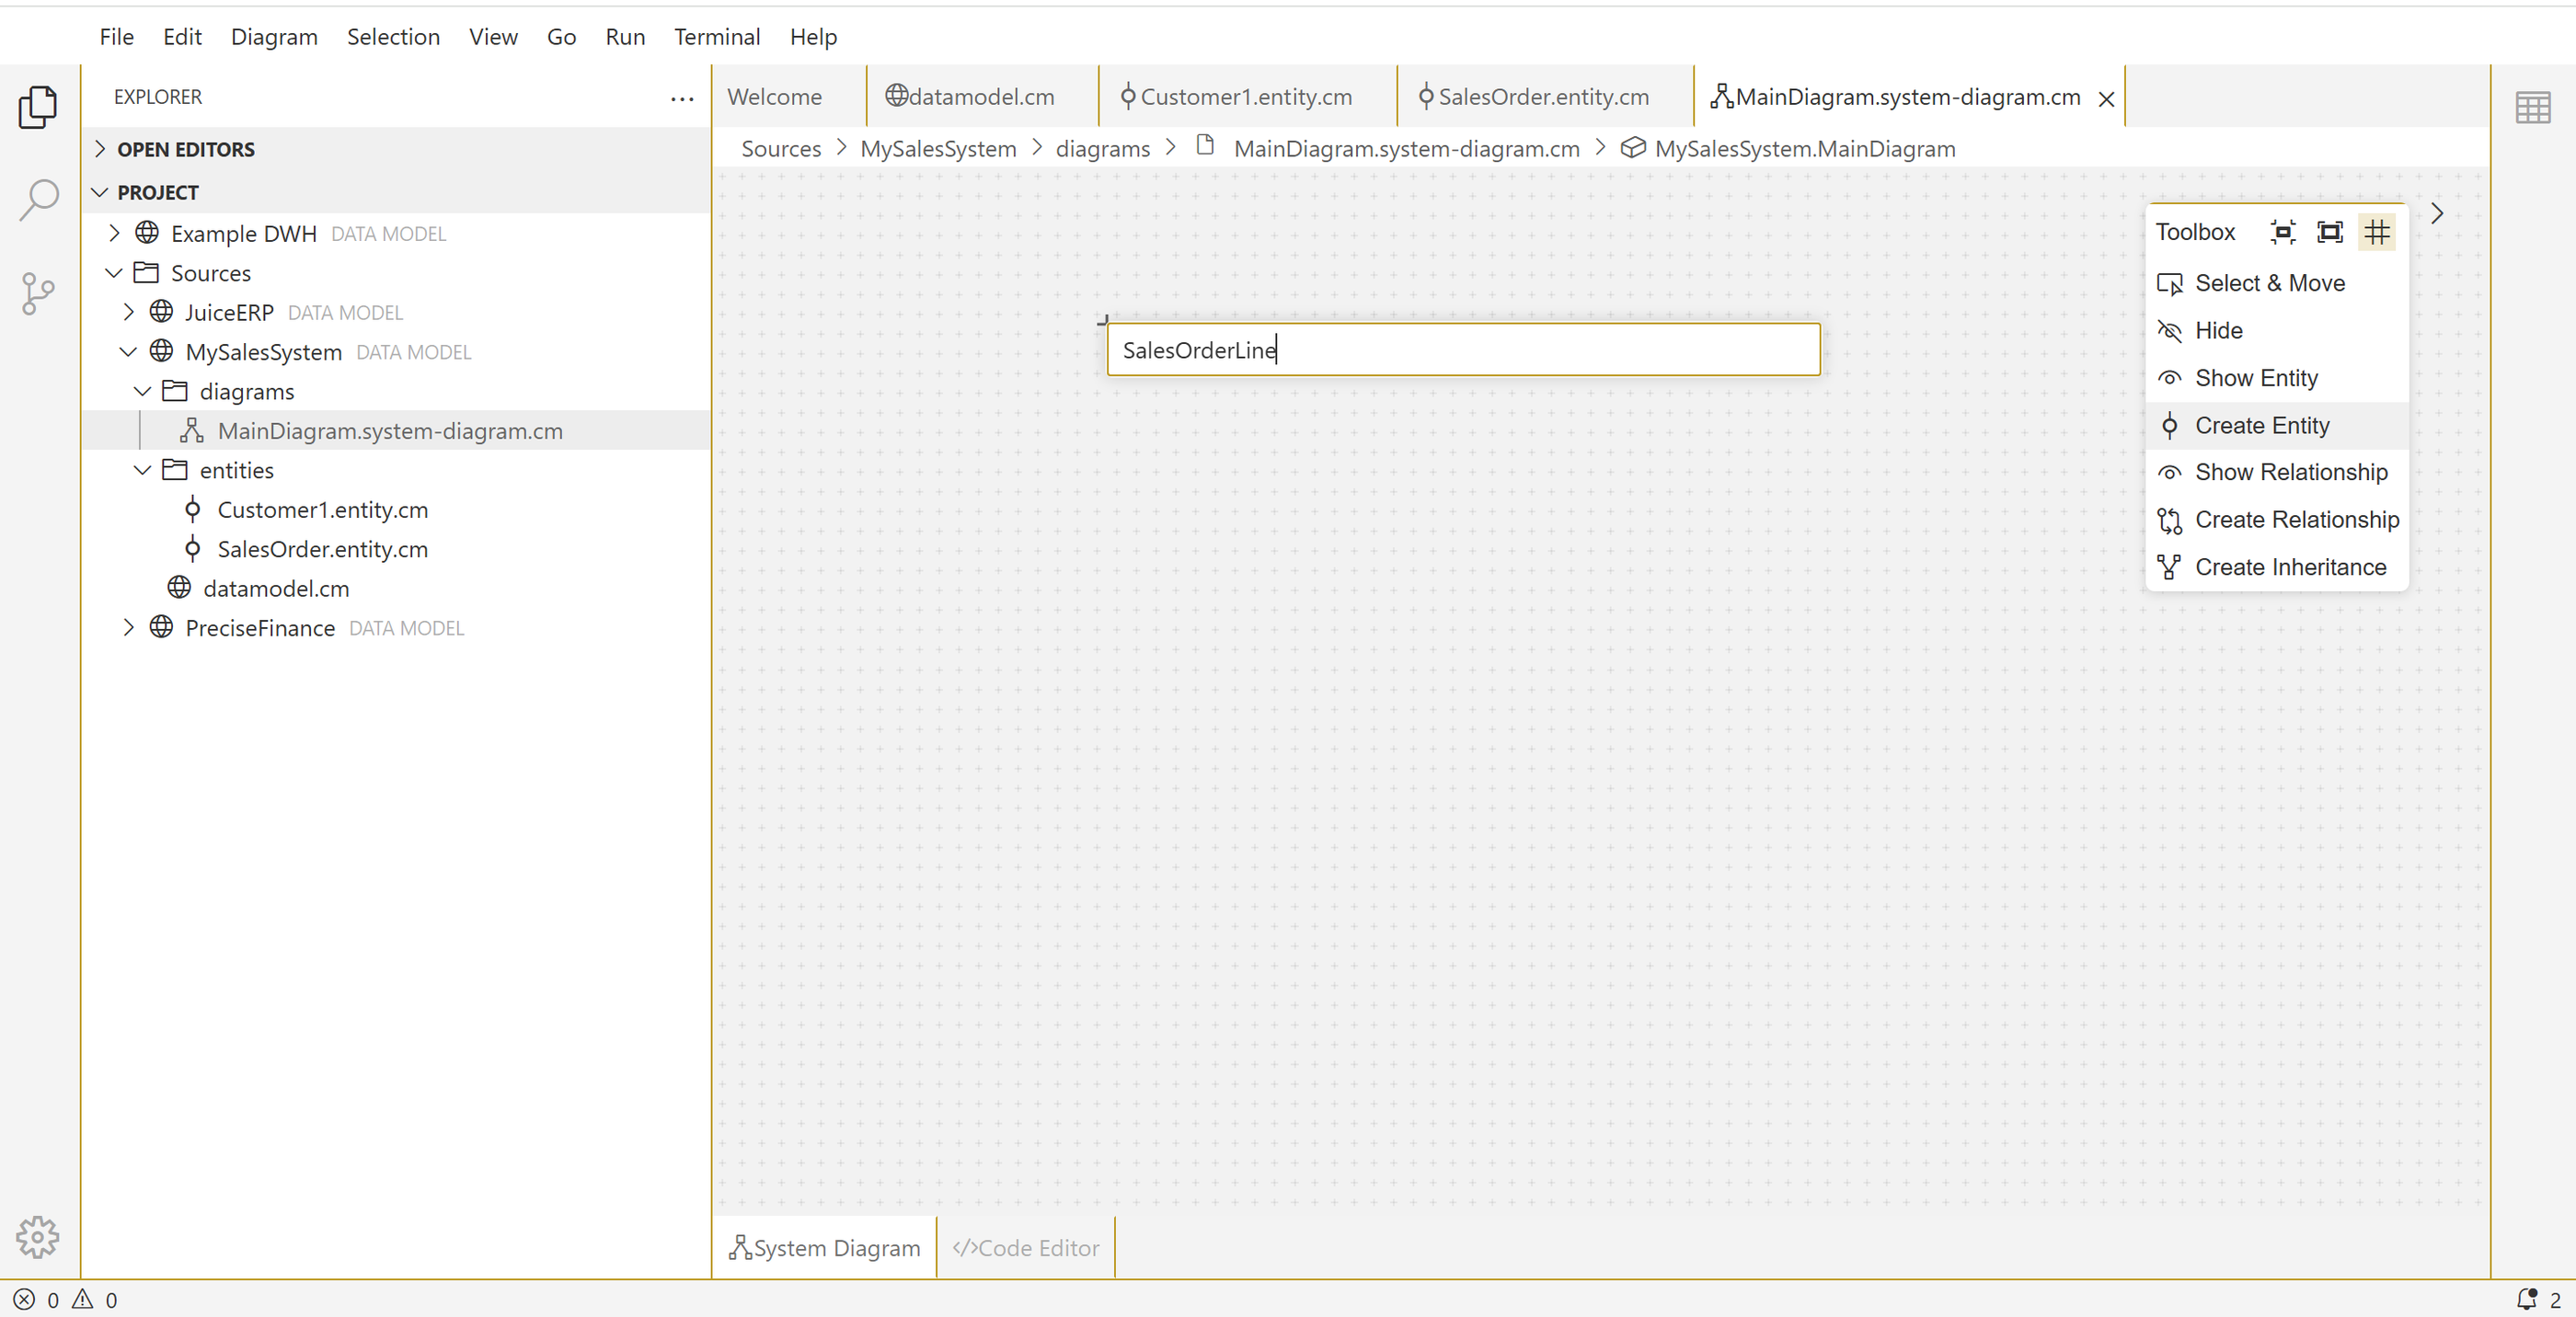
In the diagram select the Create Entity command from the toolbox, click anywhere in the diagram and type the entity name, press Enter to confirm.
Now open the property window to start specifying the entity:
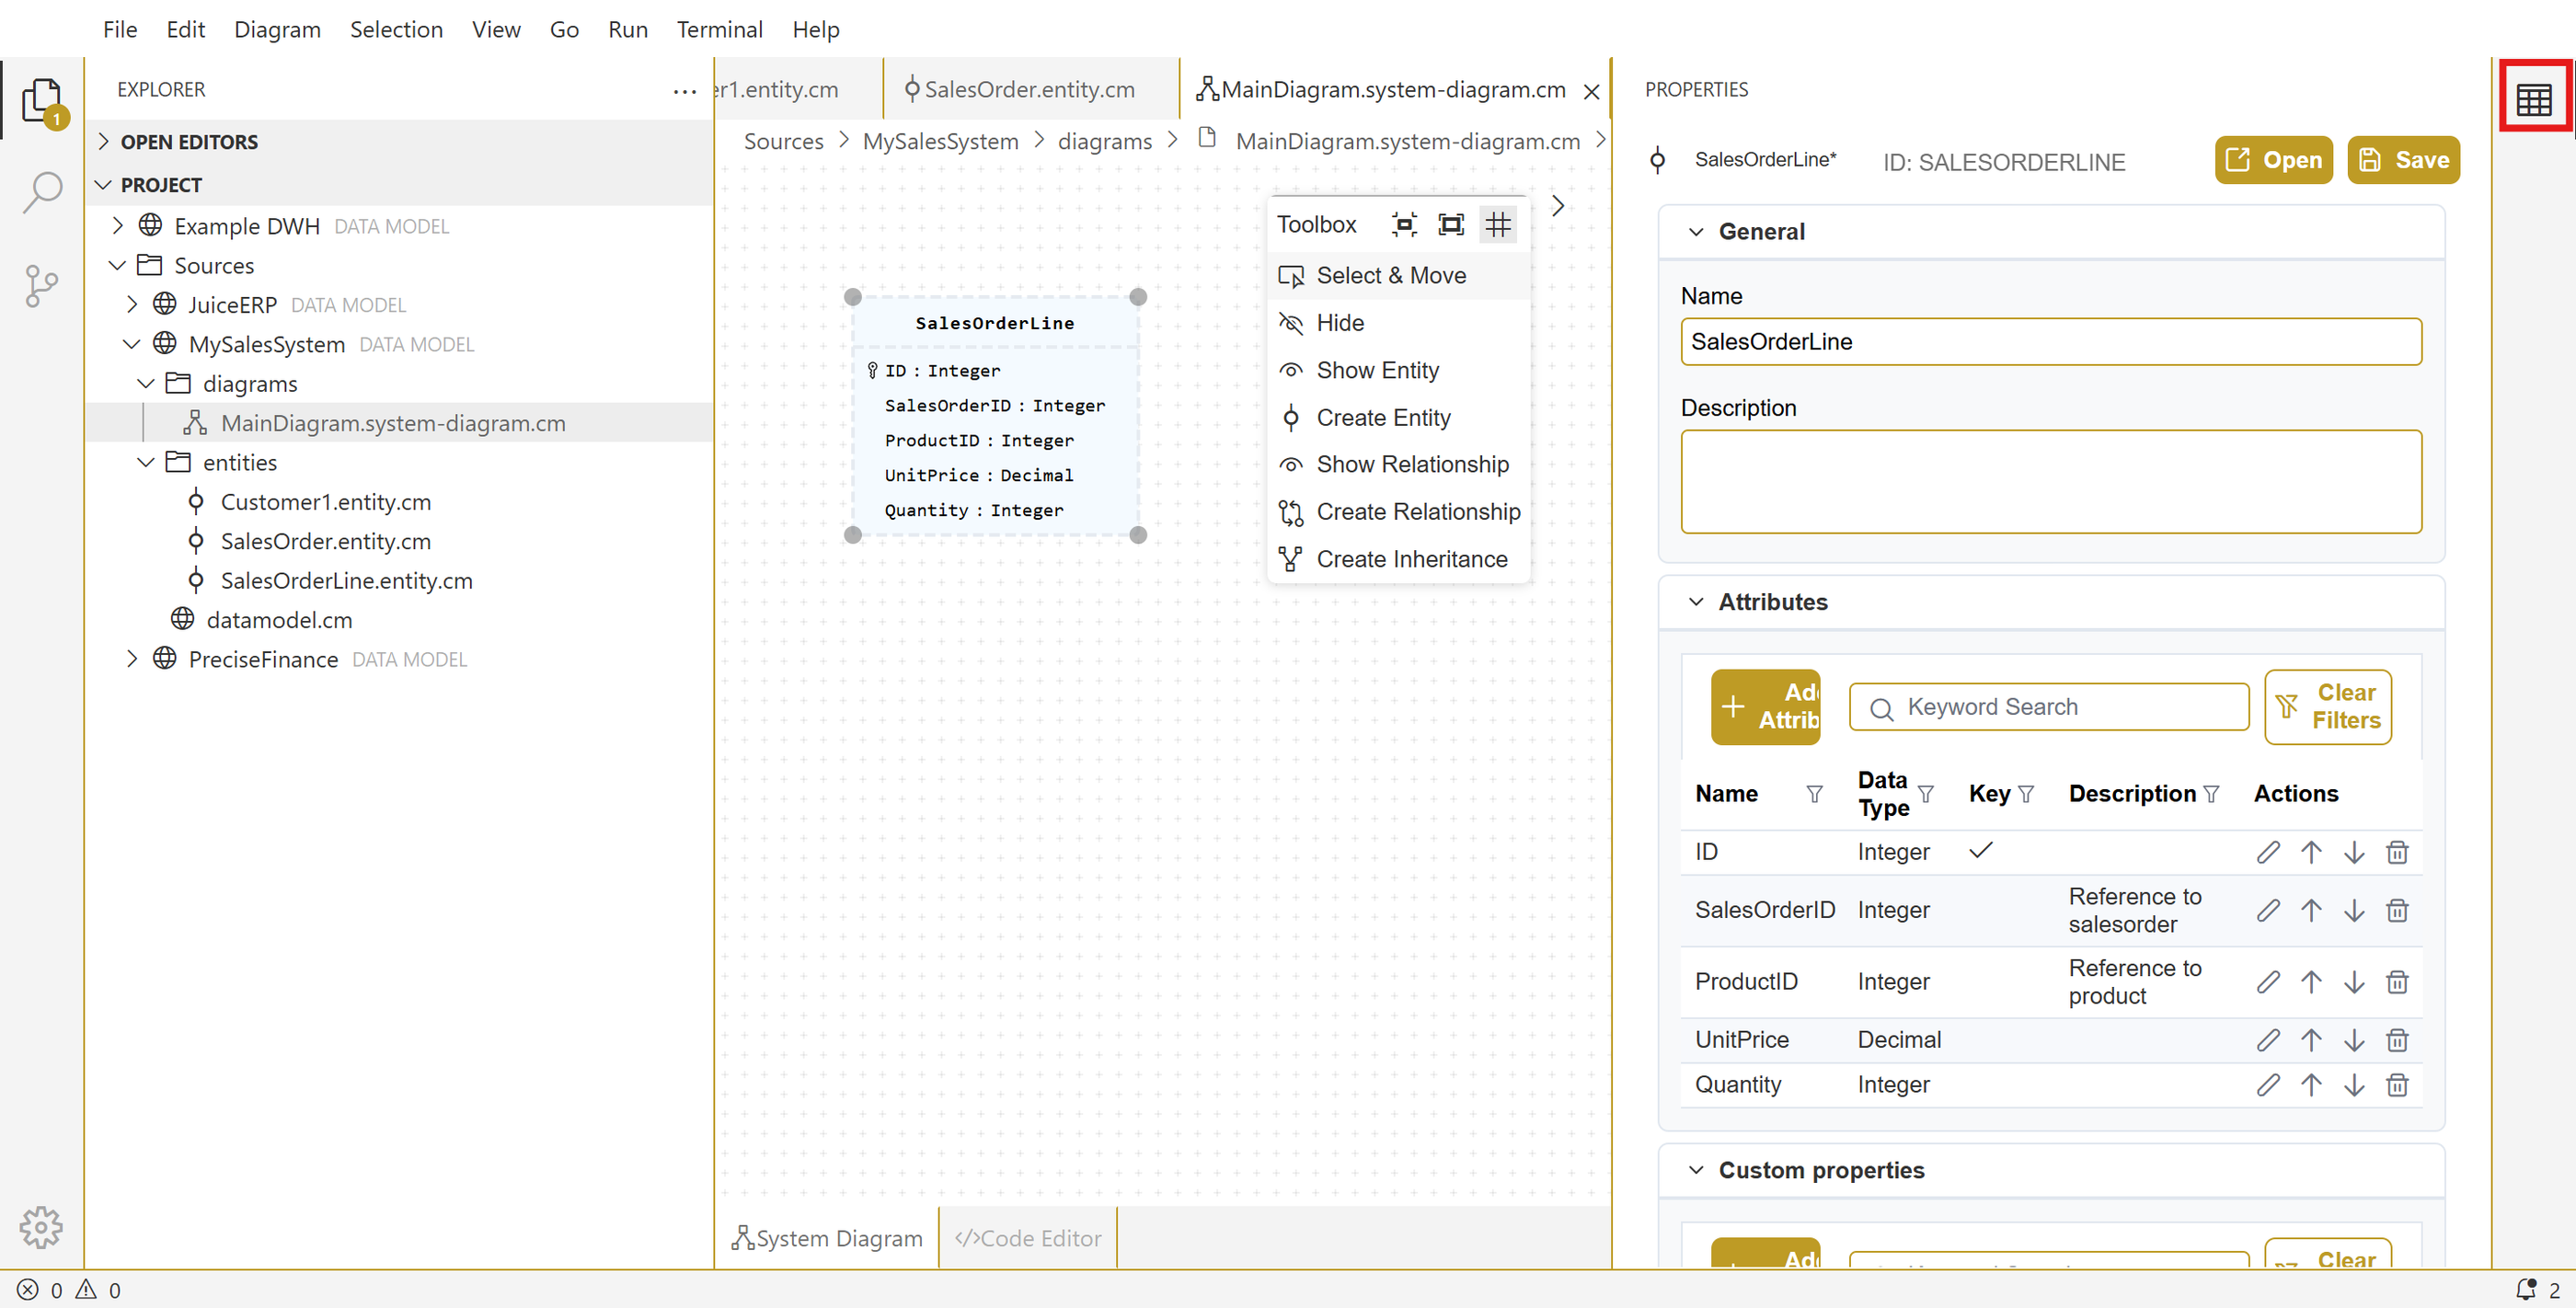
Hit save, now you have created a third entity using the diagram view. Repeat the steps to add the Product entity as well.
6 - Create relationships
Now that we have created the entities for our first model it is time to model relationships. Let's start from the diagram and first make sure all entities are displayed.
You can add all the entities to a diagram by either dragging them from the explorer bar to the diagram, or selecting Show entity from the toolbox and then click anywhere in the diagram to select the entity to be displayed at the selected location.
When all the entities are displayed, click Create Relationship in the toolbox and drag a relationship from Customer to SalesOrder. In the property window that is now displayed, set the proper parent and child cardinality.

Scroll down in the property panel to also specify the relationship attributes:
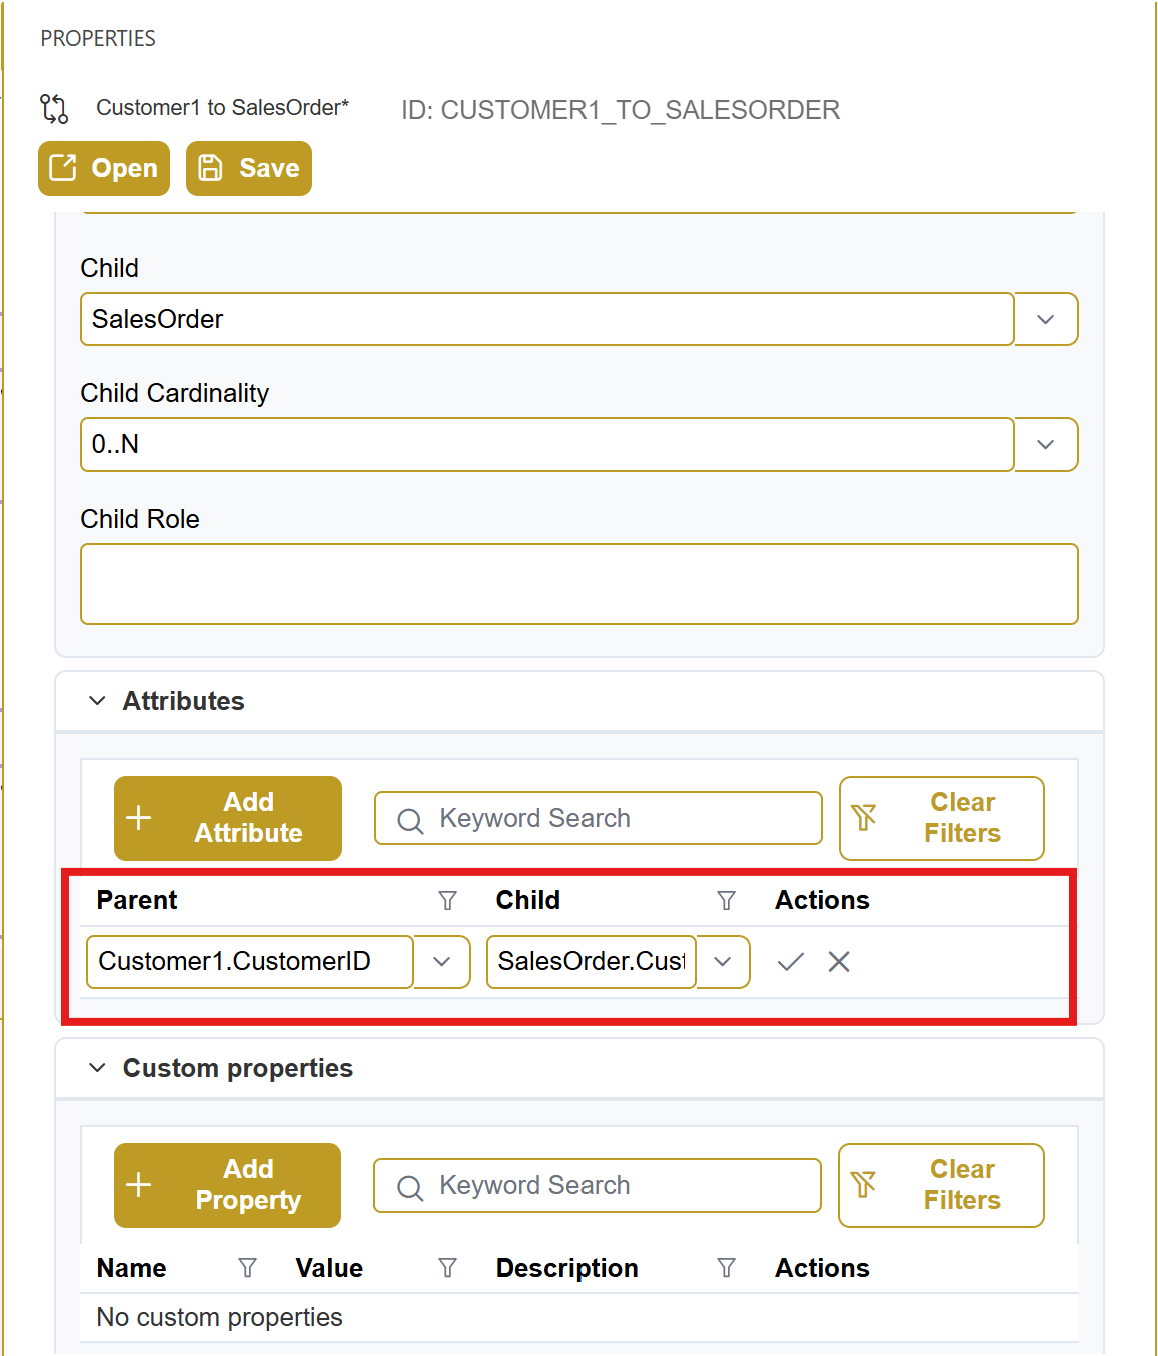
Then press save to save the relationship. Notice that the newly created relationship is also displayed in the explorer and can be managed via the form and code editor just as we saw when creating entities.
Create the additional relationships between salesorder and salesorder line, product and salesorderline using the perspective you prefer (diagram, form or code editor).
Wrapup
In this exercise we have covered the basics for creating a logical data model in CrossModel. We have created a model, worked with diagrams, entities and relationships. We explored the different perspectives that CrossModel offers and found our way around in the workspace.
In the next assignment we'll explore other options to create data models, using the AI agent to perform reverse engineering and recognition of manually drawn datamodels.