Now that we have created a basic mapping in the previous tutorial, we'll explore how to use expressions to model business logic.
Create a simple expression
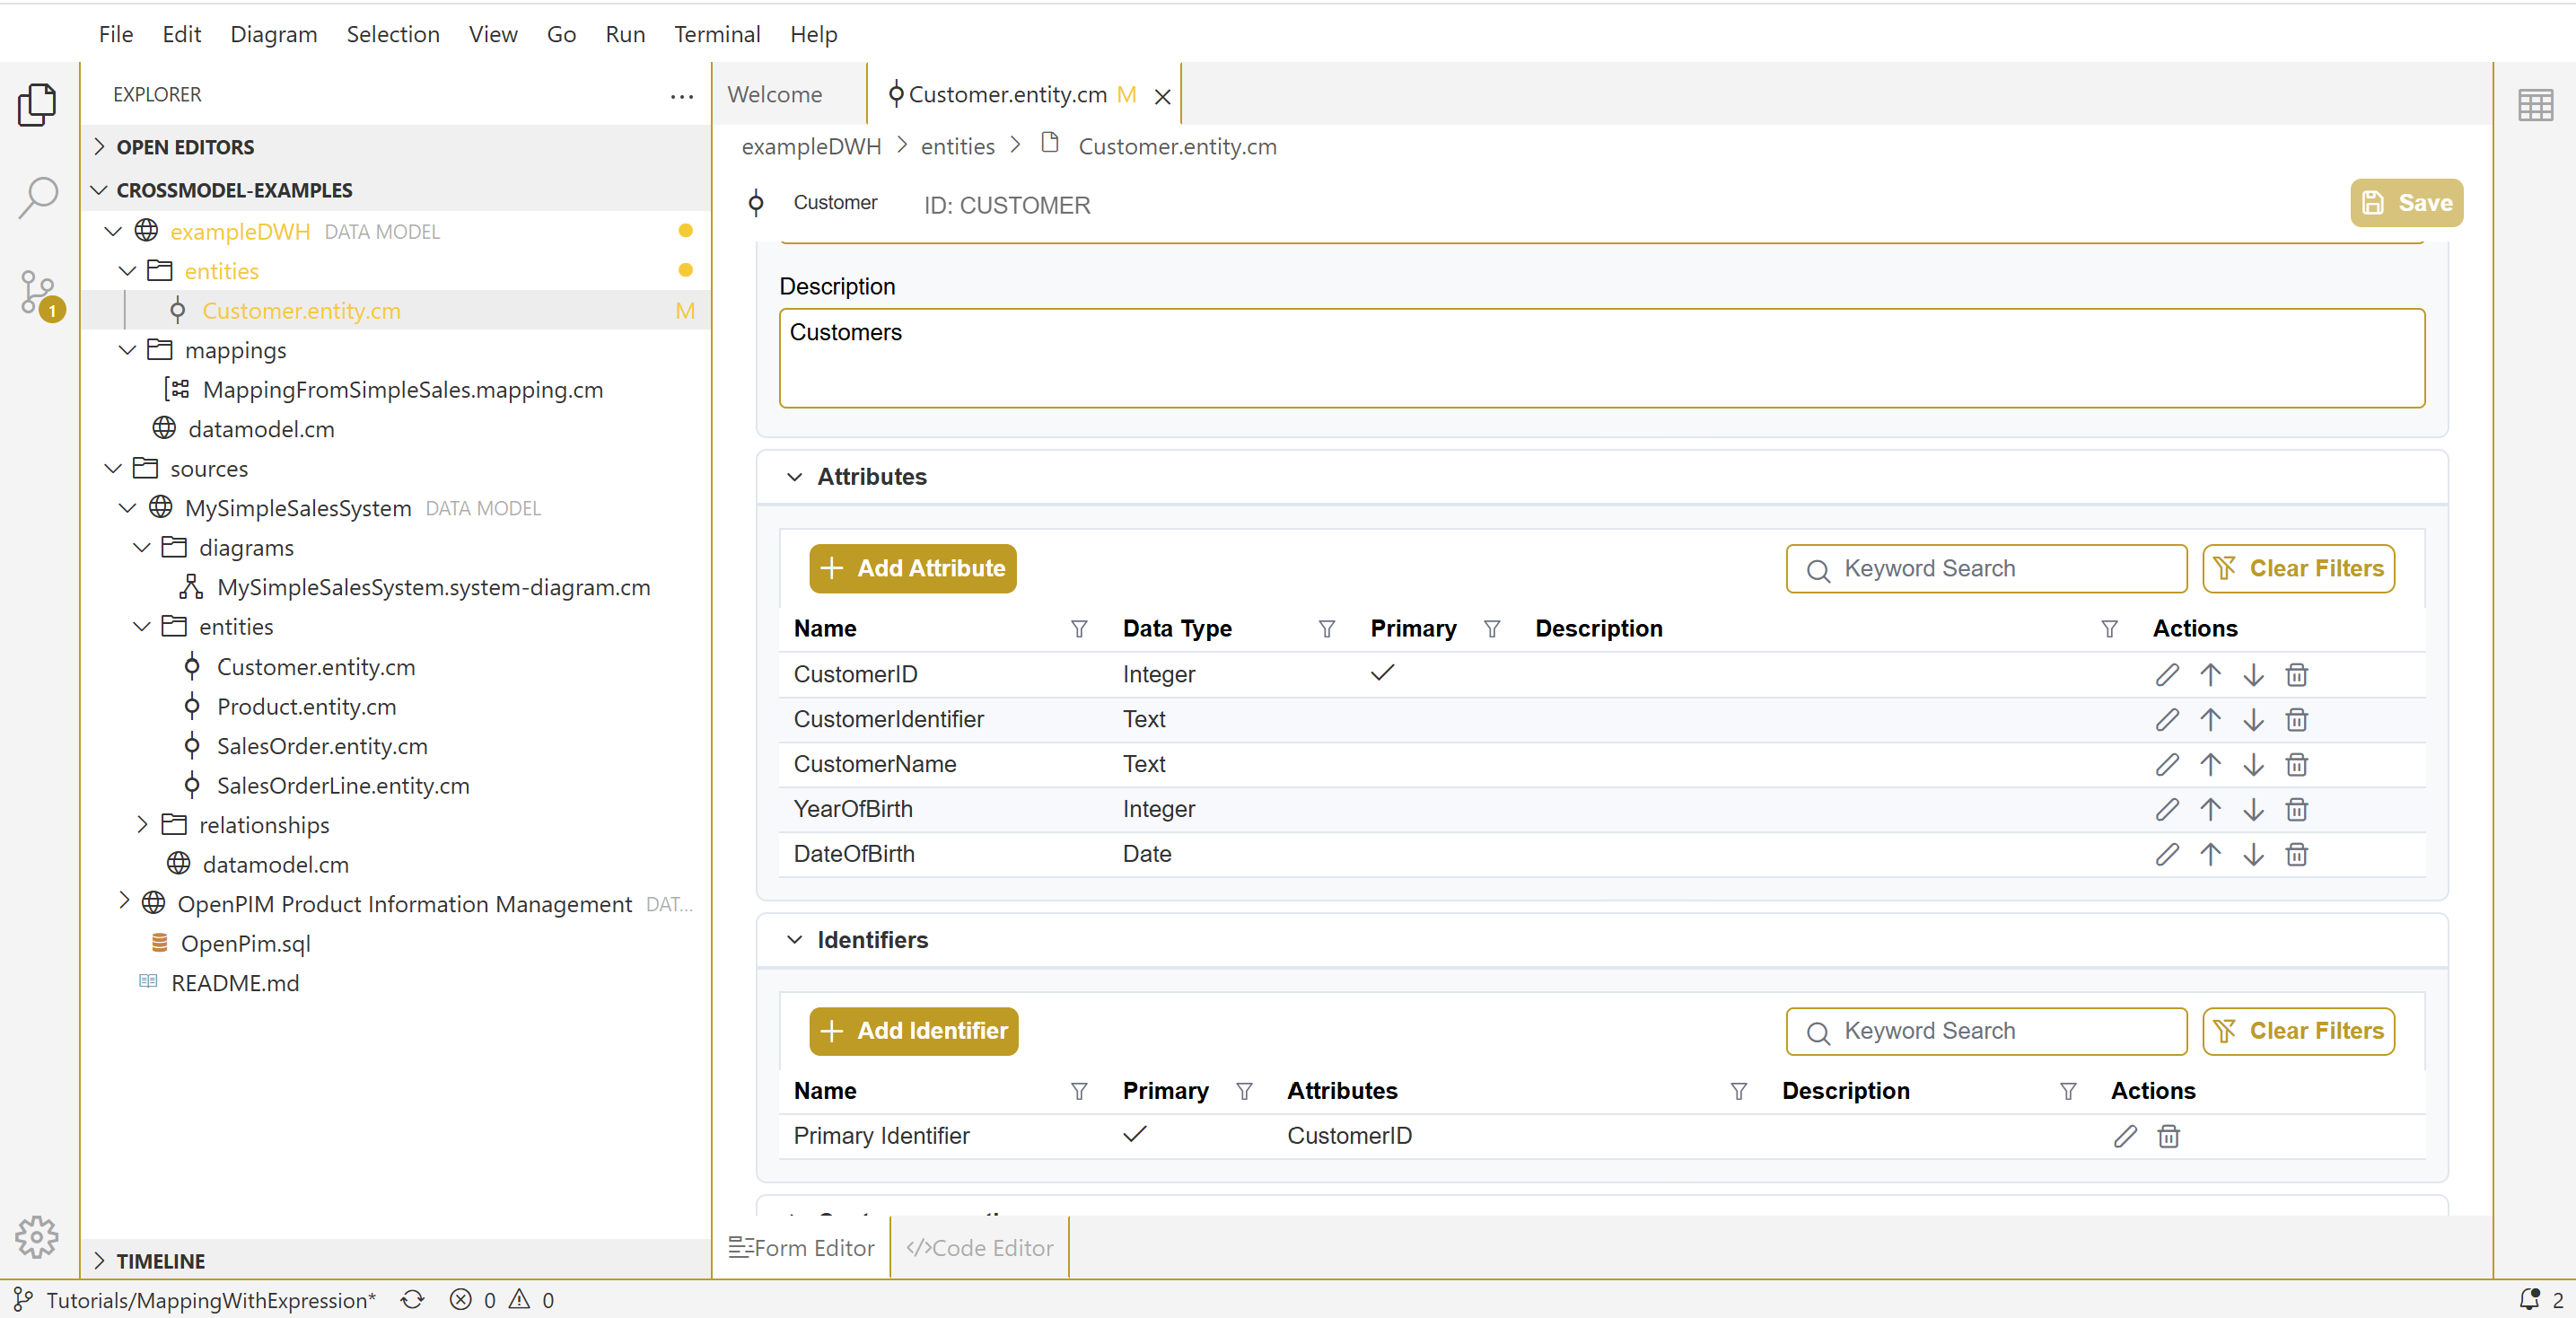
Revisiting the mapping that was created in the previous tutorial, we decide that we need a new attribute with the year that a customer is born. This can be derived from the DateOfBirth that is in our source. We also include a new attribute called CustomerIdentifier as a combination of the customer ID, which is unique but not declarative, and the customer name, which is declarative but not unique. By combining these two we can uniquely identify our customers.
We start by adding the new attributes to the customer entity in the ExampleDWH model:
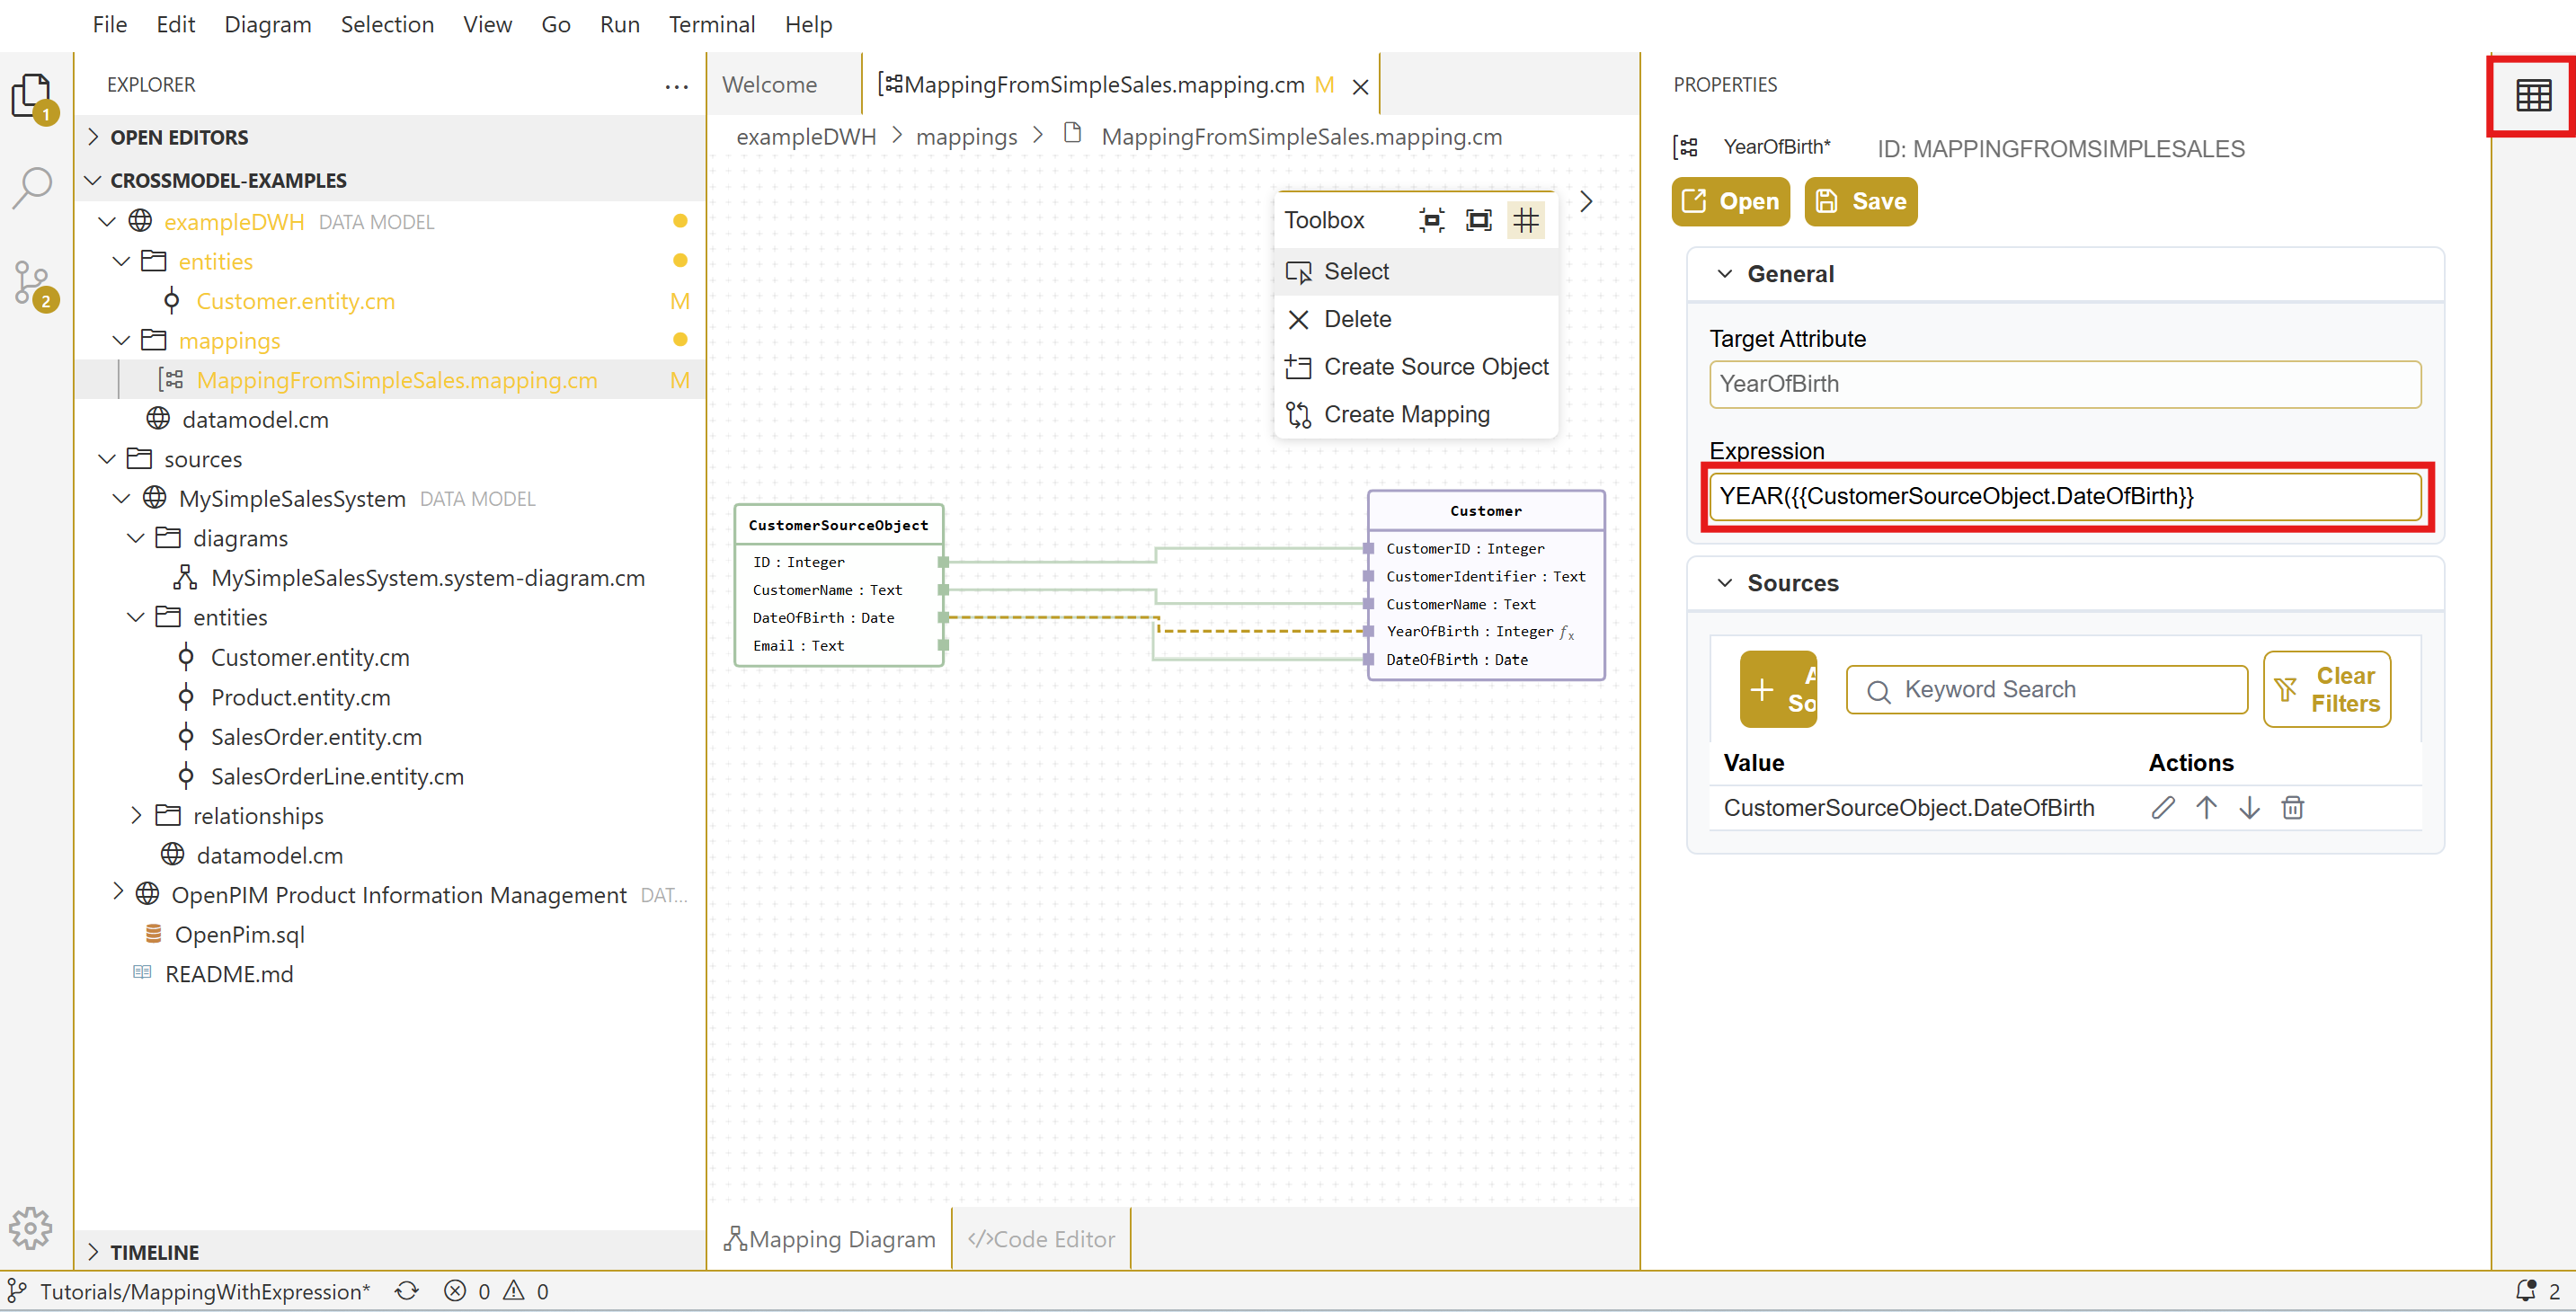
Now let's open up the mapping canvas, notice the new attributes are already visible.
Select create mapping in the toolbox and drag the DateOfBirth from the Customer source object to the YearOfBirth attribute in the Customer target object. Now open the properties panel with the button on the right (marked red in the image below) and give a proper expression to extract the year from the date of birth:
YEAR({{CustomerSourceObject.DateOfBirth}})
Note:
when referencing source attributes in an expression, make sure to enclose them in double brackets so CrossModel can evaluate them properly.
Create an expression using multiple source attributes
Now we're going to extend the mapping for the new CustomerIdentifier attribute. Select Create Mapping in the toolbox and drag the CustomerID and CustomerName from the Customer source object to the CustomerIdentifier attribute in the Customer target object. As an expression, set:
CONCAT_WS({{CustomerSourceObject.CustomerID}},{{CustomerSourceObject.CustomerName}})
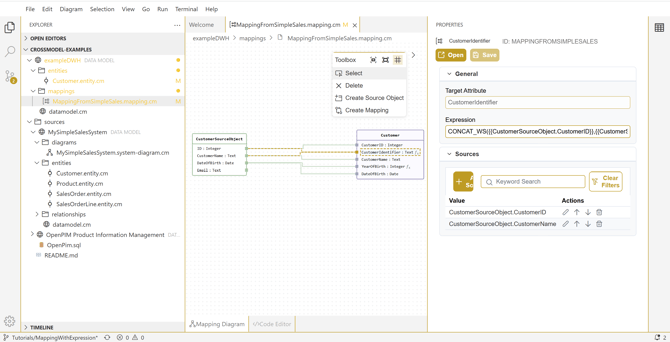
Notice that in this case, both input fields are set under sources in the property panel. Also notice that in the mapping canvas, attributes that are mapped with an expression are marked with fx
In the next tutorial we'll see how to add multiple source objects to a mapping, making it possible to model mappings that contain integration logic.